Wednesday, January 29, 2020
Valentine Bags
For the paper bag to hold the Valentine treat holders I made I wanted to use a smaller bag than I had used for Thanksgiving and Christmas. Here is a photo of the Thanksgiving bag I decorated:
For the flowers on that bag I cut apart flowers I bought at the Dollar Tree. I layered them onto a die cut doily and added ribbon across the front of the bag. For my Christmas bag I wanted the front of the bag to be covered with a 6x6 holiday print card stock from Mikes. I made the paper poinsettia using a Spellbinders die:
For the Valentine bags I used a smaller white bag and I wanted to have the front of the bags to feature red and white. Here are some of the bags:
And a close up of one of the bag fronts:
To begin with I used a Simon Says heart stencil and used my Make Art Stay-tion to cover the stencil with red ink using make up brushes from Amazon. Once that was done I trimmed it to the size I wanted for the card front. Using a scalloped rectangle die from my stash I die cut a scalloped rectangle using the #110 weight white card stock from Mikes. Used 1/8" tear and tape and put the frame over the stenciled hearts piece. Cut a piece of red card stock slightly larger than the hearts piece and I put those together using the ATG.
For the "Happy Valentine's Day!" I die cut that out of red glittered card stock and used TomBow glue to put that onto a heart paper doily from the craft store. Used double sided tape and put the heart doily/greeting piece onto the stenciled piece. Used the ATG and put these onto the bag front. At the bottom of this is a border trim I picked up at the Dollar Tree:
I used scissors to trim this adhesive border to the size I needed for the bag front and put it at the bottom of the bag:
For the red flower I recently made a stop at Hobby Lobby and picked up this floral trim that was on sale for half price:
It is sold on a spool and they are organdy fabric flowers that are sewn onto red tulle. I used scissors to cut one flower off the roll and I also trimmed the tulle to the edge of the flower. I used a 1" circle punch and punched out a white card stock circle to hot glue to the back of the flower piece. This gives the flower a stiff back. Used a leaf die from the stash and die cut the green leaves to put behind the flower. Dug out some of my plastic trim pieces - buttons and such - and hot glued one of them to the center of each flower. This flower is very soft looking and very flat compared to the flowers I have used on my other holiday treat bags. Used a small heart punch and punched out two small hearts from red glittered card stock and added them to the bag front using mini glue dots.
For the tiny tag I used a small tag from the stash and cut out white tags. Using a 1" heart die I received from Taylored Expressions for a recent order I cut out the small die from various card stocks and put them in the white tag piece. I also used washi tape from my stash to add some print and sparkle and shine to the tag pieces. For the clothespins I had plain clothespins in my stash and I used scrap printed card stocks to cover the clothespins. The red plastic heart is from a bag of table scatters from the Dollar Tree. I used a dot of E6000 and a little hot glue to hold the heart onto the clothspin. Easy bags to put together and this weekend I will add the tissue paper to the inside of the bags with all the treat holders I made. Glad I was able to finish everything without having to rush and run out of time.... unlike Christmas!! :0( TFL
Sunday, January 26, 2020
Valentine Treat Holders for 2020
This post shows some of the Valentine Treat Holders I have been working on. In the last few months I have rearranged the craft room and with that comes reorganizing items so the room works better for me. I had decided then that buying any card stock was not necessary for any reason and so I wanted to use card stocks I have on hand . . . as well as dies, ribbons, trims, bling, etc..
For my Valentine treat holders I wanted to use a 6x6 paper pad I had picked up at Hobby Lobby last year with holiday prints. Here is a photo of the paper pad:
First treat holder I made was for Hershey Chocolate kiss candies. I used printed card stocks, a label punch, and clear window sheets for the "window":
Each of the holders holds 4 kisses. To decorate the outside of the holder I used a small heart die from the stash and cut a heart out of adhesive red glitter foam sheet. Peeled the backing off of it and adhered it to the left front of the holder. The small heart on the right side I used glittered red card stock and small heart punch to punch that out. Put that on the holder using a glue dot. Red bow is ribbon from the stash. Here is a better photo of one of these treat holders:
I have made these in the past and I believe I found a video on YouTube for the how-to's for that holder.
Since I had used a label punch to make the window on the first holder I had all these label pieces when the treat holders were done. Decided I would add them to this next treat holder:
This treat holder is from Bianca at:
www.thestampinb.com/2018/10/halloween-hershey-nugget-holder.html
This holder holds four Hershey Nugget candies:
I used solid card stocks for the box/lid piece and prints to decorate the top**. Also used the label pieces from the first treat holder for the top of the box. Used cream CTMH card stock for the oval piece and stamped a holiday greeting on that. Put this greeting/label piece on the box top using foam dots for dimension. Also, as she suggested, I loosely tied the red ribbon so it can slide off for access to the candies in the box without having to untie the ribbon. Added a red heart crystal bling to the label piece for some sparkle. Thanks to Bianca for sharing her very easy project! (** The first box/lid I made I used the scoreboard from M. Stewart and the box was a little wonky and did not easily stayed closed. Decided to switch to my Scor-Pal scoreboard and all the box/lids using that board have a good shape and they stay closed without having to use glue dots or anything).
This next project - long ago I had seen a photo of this Ferrero Rocher treat holder on Pinterest but no pattern.
Here is my version of that treat holder:
I used the base box pattern from Cindy Elam on her blog:
www.heartsdelightcards.com/2018/10/ferrero-rocher-treat-box-tutorial.html
I have used her pattern a few times for bases for the Ferrero-Rocher candies. This time I used solid card stock for the base piece and again clear window sheets for the dome pieces. I cut the clear window sheet to the width of the base piece and cut it to the size I wanted to fit over the candy. I did not want it to be too high that the candy would fall out. I used tear and tape to put the clear sheet on the card stock base once the candy was in place. I used washi tape to wrap around the base piece and that not only decorates it but it also helps to hold the clear dome piece in place. Here is a side photo that may help to show the dome over the candy in this holder:
To the top front of the Ferrero-Rocher holder I added a red glittered card stock heart to add some sparkle. For this next holder I wanted it to hold a Tootsie Pop and here is a photo of a few of those I have made:
And from the side you can see this holder could hold a larger lollipop if you used a larger one:
My pattern is: 2 x 7 1/4 piece of solid card stock. Score with the long side at the top of the scoreboard at: 2 1/2, 4, and 6 1/2. If you want to add printed card stock to the front as I did you would cut that to the size you wanted and add it to the holder while it is flat. With that in place I used a bone folder to crease all scored lines. Added washi tape to the front flap piece at the top. Used a 1/4 inch circle punch to punch a half circle at the top of the holder for the lollipop stick to go through. Easy lollipop holder to put together -- also helps to use up some of the small print pieces left from other holiday projects.
This next treat holder holds 3 Ghirardelli candies:
And opened to show the candies:
Added a heart brad from the stash to the front of this treat holder. (That holder was made using a box die from my stash). For these holders I used solid card stocks for the box and added printed card stocks to the flap pieces. Used washi tape from my stash on the front of the boxes:
For this next lollipop holder I found these heart shaped lollipops at Walgreens and I made a holder for them using the Scalloped Envelope die and paper doilies from my stash:
This next holder I wanted to use the triple tag topper punch I had recently picked up at Hobby Lobby when their punches were 50% off. I had bought a bag of the Dove dark chocolate candy and they are heart shaped. Since the Dove chocolates are solid chocolate the candies are heavy. I needed to make a holder that could hold that weight without bending or ripping. To decide how to do this I laid out four candies and measured the length and then added a bit more for the tag top and to be able to have space to add a holiday decoration. Here is a photo of those treat holders:
Again I used a solid card stock for the holder. Covered it with a printed holiday card stock from the 6x6 card stock pad from Hobby Lobby. To give this piece more stability I cut out a piece of cardboard that was on the back of a 12x12 paper pack. Using the ATG I put this white cardboard piece behind the tag piece I had made - it is hard to see but in this photo you see the front of the treat holder and next to it is another treat holder turned over to show the white cardboard backing piece:
Since those candies are heavy I used a large glue dot to put them on the printed side of the treat holder. I put them inside pretzel bags from the candy supply aisle at the craft store and tied the bags closed using silver twine tied in a bow. Another easy treat holder to make.
Glad my treat holders are made and am now working the fronts to the bags these will go in. I will post those photos when done. Thanks to the other crafters that shared their ideas for treat holders and the how-to's for them! Happy I was able to make all of these treat holders without having to buy more supplies -- glad I was able to use more of my card stocks, dies, bling, and esp washi tape. No sense in having these items if they do not get used. TFL
Sunday, January 5, 2020
Embossed Thank You Card
First all photos have a dark spot on them due to something on the camera lens which has since been cleaned off. :0)
Made another Thank You card and for this card I wanted to use a background stamp with heat embossing. Here is the card:
The card stock base is a soft yellow card stock cut and scored at the side. For the embossed card front I used a piece of Mixed Media paper from Strathmore from Mikes. The background stamp I used I bought last year at a used stamp sale and it is the Floral stamp from Stampin Up. I inked it with Versa Mark ink and used white embossing powder from Stampendous to heat emboss it. Since the paper is thick I embossed it from the back and then the front until it was all embossed.
To add colour I used make up brushes for the distress inks - Dried Marigold, Squeezed Lemonade, and Abandoned Coral. I used the darkest ink first and then added the others where I wanted lighter areas. With that done I set that aside.
For the "Thank You" I used a die from my stash and cut it out of gold foil poster board from the dollar store. I also cut out a piece of card board covered in Stick-It sheet using the "Thank You" die. I peeled off the Stick-It sheet and put this behind the gold foil piece. This gives the words piece some height for dimension:
For the embossed piece I rubbed the excess inks off using a microfiber cloth from Walmart. Here is a photo of this piece before I did that:
Trimmed this to the size I wanted for the card front. Before adhering this to the card base I ran thin gold thread on the left side of the card front piece. Adhered this to the card stock base using the ATG. Used Glossy Accents and added some of the mirrored sequins here and there for some sparkle and shine on the card.
The inked embossed piece has a lot of dimension IRL but the camera did not really capture that. I like using the Mixed Media paper for the embossed piece when you add inks the paper takes the colour well and it helps the stamped design to show more of the stamped detail.
Saturday, January 4, 2020
Laminating without a machine
Every once in awhile you get inspiration from a crafter's blog post, YouTube, etc.. I had seen a video by Michelle AKA "Craftie" on YouTube for preserving her grid sheets for her MISTI. She used self sealing laminating sheets from Scotch to laminate her grid sheet without the cost of buying a laminating machine. I also do not have a laminating machine but I also did not want to take a grid sheet to the office supply store to pay them to laminate it.
Happy to say yesterday I went to a Hobby Lobby and I saw a package of the Scotch Self Sealing laminating sheets in the paper crafting section. I had a 40% off coupon so I picked up a pack of these sheets. When I came home I took a photo of the latest of the MISTI grid sheet I have in my MISTI that I have been using:
That photo shows the front of my grid sheet and now the back as I use both sides when I am stamping:
As you can see the grid sheets for the MISTI have the grid lines on one side of the sheets so using the backside does not help if you should need the grid lines - which is probably why many crafters keep buying the grid sheet refills. I decided I do not want to keep replacing my grid sheets - either with the MISTI brand or using graph paper I can buy at Walmart or the office supply store. Using the laminating sheets will prolong the life of my sheets -- and it was easy to apply.
As Michelle shows in her video I peeled the top strip off the laminated sheet and applied my MISTI
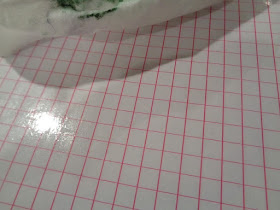
grid sheet top onto that pressing it down while I removed the rest of the protective sheet to cover the MISTI grid piece. I used scissors to trim off the rest of the laminated sheet I did not use and I used my bone folder to run over the grid paper to help the laminated sheet to adhere to the grid paper. I also did the back side of my grid paper to make this piece more durable. Ran the bone folder over that side as well and took it to the trimmer and trimmed all four edges:
Put this laminated grid paper into the MISTI and used a small stamp to stamp on the grid piece as a sample:
Once stamped I cleaned off my stamp and then ran my finger over the image to show the ink was still wet:
Used a baby wipe to wipe the image off the grid piece:
All cleaned off and ready for next use. The laminated sheets will help my grid paper to last so much longer and while I had everything out I laminated a second grid paper for back up use. Thanks to Michelle for sharing her tip.
As a crafter with a NON never ending craft budget I do not like to waste my crafting dollars on items that can be re-used. With the make up brushes I bought a set off of Amazon and I reuse them for all the colours - I do not need one brush for every colour -- nor do I need a fancy holder to keep them in. My holder is a can from the kitchen covered in wrapping paper and I keep this and the brush cleaner in the Raskog cart next to my work table:
Sometimes we have to be careful with all the "bells and whistles" of new craft products for sale not to get caught up with buying a product and all the accessories. For this crafter I much rather spend my crafting dollars on products rather than accessories -- esp for something you would have to replace all the time which would be the grid sheets for the MISTI. Always nice that we can prolong the use of a product rather than to replace that product. Thanks to Michelle for sharing a tip for laminating the MISTI grid sheets without a laminating machine!
Happy Me! Honey Bee is here!
Happy that HoneyBeeStamps had their after Christmas sale and I picked up a few things that I have wanted of theirs. Their sale was 35% off items that are their brand and that was too good of a sale to pass up. Here is a photo of items I picked up:
I like their stencils so I picked up three of those - the Confetti Backgrounds - which is a set of two stencils. Also the Square Shingles and the Salvaged Brick. I really like the Salvaged Brick stencil since the brick pattern is small but you can also see the mortar between the bricks is heavier in some areas than others:
Plus their stencils are 6x6 and that is a good size to cover your card front from side to side and top to bottom without having to move around your card front piece for coverage.
Also bought two of their dies. One set is the Square Windows die set and it is a set of three squares with stitching detail around the squares. These square dies can also be cut apart if I would want to be able to die cut a square by itself on my card front. The other die I bought is their Grass Border die - this die is nice because it is a longer die and that will be great for a card front or a 3D project or larger items - scrapbook pages, journals, etc:
Here is a photo of their contact information if you would like to see their other products:
This is my third or fourth order from them and they ship quickly and everything always arrives in mint condition as they pack them well. In this order I was happy to see I received two free items:
A bag of a misc sequin mix and a stamp for next Christmas! Always nice to receive free items for a purchase as that rarely happens. Nice additions for this craft room for crafting in 2020! Since I was placing an order with them I also picked up more of the Ken Oliver Stick-It Sheets as wellto replenish what I used for holiday projects.. Happy my order arrived so quickly and filled with inspiration!
Thursday, January 2, 2020
Christmas Thank You Card
This is a photo of one of the thank you cards I made for Christmas:
Card stock base is red card stock cut and scored at the top. For the snowflake embossed white card front I wanted the embossing to be a soft embossing so I put two pieces of white card stock in the snowflake embossing folder and embossed that. Used the second piece for my card front as that is the lighter embossed pattern. Put this embossed piece on the red card stock base using the ATG.
For the "thankful" I used a die from the stash and cut that out using red foil card stock. Then I cut it out again using a scrap piece of white card stock covered with Stick-It sheet. With the two word die cuts I removed the Stick-It sheet to adhere the two pieces together. Set that aside. Embossed "for you" onto black card stock and used the trimmer to cut that to the size I wanted. For the snowflake I die cut that using glittered silver card stock. Again used a scrap piece of white card stock and covered that with Stick-It sheet and cut out another snowflake. Peeled the Stick-It sheet off the white snowflake and put it behind the silver snowflake. This makes the detailed die cut snowflake piece more sturdy.
I put the snowflake on the card front using glue dots. Used a glue pen to add the "thankful" and I used tear and tape to add the "for you". Used Glossy Accents to add the mirrored mini sequins to the card front. Here is a better photo to show the embossing, the red foil card stock, and the sparkle on the silver snowflake piece:
This card front has a lot of sparkle and shine IRL but the camera did not capture that well. Easy card to put together.
Wednesday, January 1, 2020
Gnome for the holiday cards
Here are photos of some of the holiday cards I made for this year using the Gnome die from Simon Says Stamp:
There were other colour combinations but I did not take photos of all the cards. All the card bases were cut and scored at the top. For the white stenciled background I used a snowflake stencil from Pretty Pink Posh on my Make Art Stay-tion mat and used a light gray ink for that. Cut it to the size I needed for the card front.
Used a stitched circle die from Pink & Main for the circle of printed card stocks. The snowflakes were punched out of glittered white card stock using M Stewart punches. For the gnomes that die set is two pieces - the solid back piece and the other die cuts the other pieces - hat, beard, robe, nose. I cut the back pieces using #110 weight white card stock from Mikes. For the gnomes I used scrap card stocks since all the pieces are small. For the hats for some of the gnomes I stamped them with checked stamps or I used dotted/printed card stocks. Sponged the edges of the beards and the noses. He is so easy to put together - added a pom pom to his hat using Glossy Accents.
The greeting "Merriest Wishes" is from MFT and I used the 14 pc die set from Pink & Main I bought on sale during their Black Friday sale to cut it out. The banner die set has a very small banner die up to a much larger die and well worth the money -- happy I added that to the collection. For the greeting banner I used foam tape behind it to give it dimension. Before I mailed these out I added mirrored sequins to the card fronts for some sparkle and shine. Cute gnome die and a fun card to put together. Here is a photo of the Sentiment Strip Die set from Pink & Main: