Sunday, September 4, 2016
Bitty Berry Boxes
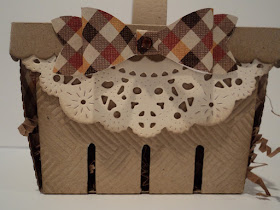
The above photo shows the Fall Berry Basket I made using the new-to-me Berry Basket I had bought from another stamper. These box dies are expensive so if I can buy them used that stretches my crafting dollars. It is even better when you buy a die that you can make something else with it. . . which brings me to the video on YouTube by Erica Cerwin. Easy video to follow and these Halloween treat holders went together quickly:
Following her instructions here are two of the Bitty Berry Boxes I made:
This first box:
Cut the basket from Stampin Up Eggplant card stock, dotted print is Hobby Lobby, black is Mikes, and others are from the scrap stash. I made the basket as the video instructed and put the printed panel at the top to hold the basket together. Used the Spider Web die from Cheery Lynn and cut out a web. Cut that in half and trimmed it to be smaller and put it on the front of the basket using a large glue dot. The ghost was cut out of glittered white card stock and I put that on a circle using glue dots. Put this ghost circle onto the front of the basket over the spider web piece.
For the "boo" I cut that out of black glittered card stock. Cut a small banner from scrap orange card stock. Used a glue pen to put "boo" on the orange banner. Put the banner onto the craft stick using glue dots and tied a bow of black yarn from the thrift store. Happy to say the dollar store now sells black paper shred so I put the paper shred in the bottom of the basket and added candy treats. Tucked the craft stick in the back of the candies.
This other basket:
This basket was cut out of Stampin Up black card stock. The orange spider printed paper is from Walgreens--I got a stack of these shelf strips free last year as they were taking down their Halloween displays and I asked if I could have them. For the pumpkin tape around the holder -- that is washi tape. The rosette on the front was made using the Sizzix/TH Rosette die and I used hot glue to put that together. Tucked a white glittered ghost next to the rosette using a glue dot. The ghost in the back is on a holiday decorative straw from the dollar store. I cut that down to the size I needed using a pair of scissors.
Here are photos showing the front of the baskets:
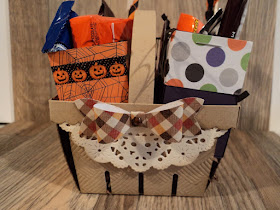
Here is a photo with these two smaller baskets sitting inside the Berry Basket I had made for Fall to show the size they are:
These Bitty Berry Boxes hold a few treats and they are free standing. A big thanks to Erica for sharing her idea and video and instructions. TFL and YOLO
https://www.youtube.com/watch?v=0k_ky2YmwuU


Thank you for sharing this technique. I love the bitty baskets and will make those instead of the bigger ones. Yours are just adorable.
ReplyDelete