I am a member of the Spellbinders Stencil of the Month Club and my first set of stencils is their Baubles & Festive Background stencil set of 5. I really like the ornament (baubles) stencils and I used them to make this card:
I wanted to make red and green ornaments to keep with the traditional Christmas colours so I picked out a red and a green ink pad from the stash. Wanted my ornament tops to be a brushed silver so I decided I would use my metallic silver ink pad from Encore and a dauber to add ink to that stencil:
I cut and scored my green card stock base and set that aside. For my stenciled piece I cut a piece of white card stock to 4 1/4 x 5 1/2 knowing when I finished stenciling I would be cutting this piece to the size I wanted for my card front. I will say I was surprised when I took out my stencils for the ornaments that none of the stencils are labeled or numbered - so here is a photo to show the three stencils needed to make this background:

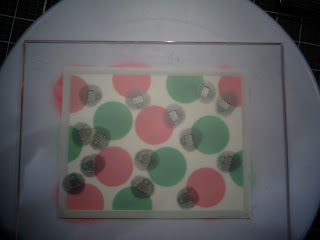
First I stenciled the stencil on the left - for my red ornaments, then I stenciled the second stencil in the center of the photo for my green ornaments and the ornament rings. The stencil on the right is the stencil for the tops of the ornaments. I was happy that with making this stenciled background for my card I could use my new Wilton cake turntable from Walmart (approx $12.00) and my sticky mat from Waffleflower to hold my stencils in place while adding inks. This turntable is a game changer -- so happy I finally bought one and put it to use for my stenciling!
First I stenciled the red ornaments and then stenciled the green ornaments and rings:
When I removed the stencil for the red ornaments I cleaned the stencil using a baby wipe and set it aside to dry while I stenciled the green ornaments and green ornament rings. Removed that stencil and cleaned it off and set it aside to dry. This photo below shows the ornament top stencil and the Encore metallic silver ink added using a dauber:
When done I removed the stencil and cleaned that off - again using the baby wipes:
The sparkle from the silver ink showed right away -- but being a pigment ink I wanted to set it so I could continue working on the card so I used the heat gun and dried it, front and back. On my craft table is the rectangle frame die set I have used recently for the candy cane cards I made so I decided to use the larger frame die in this set and cut out a white frame to go over my ornaments. I cut that out of the white card stock on the craft table. Measured the stenciled ornament piece and cut it to size to fit behind the die cut white frame piece and used liquid glue to put those together. See that aside to dry.
For my sentiment I wanted to use a "Merry Christmas" die set that also had a shadow piece because I wanted to use a vellum shadow for this. Went through the stash and decided on this die set from IO Stamps (Impression Obsession) who closed their doors last month. :0( I like this die set because the two words are connected and better yet there is no teeny, tiny dot to search for on the craft table or floor for the "i" in Christmas......
With the ornament tops being a metallic silver and having a brushed look finish I decided to use brushed silver foil card stock from the stash for the words. Used regular vellum from the stash for the shadow piece.
Vellum and glue.... bad combo.... but once I die cut out the greeting I decided to pull out the Artistic Tac sheets and use that to add adhesive behind the greeting to put this onto the vellum shadow piece:
Once that was adhered I could assemble the card. Put the framed ornament piece onto the card base using liquid glue. Used liquid glue behind the vellum piece behind all the letters. Put these onto the card front. Wanted some sparkle so I added clear/silver gems from the stash near the greeting. This photo shows the brushed silver greeting on the card front with the gems:
This was an easy card to put together and I esp liked using the turn table while stenciling - here is a photo to show my sticky mat on that:
That photo was taken after stenciling was done and all I did was spritz the sticky mat with water and wipe it off and it is ready for my next project.
As for this stencil set for the ornaments you could do all the ornaments in different colours or monochromatic or even add details on the ornaments with a white gel pen, etc. A fun holiday set to use. As for the brushed silver foil used for the greeting IRL it is very easy to read and it matches the finish of the metallic ink used for the ornament tops. Also the clear gems show up even more as they are the shiniest things on the card front so more sparkle for this holiday card.


