Sunday, May 31, 2020

Halloween Rosettes


When the Sizzix/Tim Holtz Rosette Thinlits came out I bought a set. I had seen him demonstrate this die set on YouTube and he made the rosettes a different way than I had been making mine so I tried his tips/tricks and made a set of rosettes. Each rosette turned out evenly and went together quickly. Before I had seen his video I did not have great success making rosettes - either too much glue, the wrong adhesive, too bulky, etc.. But this new thinlit die set works great and his assembly tips make making rosettes simple. Here is a photo of this rosette die set:


To start with I have been working on fall/holiday items in the craft room and I decided to make rosettes for BOO Day treat holders. Here is photos of the nine rosettes I have completed so far:


To begin with I used card stocks from my stash -- some are double sided and others are not. Once the rosette strips were die cut out I used tear and tape and put them together and creased them on their scored lines:


On my no stick craft mat I stood up all the rosettes and for each one I put a dot of hot glue in the center and pushed the rosette into the round shape into the dot of hot glue and held it there, pressing on it with my finger, until the hot glue cooled. Here is the back of the rosettes after this was done:


You can see a small amount of hot glue on the back of the rosette. I used a 1" circle punch and punched out circles from scrap card stock for the rosette backs:


and the front of the rosettes ready for decorating:


For my Halloween rosettes I used different circle dies from my stash and die cut out a decorative circle to put the rosette on. Then I used scissors and cut out a circle of sparkly tulle to go on the front of the decorative die cut circle. I also cut a small piece of black eyelash yarn to put over the tulle circle.  I put the rosette on top of the tulle. Each of the rosettes has a glittered spider web which is from the stash. I had bought this spiderweb tulle in a roll at the Dollar Tree a couple of years ago and I had used most of it for the front of Halloween treat bags I had made in the past:


I used scissors and cut out some of the glittered spider webs from this left over tulle in both black and silver as well as black and orange:


Once I put the spiderwebs on the rosettes I added the ghost die cuts I had made earlier. Some of the ghosts are from glittered card stock and others are from white foil card stocks. I used various word dies from the stash and die cut "spooky" and "Trick or Treat" from glittered card stocks. I used a small star punch and bug punch and punched out a few of those in different colours. I used Beacon 3in1 glue to layer the rosette and pieces and to put the words on the ghosts I used Glossy Accents. I also used that to put the ghosts over the spiderwebs on the front of the rosettes. For the rosettes that I added sequins to I also used the Glossy Accents for those.

Here is a link to the video for this die set - very easy to make rosettes not and they all turn out even and kept their shape:

https://www.youtube.com/watch?v=AP6BhhN0gys&t=29s

This thinlit die set also cuts both thinner and thicker card stocks easily including the scored lines.  Glad I had seen his video for his thinlit rosette die set as making rosettes should be easy with good results every time.  Working on other projects as well but wanted to get the rosettes posted before I move on to the next project.

Monday, May 25, 2020

Peaches and Cream


Had seen a video by Amy Elle on YouTube for her larger tassel. Was hesitant to make one for myself tho as I am not used to cooking my crafting supplies in an oven . . . .  haha

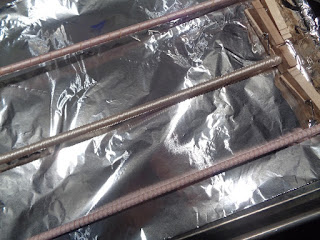
To begin with I used thin dowels and used three different ribbons to make my korker ribbons. I preheated the oven to 275 degrees and wrapped the ribbons around the dowels and held the ends in place using clothespins. Lined an old cookie sheet with aluminum foil and put the dowels on the pan and in the oven they went for 25 minutes:


Removed the pan from the oven and let them cool -- it does not take long. When they were cooled I brought them back to the craft room and took them off the dowels:


I followed her directions and sizes and I made my tassel using eyelash and fluffy yarn and beads to hang the tassel:


This project went together easily and fluffy it is -- these will be used for holiday time and I plan on making them in different colours. Here is a photo to show the beads and the snowflake charm I put on it:


The lobster claw I put this on has other jump rings on it so I can also add smaller beads to it as well. Her directions are easy to follow and the camera does not capture all the texture of the tassel with the eyelash yarn and fluffy yarn with the ribbons.  Always wanted to make the korker ribbon but was a bit nervous about the involvement of the oven but was happy it works! Thanks to Amy for sharing her idea and video!

Scarecrow Thanksgiving Treat Bag


Had seen this treat bag on YouTube done by "putsomeblingonit" and since I was working on Fall holiday projects this is one of the first things I made.  I had a lot of items on hand in my holiday stash from clearance fall sales from last Fall so I pulled out that box and this is what I made:


This is a free standing gift bag with printed panels on the front, sides, and back:


Once I cut and scored the bag front/side piece and the second piece for the back/side piece I cut out the printed card stock for the front/back as well as side panels. I put the prints on my bag pieces before I had assembled the bag so it was easier to do. With the prints on bag pieces I used tear and tape to assemble the bag and add the handles.

For the front of the bag I used a circle die and cut out a solid circle for the base. Then I used a holiday printed cupcake liner and used scissors to cut the bottom out of the liner so I only had the creased sides. I cut about 1" off of that so I could push this down onto a 1" card stock circle like a rosette. I set that aside to dry. Pulled out my holiday supply box and I found some glittered leaves and the scarecrow - he is the same scarecrow she had used in her video. Here is a closer photo of him and the cupcake liner behind him:


Used a stamp set from PaperSweeties for the "Blessings" greeting - the stamp reads Bountiful Blessings but I just inked the "Blessings" and stamped that onto scrap white card stock and used a banner die to cut that out. Used raffia from the stash and made a bow. Added a coloured crystal to the center of that using Glossy Accents.

This a good size gift/treat bag and very easy to put together. Thanks to Natalie for sharing her holiday idea!

BOO Milk Carton Bundle


Had bought the Divinity Designs Milk Carton Bundle on sale and decided I would use the set to make treat holders for BOO Day - Halloween:


Divinity Designs dies cut and score all the pieces so these treat holders went together easily. I used as many holiday printed scraps as I could for the milk carton panels. All the card stocks are from the stash. The gray card stock I used for the carrier and the cartons is a heavier weight card stock and the dies had no problem with the heavier weight.

Each carton I used various prints on and different holiday items I had die cut earlier and had in the holiday stash. I used Beacon 3in1 glue to put the black netting on the carton fronts behind the ghosts:


To keep the cartons closed I am using small black bulldog clips I had bought from Amazon. The ghosts were cut out of a shiny/foil white card stock and I backed them with black card stock to fill in their faces and to give them extra weight. Orange gems are from the stash.

For the front of the carrier I used an old Sizzix fence die (yellow die) and cut that out of black glittered card stock and backed it with black card stock. Put it on the carrier front using TomBow glue:


For the Jack O Lantern pumpkin I used two older punches from my stash - the solid pumpkin punch is M Stewart and the face punch is from Marvy:


First I punched out the pumpkin face punch from a piece of pumpkin coloured card stock. Then I punched over that face using the solid pumpkin punch. Using the solid pumpkin punch I punched out a black pumpkin to go behind the face pumpkin piece. I put the two pumpkins together using the Tom Bow glue. Used tear and tape to add the pumpkin to the front of the glittered fence piece. Used Tom Bow to add the "spooky" word next to the fence.  The bow on the handle piece of the carrier is a die from my stash and I used sparkly black card stock for that.

Nice die set and will be able to get a good supply of chocolates in the milk cartons for BOO Day. Lots of possibilities for decorating these milk cartons for holidays ahead.

Saturday, May 23, 2020

Who knew?


Had seen this four piece tool set from Michaels online over the past couple of months and with me getting my new laminating machine I wanted to have a set.  I had placed a curbside pickup order from my nearby Mikes last month but that store did not carry this set.  Yesterday I went to a different Michaels store that was open for shoppers and I was happy I was able to find this set:


I am working on lots of projects and hoping this weekend that I will be able to finish a few up so I can post them to the blog. But - when I went to the register to pay for this tool set I had planned on using a competitor's coupon for it and the cashier told me that beginning March 27th of this year they no longer accept competitor's coupons for any purchases. News to me and certainly a game changer - why go in the store if I can shop online with their competitor and maybe get a better price or free shipping??  They are turning into another Hobby Lobby -- which also does not accept any competitor's coupons.... bad news for us crafters and our crafting budgets.....  But I was happy to pick up the tool set which will come in handy for my next laminated project.  TFL

Saturday, May 9, 2020

Everything works until it doesn't. . . .


Working a reduced schedule at work but still trying to get things reorganized and settled in the craft room. . .  Throughout the year my PIC (stamping Partner In Crime) and I plan to attend different stamp shows and stamp events. We always start the year off with the stamp show in Columbia, SC, then the big stamp show in Chantilly, VA, followed by a small show here in Raleigh, NC. Usually the last stamping event for us is the warehouse sale IO Stamps holds in the late fall - Impression Obsession - at their warehouse in Oilville, VA.  Since the biggest show we attend is in Chantilly, VA we both save up for this sale as there are lots of vendors there that we may not see at other shows we attend. Chantilly is the furthest for us to travel and on New Years Day I made our hotel reservations for the show. . . But with the COVID19 breakout everything changed quickly.

The show in Chantilly has been postponed with no new date listed. I cancelled the hotel reservations so that was taken care of. Since I had already been saving money for the show and the hotel I decided I would keep checking prices and sales for a machine I have wanted to buy for some time. Finally my searching paid off when Joann.com had a sale on the machine and also offered free shipping... This price was cheaper than the price on Amazon so I placed my order. Within a week or so my new machine arrived:


I do a lot of die cutting so this machine will help die cut lots of dies at one time. I put the machine on the table with my smaller Big Shot and clearly it was a tight squeeze.....


I recently moved my machine cart next to my work table that DH had built me a few years back and although it is a much better location for this cart with the larger machine I knew this was not going to work out... Here is the photo of my thrift store kitchen cart I was using for the machines:


This cart was certainly a plus in the craft room and it held a lot of the items I needed but with the new machine and it's size alone I knew I needed a better table. . . out to the garage I went to ask DH if he would build me a new table - to my specs - from scraps he had in the garage. He came in the craft room with me (or 'warehouse' as he calls it) and asked me to explain what I wanted this table to do and sizes, etc. As with the first table he had built for me I told him I would be storing my dies/magnet sheets on the table/shelves so they would have to be able to hold the weight of these items.  He wrote down all the measurements and asked questions and he checked his scraps and said he had everything but the 3/4 inch plywood he would need. Off he went to get the plywood and he started the new table the same day. . . Happy me to see progress of this new machine table for the craft room:


After a couple of days it was ready to sand:


Stained and poly applied and ready to go in the house:


I wanted this table to be the same style as the work table he had built -- as with the work table I wanted a back on this smaller table but I wanted the sides open. Here is the back of the table showing a piece of luan.


Here is the table in the craft room:


Now it was ready to load up:


The first shelf holds the Big Shot and Cuttlebug plates. Behind the bin for the Cuttlebug plates is the Cuttlebug which I can put on my main work table to use:


Even with everything I have on this new table I have room to grow --- ;0)  and that is always a good thing in a craft room. The bins on the two shelves hold my larger dies and I have a bin of the holiday treat holder dies. With this new table I will have all the larger dies next to my work table that holds all my standard dies. (Steel ruled dies I have are in one cabinet near the work table).

As for the kitchen cart I had been using for the machine table I will use that to hold a laminating machine and also my hot glue gun and supplies. So once again moving things around in the craft room.... haha  Does it ever end??? ;0)

Also -- Divinity Designs (ODBD)... I had seen a video where a crafter had used the Divinity Designs Milk Carton die and carrier die for her project. I went to   divinitydesignsllc.com  to check out the pricing of these two die sets which came to $74.90. But Divinity Designs had originally sold this die set in a bundle when it first came out and the bundle had other items included and that sold for the bundle price of  $94.80 but it was on sale for $75.84! So for 94 cents more than the cost of the two dies I had shopped for I was able to buy the bundle with all the added products. Happy me that arrived the other day and I plan to cut them out this weekend. Between the new machine and the die set bundle I have about used up my hotel and Chantilly shopping monies but that is okay --- the Milk Carton die bundle requires the larger machines to die cut them so the new machine will be put to good use right away. It will also cut the larger/longer Sizzix dies I have on the bottom shelf in the Sizzix holders as well as my longer Spellbinder border dies. . .   New items in the craft room that will certainly get some use!

Very happy this new table is finished and ready for serious use in this craft room -- already working on die cuts for the holidays ahead so will continue those die cuts as well as finishing putting everything back in place after moving in my new machine table... A HUGE thanks to DH for building me another great table to my specs and I love it already!  Here is a photo to show the two machines on the new table top with plenty of room for them both:


Stay safe and healthy!  TFL


Saturday, May 2, 2020

This and that - -


No real project in the makes but I have been busy with die cutting - - trying to get things started for holiday treat holders ahead. Started with some BOO Day die cutting -


Used black card stock and die cut the above shapes - Also cut out the pumpkins below:


As well as some Jack O Lantern pumpkins:


Also die cut some treat holders. This is the Turkey Lollipop treat holder from My Creative Time. Their packaging does not have a colour photo of a finished project so I looked up this project and printed out a photo of the finished treat holder and taped that to the magnet sheet I store this die set on:


The photo not only shows what colours were used but also shows what the tiny die pieces are for. Here is the photo of my die cut pieces for the Turkey Lollipop treat holders:


Pulled out a pad of textured card stock for the layers on the turkey but die cut the turkey base out of smooth brown card stock. For Christmas I die cut some ice skates:


Also cut out boughs and pine cones:


Here is a photo of the plastic Sizzix envelopes (that other die sets are sold in) that I store these die cut pieces in for later use:


Here is a photo of the Tote Bag treat holders I die cut from PaperTreyInk:


For the totes I used 6x6 card stock pads. My PIC (stamping Partner In Crime) had gifted me a couple of the Fall/Thanksgiving printed pads for Christmas and I used some of those papers for the totes. I will use these for Thanksgiving treats.

Also -- here is a photo of dies I had bought on sale at Elizabeth Crafts:


Today they are having a sale for 20% off everything -- so I may have to shop their website again~ ~ wink, wink . . . I also bought these brand new magazine holders at a thrift store:


I bought the two sets they had -- and they are from the Container Store and sell there for $9.99 for the set of two holders - I bought my sets for $2.99 each. They are heavy duty and brand new so a good find for me. Plan of using them for card stocks. Now I am working on how I will decorate the paper gift bag fronts for my holiday treat holders for each holiday. Hoping all this prep work will save time when the holidays roll around . . .