Showing posts with label Valentines. Show all posts

Monday, February 23, 2026

Romantic Valentine Card

 Made this Valentine's Day card using a new die set from Scrapdivadesigns.com called Romantic Heart:

I used a doily die set from the stash from My Creative Time on the front of the card:

I used matte red foil card stock from the stash for the foiled heart layers:

For Valentine treat holders I used all dies and card stocks from the stash:

I used this older Spellbinders die set to make a box for Hershey nugget candies and I added washi tape from the stash to the top and bottom of each box:

Used a pizza box die set from PixiDust Designs from the stash for the pizza box and I made rosettes for the tops of the boxes:

Also used an old lollipop die set from My Favorite Things (MFT) for my Tootsie Pop holders:


Here is a photo of one of the treat bags I had made using bags from the stash and card stocks and dies from the stash:


Also a Valentine's Day joke from the radio:

Two guys, who do not know each other, stopped at the grocery store after work on Valentine's Day. They both headed over to the Valentine's Day floral display.... one guy says out loud:

"This is a lot of money to spend for something that is just going to die"

Other guy replies out loud:

"Yeah.... but she really likes flowers....."

Sunday, January 25, 2026

Grid Valentine's Day Card

Here is the grid Valentine's Day card:

Stash or cash --- for this card I used a peach card stock base cut and scored at the top. For the grid card front I used the new PinkFresh "Refined Grid" cover plate die with matching stencils set that I bought in December. Here is a photo of the packaging for the stencils:


These stencils make a few patterns so the set is worth the price but remember you need to use their grid cover plate die with the stencils:


After I had the card stock base ready for the card I decided to use a creamy white card stock for my grid piece rather than a bright white card stock. I die cut out the grid cover plate from my creamy white card stock that was cut a bit larger than the cover plate die. Once that was cut out I stenciled the two hearts stencils onto the grid piece. This cover plate does not cut the grid piece out for your card front. To cut my stenciled grid piece to be used on my card front I used the Spellbinders Precision Layering Basics die set from my stash and cut my grid piece to the size I needed for my card front:


I used liquid glue and put the stenciled grid piece onto the front of the card stock base. For the greeting I used a die set from the stash from Karen Burniston:


I die cut the greeting out of glittered card stock for the card front. I wanted to put the greeting on a piece of vellum so I used a circle die set from Spellbinders from my stash and die cut out a circle. Used liquid glue to put the greeting onto the vellum. Then I added liquid glue behind the words on the greeting circle and put the circle onto the grid card front:


Added flat red hearts gems from the stash to the greeting piece. For the inside of this card I used this older stamp from the stash from Hampton Art (G) from Michaels:


I stamped this using red ink and then I used the stencil set and stenciled two hearts:


Easy card to stencil and put together but remember if you should use this grid die set that you have to trim your grid die piece to the size you want as that cover plate cuts only the grid and not the edges of the grid piece for your card front.


Wednesday, January 14, 2026

Road trip to Ikea - - -

Drove the 3 hour trip to Charlotte last week to make a trip to Ikea. Since we were going to Charlotte anyways I made a stop at the recycle craft store there, Upcycle Arts.  As with any of these recycle crafts store their donations are their stock and each time you visit you never know what you will find. This trip I was happy to pick up the LawnFawn Shutter Card die set. It was marked $38.00 which is the price it sells for on the LawnFawn web site but I paid $3.00:


I also picked up some orange card stock for Halloween projects and some other card stock. Spent less than $10.00 but happy I made the stop for the shutter card die set alone..... Here is a card I made using this die set:

Closed with the belly band:


Belly band off and card is partly opened revealing the tiny stamped heart in the sentiment window:


Open all the way:

Not having used this die set before I watched a couple of videos on YouTube for tips, tricks, and assembly. This is a very easy die set to put together but I did find out that LawnFawn offers an add-on die set for their Shutter Card die set. This add-on set has the die piece that on my card is the black and white hearts card stock with the circle window cut out in the center. But having only spent the $3.00 for this die set I did not want to spend more for the add-on die set and then shipping on top of that so all I did was measure how wide and long I would need to cut my center piece for the window and then be done with that. If you buy both sets from LawnFawn it is approx $53.00 but Pink&Main also have a shutter die set and their total set includes everything and that is approx $28.00 for theirs. 

For my card base, shutter pieces, belly band I used black card stock. For the front and inside red panels I used card stock from the stash. Also the black and white hearts card stock is from the stash. For the sentiment I used the old MFT Lollipop Additional Love add-on stamp in my stash for their lollipop die set:

I stamped the circle "Happy Valentine's Day" in black ink on white card stock and used the small heart in the stamp set and stamped that in the center of the circle using red ink. Set that aside to dry. I wanted the shutter window over the sentiment to have a 'lens' so I used a clear window sheet behind the die cut circle in the center of my black and white hearts piece:

Such an easy die set to work with for this shutter card. Belly band is also the black card stock and I die cut that out with the die in the set for that. For my red glittered heart I used a heart die from the stash from Divinity Designs (Our Daily Bread):

To cut this heart out I used a scrap piece of red card stock and cut out a heart and then cut out the same heart die from glittered foam sheets from my stash. Put the foam heart and card stock heart together using liquid glue. The card stock will help the foam heart keep it's shape:

This shutter card closed measures 4 7/8" high by 3 1/2" wide. OPEN it measures 4 7/8" high by 7" when it is open and flat. Fun die set to work with and happy I picked it up to add to my stash and that it was so cheap!

Wednesday, February 12, 2025

Heart Gift Bag Die Set

 www.happycraftershop.com   came out with new die sets for Valentine's Day and I bought her Heart Gift Bag die set to make two Valentine's Day treat holders:

The dies cut out so well - the red card stock is from the stash and the kraft card stock on the right is by PaperTreyInk and it is a thicker card stock. The die cuts out the base and side pieces, then you cut out two heart shaped pieces - front and back - for the bag and the handle is part of that die so all one piece. It also has a layering piece for the front/handle for the bag and I also cut it out for the back of the bag:


I made a few treat holders for these and I put tissue, the treat holders and chocolates in the bags:

To decorate the front of the bags I used a heart die and cut out a red heart from red glittered card stock. I also used two bow dies from the stash to add bows by the handles. Once the bags were filled with treats for Valentine's Day I put them in 5" x 11" cellophane bags (from candy aisle at craft store) and tied the bags closed with red ribbons:


Such a cute treat holder for Valentine's Day and it could also hold embellishments or a small gift or a die set, etc.. Nice size treat holder! Another fun die set!

Sunday, February 9, 2025

Happy Valentine's Day Card

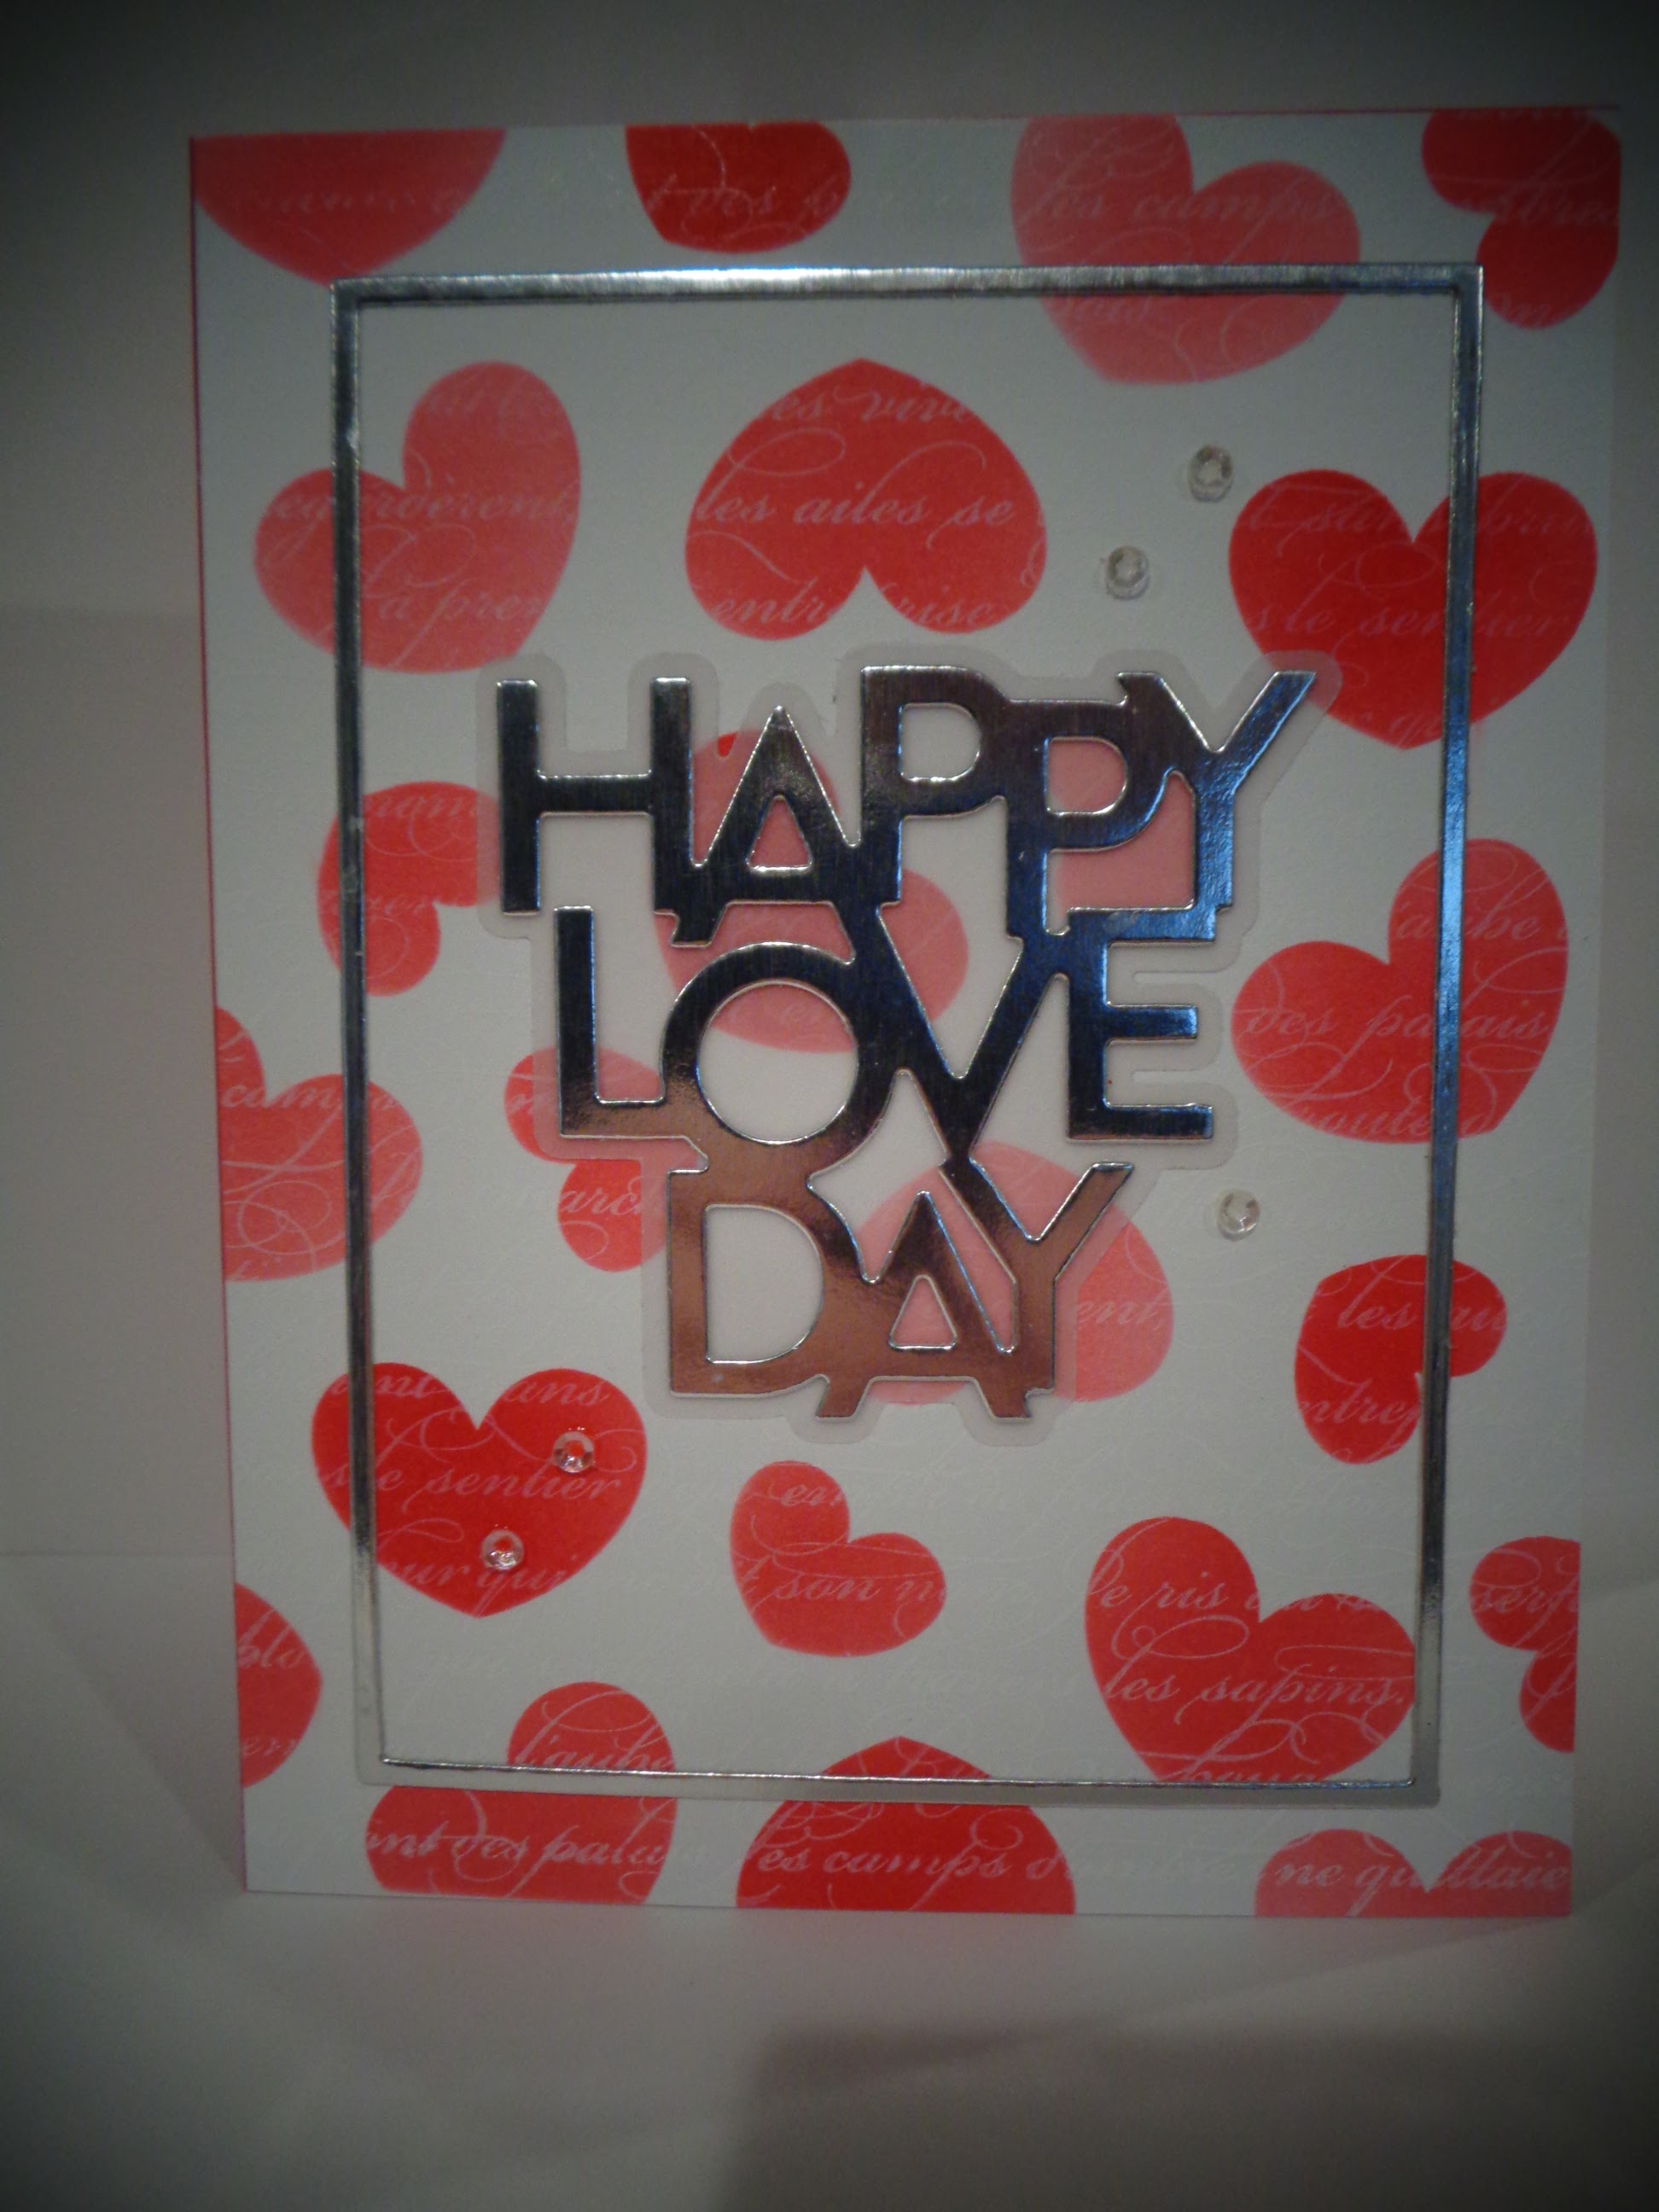
This year I used the new bundle from Concord & 9th by Kristina Werner "Happy Love Day" for my Valentine's cards. She has done a lot of work with Simon Says Stamp in the past and I was happy to see she was now releasing her own product line with Concord & 9th. The bundle has a four piece stencil set, the greeting die set, and a small stamp set. Here is one of my cards:

Her stencil set has the four heart stencils for layering and these stencils are 6" x 9". This is nice because you stencil a larger piece and when done you cut it in half and it will measure 6" x 4 1/2" which gives you two finished pieces for card fronts. Once the stenciled hearts were done I went through my stash of background stamps and found a French script stamp and I inked that with white ink and stamped it over the stenciled hearts. Set these aside to dry. 

Used the Ellen Hutson framed die set and cut out my silver frames from foiled poster board from the Dollar Tree. This is a very thin frame so how to put it on the card front so it is straight and not wavy? 

I cut and scored my red card stock base at the top for the card. Trimmed my heart stencil card front piece to the size I needed for the card. To put the silver frame on the card front and to be sure it was straight I used the center piece this frame die cut out and laid that onto the stencil piece - then I added glue to the back of the frame and laid that over the center piece to keep it straight. Once the thin frame piece was on the card front I removed the center of the frame piece:

Set that aside to dry and I cut out the "Happy Love Day" greeting from the silver poster board and for the shadow piece I used vellum from the stash. Use liquid glue to put those together. Used liquid glue and put the card front on the red card base. Used the same glue to add the greeting to the center of the frame:

The above photo shows the greeting added and it also shows the white background stamp stamped over the stenciled hearts. I stenciled all my cards using this stencil/stamp/die bundle set and half the cards after I stenciled the hearts on I used a small circles stencil and added red circles to the stenciled pieces and here is what that card front looks like:


Happy these cards came together quickly and easily with stenciling a larger piece of card stock at one time. For the inside of the card I used a wooden stamp from the stash and I stenciled one of the red hearts above the stamped image:


Love the larger sized stencil set -- love the fat, curvy hearts and how easily it was stenciled and when done I cut it in half for two card fronts. Certainly saves time ..... ONLY thing I wish this stencil set had was numbers on each stencil so you know which order to stencil them in but I used a black Sharpie marker and numbered them myself. Easy cards to put together for Valentine's Day!

To complete the cards I added holographic sequins from the stash:


Tuesday, February 4, 2025

Finishing up the Valentine's Day Treat Holders - - -

All my treat holders/bags for this Valentine's Day are all made using this printed card stock from Triplicate that I found on Amazon:

When I decided what treat holders I would make for this year I decided to hit the stash first and see what colour paper gift bags I had on hand from the Dollar Tree. I came across bags that are a brick red and when I saw this paper pad I thought it would be perfect for all my projects this year. I had made my list of projects I wanted to make using my altered clipboard for Valentine's Day so that I could keep track of things I wanted to make..... was just about to start on my last treat holder when.....

www.happycraftershop.com  changed all those plans..... I saw they had a new release out for Valentine's Day and she has the Heart Gift Bag die set and I knew I had to order that right away! Here is a photo of the front of the die packaging:

The backside of the packaging has the stitched lining die pieces for both the bag and the sides. It also has the side pieces and two heart shaped tags..... Here is a photo of just two of the Heart Gift Bags I have put together for this year:

The printed card stock works well with the solid darker red card stock as well as the kraft card stock on the second bag. The kraft card stock is from PaperTreyInk and this die set cut right through that thicker card stock with one pass in the Big Shot with no shims. The nice thing about this die set is both the lining piece for the printed card stock cuts out the front of the bag as well as the handle piece and being all one piece it is easy to put onto your solid bag base. Here is a photo of the red one, front and back:


And the kraft bag:


For the fronts of the bags I used a heart die set and cut out a heart using red glittered card stock. The bows on each bag front are die cut from red foil card stock and I used a bow die set from Scrapbook.com, their brand. 

This bag will hold a lot and would be good to hold embellishments, small die sets, lots of chocolates, etc. The width is approx 5 inches across the front and approx 5 1/8 inches high - from the bottom of the bag to the top of the handle.  Very cute treat holder and very easy to assemble. This is my first die set from the "happycraftershop" and happy I saw it for Valentine's Day treat holders!


Sunday, February 2, 2025

Valentine's Day Treat Holders

Here are some of the treat holders I am working on for Valentine's Day. I bought the Heart Top Box from the new release at My-Creative-Time.com:

This is a four piece die set and very easy to decorate and assemble. You cut the box die out twice for the front and back of the box and the die set has two panel die pieces for the front and sides of this box. Here are photos of the box and showing the side panels:


I used PaperTreyInk kraft card stock for the boxes and the panels are papers from a vintage pad of paper by Triplicate that I bought on Amazon. I used red washi tape from the stash to decorate the top of the box. All I have to do is fill the box with chocolate treats and add a tag.... I used the lollipop die set from MFT Stamps for my Tootsie Pop holder and I used the Sizzix Rosette die for the rosette. The cream doily was die cut from a small doily die from my stash:


Here is a photo of the lollipop die set as well as the Rosette dies I used:


Also my accessories for when I make the rosettes:


First I have a dauber handle tool that I use to make my rosettes with - I punched out a small circle from my brown craft mat and glued that to the bottom of the dauber handle tool. When I use the hot glue to make my rosettes I press down on the top of the rosette using this dauber tool and I do not have to touch the hot glue on the rosette. This next photo shows the circles I have made as patterns for my tulle I use on the rosettes:

I keep the different sized circles in a bag so when I need a certain size I can easy lay it on the tulle and cut out my circle to fit whatever size rosette I make.

Added sparkle red tulle to the front of the rosette and metallic red thread behind the die cut heart I added to the center. This next treat holder was so easy to assemble:


The die set to make this box that holds four Hershey Nugget candies is:


This Art Impression die set has small pieces to die cut card stock pieces for the side panels of the box but I wanted to use scrap pink gingham card stock I had on hand so I just measured the panels and cut out my pieces and put them on the box panels using liquid glue. I used SimonSaysStamp Cotton Candy card stock for my boxes and I die cut a heart from the box top for a window. I used clear sheet to line that cut out piece. To keep boxes closed I used a little velcro dot. 

For the small pillow box treat holders I used a die set from FunStampersJourney to make the box and I used red card stock for those:


Here is a photo of the die set


The hearts I put on the fronts of the pillow boxes are the hearts I had cut out of the pink boxes for the windows:


Still have to add embellishments but mostly done with treat holders and the bags they will go into. Happy to have the Heart Top Box die set from MCT - nice size and free standing!