Wanted to make some embellishments for BOO Day using items from the craft room for projects I have seen on YouTube and blogs for Halloween. Here is the first project for Halloween embellishments I made:
Witches Brooms:
There are a few videos on YouTube showing how to make these crepe paper/straw brooms but I will explain how I made mine below. For some of my brooms I used thin ribbons to make a small bow with a gem and others I used flat back flowers in place of the bows for the broom tops:
All the Halloween themed straws I used for the broom sticks are from my stash and I had bought them at Dollar Tree at when they put out their Halloween items over the years. You can also use plain straws that you paint or cover with washi tape or card stock. Some crafters have also used popsicle sticks for their broom handles. Here is how I made my Witches Brooms:
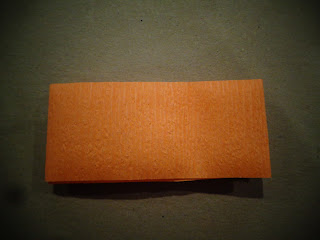
First I used an Exacto knife and cut the straw in half lengthwise. Then I cut a piece of crepe paper approx 16 inches long with scissors. I folded this in half lengthwise:
I folded this in half again:
I used my M Stewart fringe scissors to cut the crepe paper being sure to leave about 1/4 inch from the top uncut:
If you do not have a pair of the fringe scissors you can easily cut the layers of the crepe paper with regular scissors but be sure to leave a 1/4 inch border at the top. Open the crepe paper:
The key to making the brooms is using hot glue - but you want a very light dot of the hot glue. Put the glue in your top corner of the crepe paper and lay your straw in the glue on the crepe paper. Even tho the Exacto knife cuts the straw easily your cut may not be totally even so I would put the cut end of the straw on the crepe paper piece. With the straw attached with the glue to the crepe paper start rolling the straw down your crepe paper piece. Every so often put another small dot on the crepe paper so the layers will adhere:
Try to keep the crepe paper even at the top as much as you can, adding dots of hot glue here and there and at the end of the strip another dot of hot glue to close the "broom" the crepe paper formed. Even with using such a light application of the hot glue the crepe paper will stay closed/formed on the straw:
The crepe paper is thin so if it should tear/come apart just add another small dot of the hot glue to reattach it and keep going - no one will know that your crepe paper is not one piece. With my crepe paper/broom on the straw I then cut a piece of black sparkly eye lash yarn from the stash to wrap around the top of my broom:
Attached the yarn to the broom piece using a small dot of hot glue and I just wrapped this around the top of the broom and I continued to wrap the yarn around the straw a few times at the top of the broom and held that in place using a dot of hot glue:
After the glue has cooled use scissors and trim off the excess yarn. Turn the straw over and hot glue a flat back flower to the broom front or hot glue a small bow with a gem to the front:
Used hot glue to add a pom pom to the top of the brooms. These go together quickly and each one looks different from the other depending on the colours of crepe paper or print on the straw you use. These will be cute embellishments for rosettes or bag toppers and the like for Halloween projects ahead......
TIPS: For all my brooms I made the bows with the gems first since I used liquid glue for those and set those aside to dry while working on all the brooms. Also when I was rolling the crepe paper to form the broom I only used a dot of hot glue four or five times forming my crepe paper into the broom shape. You do not need a lot of the hot glue as the small dots of hot glue will keep the broom shaped while you are continuing to make your broom. You can also fluff out your crepe paper at the bottom of the broom once you finish them to make your broom look fuller. Fun project to add as a Halloween embellishment for holiday projects ahead!


