Showing posts with label Technique. Show all posts

Sunday, January 26, 2025

Who knew????

Who knew???? Had come across a video on YouTube by NB Cards and she was making a project with die cuts and these die cuts had fine lines and she showed her tip to add glue to these finer die cut pieces for her project. Usually when I use finer die cuts I will use the Artist-Tac sheets to add adhesive to the die cut pieces but I was working on a Valentine's Day project and I used a die for "Happy Valentine's Day" with lots of detail and lots of thin lines. . . did not think the Artist-Tac had enough space to adhere well so was not sure how I would add adhesive to the word die pieces until I saw her video. 

She used a silicone brush to add glue to her die cuts --- so here is my new silicone brush:

As she showed in her video I used scissors and cut off the long bristles:

Using a craft mat I squeezed out some TomBow glue and now I could add this glue easily to the finer die cut piece I needed for my project:

Tapped the silicone brush into the glue and then tapped it over the back side of the die cut I needed glue on. I put the die cut on my project and it works great! Rinsed off the silicone brush under warm water and the glue comes right off. Simple idea but certainly will be a time saver for future projects. She has a lot of great videos on her channel with lots of tips and inspiration. Happy I came across her video on adding glue to die cuts and thanks to her for sharing this great idea!

Monday, May 29, 2023

Floral Card Fronts

 Finally had time to work on floral card fronts that I have wanted to make. These card fronts have embossing folders with matching stencils for easy ink blending to add colour to the flowers. Here is a photo of some of the finished stenciled pieces:


The pink sample was made using the Vintage Lace 3D embossing folder and stencil set from Altenew. To make this card front I cut my white card stocks to 4 1/4 x 5 1/2. Once I put the card stock in the embossing folder I lightly misted the front of the card stock with water and ran it thru the die cutting machine to emboss this design. I did this same thing with the blue rose sample. Set these aside to dry.

Cut my coloured card stocks to the sizes I needed for the card base and card front. Set those aside. With the stencil in place over the embossed pieces I added ink to the design using blender brushes. Once all the blending was done I cleaned my stencils and trimmed the floral pieces to the size I needed for my card fronts:


Assembled the layered card fronts. Put them on the card stock bases using liquid glue. The floral designs can be used for many different occasion cards. Now I have to hot foil my sentiments or maybe heat emboss them - will have to see what I have in the stash... For a crafter that can not do colouring with Copics and such these embossing folders and matching stencils certainly let me have that "look" of a card that was coloured.  The Altenew 3D embossing folder embosses well with one pass in the machine and has lots of detail on the design:


Sunday, January 6, 2019

Altered project


This year I will be making different projects I have seen that I have wanted to try and make but never had. Decided I would start with a project I have wanted to do for a long time. . .

These are called Altered Paper Clips and I am using my paper clip vertically rather than horizontally as many of the altered clips are. Here is a photo of my Altered Paper Clips:


The first one I made:


The image of the vintage woman and the seed packet I founded on the internet and you can print them out for free. I used the computer printer and printed them out onto white/GP card stock. Set these aside.

Have seen many of the altered paper clips online but I did not want to make a small one. For the base of my altered clips I used the Memory Box Sideshow Tickets die set. This is a photo of the die set:


The size I used was the second smallest die. For the above ticket I used cream #110 weight card stock from Mikes. I cut out two tickets - one for the back of the paper clip and one for the front. This photo shows the front ticket piece and the printed card stock ticket I will put onto the front ticket:


I used the ATG and put the printed card stock onto the ticket base. Using a pink distressed ink I sponged the edges of the ticket front. With that done I put the paper clip onto the back ticket base and attached this to the ticket front pieces using red sticky tape. With the ticket pieces together I could now decorate the front.

I used scissors to cut out a photo of a woman I liked and a seed packet I wanted to use. I do not have the 'torn edge' scissors to give the photos of the woman the torn edge look but I have a die set for that from Frantic Stamper. I die cut the four sides of the photos and then sponged the edges of them using distressed inks. Set those aside.

For the "love" and word stamps on my altered clip pieces I used an old stamp set from MFT.  I cut them out using scissors. The red crystals are from my stash. I cut out two sets of three circle red crystals and put one set at the top of the ticket and the other set at the bottom. Wanted to add cheesecloth to the ticket so I cut a small piece of cheese cloth and I laid that onto scrap copy paper. I dabbed this cheese cloth using an applicator and distressed ink to give it the pink colour. Using TomBow glue I put glue on the front of the ticket and laid the cheese cloth onto that and pressed it down so it would stick. Set it aside.

Using a pearl from Hobby Lobby I added a pearl to the bottom of my ticket pieces and in this next photo I show this pearl on the second ticket I made:
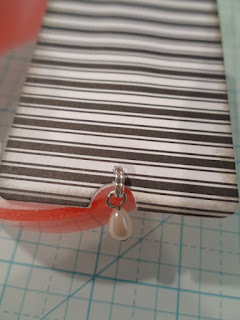

With the pearl in place I now decorated the front of the ticket. For the seed ticket I laid the seed packet photo over the cheese cloth and put that on the ticket using tear and tape. For the photo of the lady I cut out a small cream doily using an old Cheery Lynn doily die. Cut that in half using scissors. Lightly sponged the edges using the pink ink.  Used scrap cream lace and cut off some of the edging of that and put the photo on top of that using red sticky tape.  Then I put this on top of the half doily piece using tear and tape.  Wanted her photo to be higher for dimension so I used foam tape behind her. Put her on the ticket over the seed packet piece. Added a red crystal heart to her photo and also to the seed packet.  Put the "love" greeting on the ticket front using glue dots. To finish the ticket I tied a piece of red ribbon at the top. Here is a photo of the other ticket I made:


For this ticket I used a floral card stock print that I just bought at Hobby Lobby from Prima. The black and white card stock is from my stash. This ticket is a base of white #110 card stock from Mikes. I also used the white card stock to cut out a Cheery Lynn doily die piece and cut that using scissors to fit behind the floral ticket piece - for this altered paper clip ticket I used the floral print and cut out the smallest ticket die in the die set for a smaller ticket.

Once again for the vintage lady photo I used the torn edge die for the edges of the photo piece. I had bought a hard cover dictionary at the thrift store for a quarter and I tore a piece of a page out of the book to put onto the ticket front. For this ticket I also used cheese cloth but left it the white it comes as. Used liquid glue to put that onto the ticket front and also put the dictionary page piece onto the ticket with that glue.  Set that aside to dry.

For the photo piece of the lady I added a piece of black ruffled trim from my stash trimmed to fit behind the photo.  Put the floral ticket piece onto the ticket front using tear and tape. Then put the lady photo piece over that also using tear and tape. Once again the stamped words are from the old MFT stamp set and I used black in from Close To My Heart for those. Cut them out using scissors and put them on the ticket front using tear and tape. Added pink crystals from my stash to the upper and lower corners of the ticket front.

For the pink rose -- had that in the box of supplies for the tussy mussy's I had made and I used clear TomBow glue on the tips of the rose and sprinkled it with glitter. Set it aside. Using scrap green card stock I punched out two sprig pieces using the sprig punch from M Stewart.  Put the rose onto the sprig pieces using hot glue. Also used hot glue to put this rose onto the ticket front. Added a piece of black satin ribbon at the top of the altered paper clip ticket piece.

I will use these altered paper clips to slide on the top of the gift treat bags I am making for Valentine's Day. I am happy with the size I made these and each one is different but even tho I am currently working on some more.... they are addictive!!! But fun and good to use scraps of different things I have on hand. Happy I have tried to make something new and for making something other then cards, tags, or treat holders.... TFL

Friday, September 28, 2018

Autumn Tissue Card


Loll Thompson shows the how to for the Embossed Tissue Technique card on YouTube and in the past I have made other cards using this technique. Here is a Christmas card I made following the how to's for this technique:


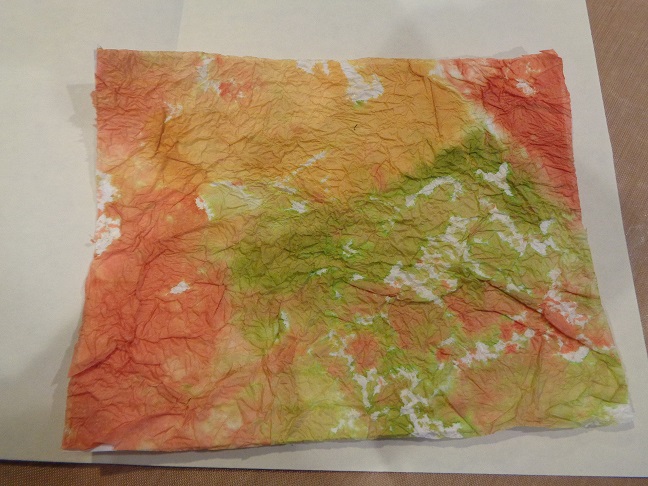
Wanted to make a fall card using this technique so I cut two pieces of white/GP card stock larger than what I needed. Set those aside. Cut two pieces of white tissue paper - from the dollar store - a bit larger than my two white pieces. Using three Stampin Up ink pads I put ink onto my craft mat next to each other. Used a fine mister and misted water onto the the inks. Using a palette knife I blended the water and inks together. With that done I laid my white tissue pieces into the inks with the shiny side of my tissue paper down onto the inks.

Carefully pulled this off the craft mat and put it on a cookie rack to dry. Wiped off the craft mat, reapplied my inks, misted them and laid my second tissue into the inks. Put this on the cookie rack to dry while I cleaned off the craft mat. The tissue is thin and does not take long to dry. Once my two pieces were dry I crumpled them up in my hands and this gives the tissue pieces dimension.

Used TomBow glue and covered one of the white/GP pieces with that. Carefully opened one tissue and laid it onto the white/GP piece. Gently pressed the flattened tissue onto the white piece but was careful to leave crinkles and wrinkles on the tissue. Did this with both white pieces and let these dry. Here is a photo of one of the tissue pieces glued to the white/GP piece and dry:


With these pieces being used for Autumn in the fall colours I wanted to use gold embossing powder on the tissue pieces.  I used a Stamping Buddy all over the tissue piece and then rubbed the VersaMark ink pad over the crinkles on the tissue pieces with a light touch so that the VersaMark was not smeared all over the background of this piece. With that done I covered the tissue piece with gold embossing powder and heat set that --- but I thought the gold was too dark and made the piece look "flat" and not the look I wanted:


Off to Plan B -- for the second piece I did everything in the same order but for my embossing powder on this piece I used the Jeweled Gold embossing powder by Stampendous and here is a photo to show the sparkle and shine this embossing powder gave the tissue piece:


Here is the finished card:


IRL this embossing powder adds a lot to this fun technique. I used a stitched rectangle die to cut out a white frame for my tissue piece. Laid the frame over the tissue piece and used scissors to cut my tissue piece to size. Used red sticky tape to add the frame over the tissue piece. Cut a piece of white craft foam to put the framed piece on. The card stock base is green and scored at the top. Used white/GP for the stamped white card front. "autumn" is a stamp by Hero Arts.

For the two glittered leaves I used a leaf border punch from EK Success and punched out scrap glittered card stock. Used the ATG and put the stamped white piece onto the green card stock base. Used double sided tape and put the framed tissue piece on the stamped card front. Used glue dots to add my two glittered leaves to the lower left corner of the frame.

This is an easy technique and if you plan in advance one of your tissue pieces can give you two pieces for card fronts. The glittered gold embossing powder definitely makes the card front and brings out all the fall colours on the tissue.  TFL

Tuesday, August 14, 2018

Autumn Harvest Card


Saw and ordered the Sunny Studios Happy Harvest stamp and die set and have not had any time to do much of anything with it other than taking it out of the packaging....  Finally was able to make this card using a technique I have wanted to try like forever..... Was able to use one the stamps from the Happy Harvest stamp sets:


This card was very easy to make and IRL is very dimensional. First the card stock base is kraft card stock with Pumpkin Pie for the card front. The white piece on the card front covered in leaves is a piece of white/GP.

To begin I cut and scored the kraft card stock base with the fold at the side.  Cut the Pumpkin Pie piece to the size I needed. Cut the white/GP piece to the exact size I wanted for the card front. Using a leaves stencil from my stash I laid the stencil over the card front white/GP piece on my craft mat. I used Texture Paste from Ranger to cover the leaves stencil. (Not Embossing Paste).. With the stencil covered I gently lifted the stencil off the card stock and put the stencil into plastic container with warm water - this keeps the paste moist so it is easy to get it off the stencil when I wiped the stencil clean. I let the stenciled leaves white/GP dry naturally.

Once the stenciled piece was totally dry I laid my cleaned and dried stencil over the stenciled piece lining the stencil over the stenciled leaves. With that in place I used washi tape to hold that in place. Using various distressed inks I added ink to my leaves using a sponge applicator for each colour:


For the greeting I cut a piece of white/GP to the size I wanted and stamped the greeting stamp using brown ink. Added a piece of green checked washi tape to the left side of that piece. Using the same distress inks I used on the stenciled leaves I covered a scrap piece of white/GP with inks. Used a leaf die and cut out a leaf.  Used clear Wink of Stella and covered the leaf so it would add some shimmer and shine to the banner piece:


Used the ATG and put the card layers together and then put them onto the kraft card stock base. Added various sequins to the card front for some sparkle. Here is a photo to show the leaves on the card front and the dimension the texture paste gives them:


Fun technique and love how easy it was to use on the stencil for the card front. TFL

Wednesday, August 1, 2018

Shimmering Dream Card


One more card using my two new favorite additions to the craft room -- the Fun Stampers Journey Rose Garden die set and the NUVO Mousse in Power Blue -- here is the card:


This card is sooooo easy to make!  To begin with I used a piece of white/GP card stock cut larger than the die set. Using the Rose Garden die set I cut this out. Using the NUVO Mousse in Powder Blue I covered the die cut piece with the mousse. This goes on smoothly and covers well. Set this aside.

Cut and scored a piece of white #110 weight card stock from Mikes for the card stock base with the scored line at the top. Wanted to use a die cut for the word "dream" so I cut that out of scrap white/GP card stock. Also cut that word out of a card board tab top to a kleenex box. I used TomBow glue to put the card board "dream" under the white/GP card stock word "dream".  By gluing these together it will give the word dimension on the banner. With those glued together I covered that word also using the Powder Blue mousse. Set this aside.

Measured and cut a banner large enough for the word die cut piece for the card front. Dug out a white flower from the flower jar stash in the craft room. Used a M Stewart sprig punch for the sprigs I used under the flower. Using Pearls Shimmer Mist I spritzed the sprig pieces, the flower, and the word "dream" to add a little of sparkle to them. Set those aside to dry before I put them all together.

Measured and cut a piece of white/GP card stock to fit behind my die cut card front. Put them together using TomBow glue. Used the ATG and put theses onto the white card stock base. Using a large glue dot I put the sprigs behind the flower and then added the banner piece that was cut using the Stampin Up Banner punch. Put the "dream" die cut word onto the banner piece using TomBow glue. Put this onto the card front using large glue dots. Here is a photo to show the shimmer and shine the mousse adds to this die cut card front piece:


LOVE the NUVO mousse -- goes on smoothly and really adds a lot to a card front. Also am loving the Fun Stampers Journey Rose Garden die set. Here are items I have already used it for:

A gift bag front (over clear sheet):


My two cards using the Over and Under with distressed inks:


And now this card covered with the mousse:


I apply the mousse using the distress ink sponges and handle and this is how I store all the mousse and applicators:


Two new fun additions to the craft room that I am enjoying getting to use. TFL

Sunday, July 29, 2018

Fall into Autumn Cards


Had bought this fall themed embossing folder at a stamper's used items sale earlier this year - I paid $1.00 for it and knew I would use it for the upcoming Fall season. . .


Here is a photo of the two cards I made using this embossing folder:


These cards were made using one piece of white/GP card stock that I covered with various distress inks. Once the inks were applied I used a stitched wavy edge die from Pink & Main to cut this in half. Here is a photo of the die set this die is part of:


With the distressed piece cut I put the two pieces into the new-to-me embossing folder and embossed them in the Cuttlebug. Went over the top surface of these two embossed pieces using a gold Nuvo Mousse to add shimmer and shine to the embossed pieces. Set these aside.

For this first card:


The card stock base is SU River Rock, front piece is Pumpkin Pie, and the white piece is white/GP. I used a stamp from Stampendous for the greeting and stamped that using SU Pumpkin Pie ink. Put the embossed piece on the white/GP piece using the ATG. Then put this onto the Pumpkin Pie piece and  put these onto the card stock base.  Used glue dots and added three sequins to the card front. Here is a better photo to show the gold mousse over the embossed design:


This next card:


This card has the SU Old Olive as a card base. SU More Mustard was used for the card front and the white is GP.  Cut this white piece to the size I needed for the card front. Stamped a Northwoods Rubber Stamp using Old Olive ink. Used the ATG to add the embossed piece to the left side of the card front. Used the ATG and put this onto the More Mustard piece and then onto the green card stock base.

Using various glittered card stocks I used a leaves border punch from EK Success and punched out some leaves. Put the leaves onto the card front using glue dots. Here is a photo to show the gold mousse over the embossed design:


The key to using the embossing folder for both front card pieces is the design on this embossing  folder has no direction - the rake and leaves go in different directions so cutting it in half would work. Had it had a directional pattern when I cut it in half one of the embossed pieces would be upside down on my card front. So this works with a random pattern embossing folder.

Easy cards to put together using just one decorated card front piece. Happy to find this embossing folder at the sale and will probably be making more fall projects using it this fall! TFL

Saturday, July 28, 2018

Out with the old and in with the new . . .


Recently went to a local stamp show and bought a jar of Nuvo Mousse at the booth of Tessler Crafts. Wanted to see if I would like this product since I have seen so many people using it on cards and projects. . .  Tried out my single jar and really liked it and wanted more colours so "out with the old" in the craft room...

Weeded out supplies I no longer use in the craft room and some storage items. Sold those on Craigs List. Used that money to buy my Nuvo colours -- was happy to get them on sale for half price online with free shipping so a win-win for me. Have not used all the colours yet but am on my way! I wanted to keep them all together so I have them in an IRIS box with a lid. Using velcro circles from the dollar store I attached a circle sponge to the top of each jar so I will have a sponge ready when I use each colour. Also have a basket in the box for the plastic spatulas and the applicator handle for the sponges:


This is one of the cards I made using the Nuvo Mousse:


For this card I used green card stock for the card base scored at the top. Cut a piece of white/GP for the card front. For the distressed/embossed card front I again used a piece of white/GP. Cut that a bit larger than the size I wanted for the card front. Used various distressed inks to cover the card front piece. Using a Sizzix leaves embossing folder I embossed this piece.

Once embossed I trimmed it to the size I needed for the card front. Using the Mother of Pearl Nuvo Mousse I lightly sponged this over the embossed piece. Wanted more of the mousse on the raised leaves than on the background so did this lightly. With that done I used the ATG and attached this embossed piece to the white card stock piece. Set this aside.

Using a stamp from Northwoods Rubber Stamps "AUTUMN" I stamped it onto a strip of vellum using Pumpkin Pie ink. Used the heat tool to set the ink. Using a die from my stash I cut out "happy" using scrap card stock and backed with Stik It from Ken Oliver. Then cut out this die from the top flap from a kleenex box and attached it to the card stock "happy". Covered these with clear Wink of Stella for some sparkle. (Having the cardboard "happy" behind the card stock "happy" gives this piece dimension on the card front).

Using double sided tape I put the stamped greeting vellum strip across the card front and attached it to the back of the embossed card front piece. Used the ATG and attached this to the green card stock base. Used a glue pen to attach the "happy" piece onto the stamped vellum piece. Added green Nuvo drops randomly to the card front. Here is a photo to show the shimmer on the embossed card front piece showing the Nuvo Mousse sponged on it:


The mousse can be used alone or spritz water on it and then add it to your project and you can even put it into a spritzer with water, shake, and now you can spritz it onto your projects. The mousse has a nice texture and you do not have to use much so buying them at half price was quite the deal for a long lasting product. TFL

Wednesday, June 20, 2018

Mask and Merry Card


This is the first Christmas card I have made for the 2018 holiday season.... It is the first time I have used liquid mask on a card.... It is first time I used Stampin Up inks for sponging a background on a card....  A big thanks to Bibi Cameron and her video on Youtube for inspiration and how-to's:

www.youtube.com/watch?v=3oNWNHFpsZA&t=1043s

I choose one of her cards as inspiration for my card and here it is:


To begin with I used the masking fluid by Winsor & Newton that I bought at Hobby Lobby with a coupon. For the toothbrush I used to splatter the liquid mask I used a cheap one from the dollar store. The trees stamp set I used is Lovely As A Tree from Stampin Up. The card stock base is cut and scored at the top and it is Night Of Navy card stock from Stampin Up. The watercolour card paper I used is Canson.

To begin with I cut the watercolour paper 4" x 5 1/4". I wanted a 1/4" border around my piece so I used a ruler and made a light pencil line on the sides, top, and bottom of this piece. As suggested in the video I also used washi tape to keep my border free of masking fluid and inks. I used a craft mat to make this card on. With the washi tape on all sides of my card front I put this inside a card board box and then splattered the masking fluid all over it:


I put this in the box since splattering the fluid over it it will  get all over the place and the card board box contains that mess -- just like I do when using anything I spray or spritz. Dipped the toothbrush into the bottle of masking fluid and with my finger I splattered this over the card front piece. After the masking liquid was on this I removed this card front piece carefully from the box and laid it on the craft mat flat and let it dry. This is the key to using a masking fluid -- is letting it totally dry before continuing the project. While that was drying I cleaned the toothbrush under running water to get all the masking fluid off of it and set it aside to dry so I can use it again.

Once the fluid dried on the card stock I added two inks to my card front both from Stampin Up - Night of Navy and Pool Party. My card is much lighter than hers in the video but I only used the two inks. I also used a torn Post It Note for my hills and the circle piece for the moon as she suggests. This is not my first attempt and here is what I learned - be sure your circle for your moon is pressed down firmly so you will have a solid circle moon. Also when stamping the trees be sure to ink them well and press hard when you stamp them and do not lift them off right away as it helps to keep them pressed down for the watercolour paper to absorb the ink. When sponging over the torn Post It Note mask be sure to move it around so you do not have a "stripe" look for your hills.

Once again -- LET DRY. With my stamped trees and hills sponged I let this piece sit on the craft mat without moving it. I cut and scored the card base and set that aside. With the card front inks all dried I used my fingers -- after I washed all the inks off of them -- to gently remove the dried on masking fluid. Removing that reveals the snow effect on the card front. I also peeled off the circle for the moon. Made sure all fluid was off the card front.

Gently peeled off the washi tape from the card front.  As Bibi had I also wanted to use a word die from the Stampin Up Christmas Greeting Thinlits set and I decided to use "merry". Here is the card front and the SU die set - as with all my word dies I always die cut them out of scrap card stocks and put them on a piece of dark card stock using a glue pen. I keep this sample with the die set so I can easily read what words that die set has since trying to read them backwards is not always easy - haha:


I cut the word "merry" out of silver foil card stock backed with Stick It sheet for adhesive:


As Bibi had used I also used the Christmas stamp from the Stampin Up Holly Jolly Greetings for my stamped greeting on the card front. But I did not want this to be crooked and since it is a cling stamp I did not want to trust this job to the Stamp A Ma Jig... so using clear plastic sheet from stamp packaging I cut a piece larger than what I would need for the one word stamp.

For the card front I put it in the MISTI and held it in place with magnets. I put the packaging clear sheet over the bottom half of the card front and held that in place with a magnet. Using the Stampin Up Night of Navy ink I inked this word stamp and stamped it onto the clear sheet to be sure it would be straight for my card front and where it would stamp on the card front - The clear sheet allowed me to move the stamp for placement and the ink wipes off the clear sheet with a baby wipe. This is hard to see but this is the clear sheet once I had the stamp where I wanted it and I stamped it:


Happy with placement I removed the stamped clear sheet and inked the stamp again and stamped it onto the bottom of the card front. With that stamped I removed the card front from the MISTI. Peeled the backing off the die cut word "merry" and put this over the stamped word on the card front:


Always hard to photograph foil card stocks.... With the die cut word on the card front I used the ATG and put this piece onto the card base. Added small sequins to the card front for some sparkle as you can see in the above photo. Bibi also made a small banner/flag for the top of her card, adding gold twine to that. I used the Stampin Up Gorgeous Grunge stamp set and stamped a stamp onto scrap Canson watercolour card stock using the Night of Navy ink. Used the trimmer to cut that to the width I wanted and used the Stampin Up banner punch on one end. I put the banner piece on the card front using the ATG and added silver twine I had looped and tied into a bow and I put that on the banner using clear TomBow glue. Here is another photo to show the snowy effect the liquid mask gave this card front:


This was much easier than I thought it would be and IRL this card has dimension with the hills and the moon. Thanks to Bibi for making the unknown technique easy and fun. One holiday card down... so many more to go! :0)

Saturday, May 5, 2018

Spring Tissue Card


What is old is new again -- used the Faux Silk technique that France Martin demonstrated in her video on Youtube:

https://www.youtube.com/watch?v=9AzFMQH_JQc&t=25s


For my card I used a kraft card stock base and cut and scored that with the fold on the left side. For the card front I used pink card stock and cut that to size. Used the ATG and put the pink piece onto the kraft card stock base.

Like "Frenchie stamps" in her video I also used the Stampin Up Indescribable Gift stamp set. For my white tissue I used tissue from the dollar store and I stamped my flower image on the non-shiny side of my tissue paper. (If you should try this technique be sure you cut your tissue piece much larger than what you will need for your piece). Once stamped I followed her instructions for using markers on the backside of the stamped tissue.  Set it aside to dry.

Using a white paper doily from the dollar store I cut that in half for my card front. Used a scalloped frame die and cut out a kraft card stock frame to go over my stamped tissue piece. With my items cut I used a piece of white/GP and cut it a bit larger than I would need for my card front. Covered that with TomBow glue and smeared it all over the white card stock with my finger being sure to have glue on all my edges. Cleaned the glue off my hands and then took the stamped tissue paper and crumpled that up. Gently opened it - not to tear it - and laid it on top of the white card stock that was covered in glue. Tapped the tissue into the glue -- do not smooth out the wrinkles on the tissue paper as that is the texture you want. Be sure your edges are glued down. Set this aside to dry.

With that dried I then trimmed this stamped tissue piece to the size I needed to fit behind the die cut frame I had cut out. Decided it was "too white" and blank so using a stamp from the Stampin Up stamp set Eclectic Expressions I inked the stamp and stamped it off onto scrap paper and then stamped it randomly onto my tissue piece to fill in the background. For the greeting I used a stamp from an Easter stamp set from Reverse Confetti and stamped that using brown ink. Used thin red sticky tape to put the die cut scalloped frame over the tissue piece. I laid this piece onto the card stock base and put the two half doilies where I wanted on the card front. With that decided I used double sided tape to put the doily half pieces onto the card base. Then used large glue dots to put the tissue piece on top of the doilies and on the card front.


Easy card to put together and thanks to Frenchiestamps.com (France Martin) for sharing this technique and cards on her video.

Monday, March 12, 2018

Eclectic Birthday Card


When I bought the Stamparatus from Stampin Up I qualified for a free stamp set during their Sale A Bration ongoing special so I bought their Eclectic Expressions stamp set. Made this first card using this new set:


Needed a quick birthday card and this stamp set is still out on my work island so this is the set I used. I had seen this card made by Dawn Griffith on Youtube:

www.youtube.com/watch?v=HUmfrvr9kII&t=70s

So here is my card following Dawn's video and instruction:


I used Stampin Up Rose Romance and Early Expresso for my inks. I did everything Dawn instructed except I did not stamp across the top and the bottom of my pink card base. I also did not have the "celebrate" die set she used so I used a Spellbinder die set for my die cut "celebrate" words. I cut out a pink word and a brown word and used glue to put them together. As Dawn did I also put clear Wink of Stella over my pink lettering:


Thanks to Dawn for sharing her fun card -- I love this stamp set -- thinking it will get used often like the Stampin Up Gorgeous Grunge stamp set I have in the craft room. Two cute cards, totally different, but using the same stamp set.  TFL