Saturday, November 28, 2020

Tootsie Pop Christmas Treat Holder

 Here is a photo of the Tootsie Pop Christmas Treat Holder I made to hold the Tootsie Pops:

To make the holder I used the multi tag punch I had in my stash that I had gotten at Hobby Lobby on sale:


I used a seasonal background stamp for the background but with the height I wanted my holder to be the stamp did not cover my whole strip - here is the cut strip I used and I stamped it straight:


I cut my strips from kraft card stock. I used red ink from IOStamps for the ink. Once the stamping was done then I used the tag punch for the holder piece but you can see the plain kraft card stock at both the top and bottom of the holder piece. To fix this for the next strips I angled them on the stamp - here is a photo to show how stamping at an angle covers my whole holder piece:


I had the stamp on the door of the MISTI and I covered that with the red ink. I laid the kraft card stock strip on the stamp at an angle:


With that in place I put a piece of white/GP card stock over the stamp and strip and I used a dry board eraser to go over the piece to transfer the inked image to the kraft card stock:


With that done I used the tag punch on both ends of the strips for the holder. I used a 1/4 circle punch on a piece of scrap kraft card stock and punched over that with a 1/2 circle punch and this gave me the circle ring to put over the hole on the tag piece to reinforce it. I used liquid glue to put these rings on the tag pieces:


For the Santa hat on the front of the holder I used two Cottage Cutz dies - the first for the hat:


Used scrap red and white card stocks for the hat. Wanted to add holly and berries to his hat so I used that part of this die:


With the hat die cut I sponged the edges of the red pieces of the hats with red ink. For the white pieces I sponged the edges with a light blue ink and used tear n tape to assemble the hats. Used glittered green card stock for the holly leaves and red foil card stock for the berries:


What had prompted me to make a Christmas Tootsie Pop Holder was this package of holiday pencil erasers from the Dollar Tree: 


I knew the stick on the Tootsie Pops was too small to hold these erasers but I figured I could use holiday straws and cut them down and the eraser would fit on that.... of course Dollar Tree did not have any holiday straws so since I was out and about I stopped in to Hobby Lobby to see if they had any.... found none but stopped in their party supply section and I found striped straws - I looked at the red straws and it was more of a coral shade and the green was a lime green and both of these would not work for the holders I was making.... decided to use a package of their clear plastic straws for this project.  Brought the straws home and cut them into thirds and they worked perfectly --- Here are the cut straws with the erasers on top:


Tree, reindeer, Santa, and a snowman - can't get more festive than that! Here is a photo of some of my holders with the eraser straws over the lollipop sticks:


and a group photo:


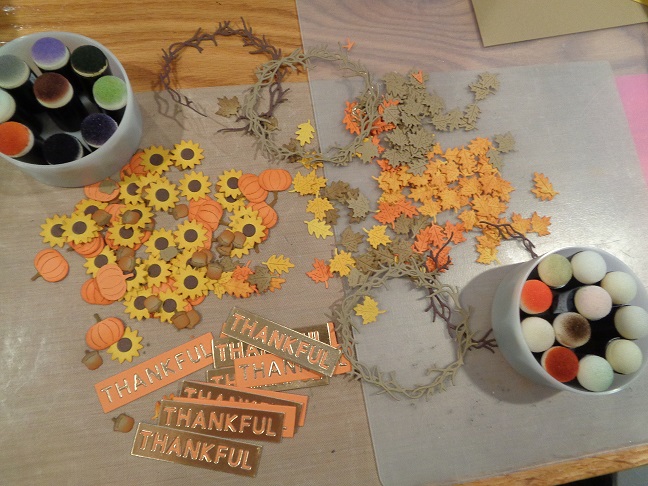
Had used a pom pom on the ends of the Tootsie Pop sticks for Halloween and wanted to used something different for Christmas - here is a photo showing the pom poms:


Glad I saw the erasers this last DT trip... while I was at Hobby Lobby buying straws I checked the Clearance Section and happy me that I found two Spellbinder Glimmer Hot Foil plates on clearance that I did not already have -- one is $5.99:


and this one was $1.49!


Wanted to make the Tootsie Pop Holders using the straws and erasers to see how they would turn out and I have lots more items I am working on but the craft room is a hot mess so that has to be addressed before I make anything else -- this could take all day --- haha....

For my treat holders - 

Cut kraft stock 6 3/4 x 2
Stamp
Using the multi tag punch punch both ends of the strip
Put this on scoreboard with long edge at top -- score it at 2 5/8 at one end - turn all the way around and score it again at 2 5/8 at other end. Use bone folder to crease the scored lines.
Used a 1/4 circle punch and then a 1/2 circle punch over it for the tag hole rings - glue them onto tags.
Used twine to close the holders.

Fun project to put together and the tag punch is nice because it makes different width tags and any length you would want to use. TFL

Thanksgiving bags and such - -

 Here are photos of some of the items I made for treat holders for the Thanksgiving bags I had made - since I had to replace the adhesive cork I had picked up at the Dollar Tree for the word "FALL" due to the backing not peeling off.... I decided to use glittered card stock for the rest of the bags:


Since I had to die cut all the letters out again I also cut them out of white card stock to put the letters on to make them more sturdy - glad I had picked up the larger clear blocks cheap from the used stamp sale I went to earlier this fall as they come in handy when gluing items --


Awhile back I had seen a video on YouTube from Liz Russell for her cute treat bags. I did not have the Sizzix die she used for her bag so I bought mine cheap off  Ebay:


Here is a photo of one of my bags I made using her idea for the crepe paper fringe and this new to me die:


added a left over scarecrow from the stash that I had picked up at Hobby Lobby.  Easy bag to put together. I also had made a second bag using the Gift bag die set from Pink & Main:


and some of the bags I made using card stocks from the stash and printed scraps:


another free standing bag for a treat holder. The word greeting banners are from a die set from Frantic Stamper. Also a Tootsie Pop holder using a die from My Creative Time:


I die cut the turkey using textured card stock from the stash - sponged the edges of the turkey and using liquid glue to assemble - here is a better photo to show the textured card stock:


Using punches I made the scarecrows for the matchbook holders that hold Fun Size M&M candies:

Used washi tape across the bottom of the holders to cover the staple that was used to keep the bag of candy in place inside the holder. Fun holders to put together and was able to use scraps for many of the holiday prints. 

Sunday, November 15, 2020

With plan in place . . .

 Earlier this year I had a seen a die from AliExpress that was a cute scarecrow and altho I rarely order from them I ordered the die. Decided I wanted to use him for the front of my Thanksgiving bags for this year and I wanted to keep with a Fall theme rather than all the Thanksgiving icons - turkeys, pumpkins, pilgrims, etc.... 

Happy me when one trip to the Dollar Tree I found adhesive cork sheets in their craft section. I picked up a couple of packs and when I came home I die cut the word "FALL" out of the cork sheets for the front of the Thanksgiving bags I planned to make. I also had an older die from AliExpress that had sunflowers on it so I decided I would use that die for the bag fronts as well. On another trip to the Dollar Store I found dark rust gift bags so I bought those to use for this project. Each of the bag fronts features different card stocks and different ribbons for the bows but here is the first bag front finished:

To start I cut out the sunflower die in the upper right corner from gold mirrored (foil) card stock. I trimmed it to the size I wanted to use. I cut the piece of the card stock I needed for the bag front. Used liquid glue and put the sunflower die cut piece onto the corner. Set that aside to dry. I had assembled all my scarecrows in the summer so all I had to die cut was the tag piece he is on. I cut it out of a print and then a solid base. Put those two tag pieces together using the ATG. Sponged the edges of that. 

Wanted to add a burlap ribbon across the tag so used liquid glue to put that on the tag - the glue dries clear so that would not show through the ribbon. Once dried I put the scarecrow on the lower part of the tag using tear n tape. Used my Bow It All and tied a double loop bow for the top of the tag. Put that onto the tag over the hole the tag die cuts on the tag. Set this aside. 

Cut a piece of the printed card stock that matched the tag for a strip for the lower part of the bag front. Put that on the card stock front panel piece using the ATG. Put the card stock front panel piece onto the bag front using the ATG. Then decided to put the "FALL" letters in place.... and the nightmare began....

Could not get the backing off the letters to put them onto the bag front piece. -- either the backing would not come off or the cork would rip or only parts of the backing paper would come off.... trial and error.... about 6 "L"s later I was able to get four letters for the front of the bag. Once I was able to get the paper backing off the letters I used tear n tape to put them onto the bag front. With those in place I added two sunflowers I bought at Hobby Lobby in a package. Added the tag piece to the bag front and added gold sequins to the bag front using Glossy Accents. Between the bag fronts and my Thanksgiving cards this year I am leaning more towards a fall theme than a Thanksgiving theme in that I am using sunflowers on both projects. 

Not happy with the adhesive cork letters and will have to re think this before I try to finish the other bag fronts -- they are all waiting the "FALL" letters and then they will be finished.... great ideas... until they aren't.... haha

Purple Person PIC

 This past week my PIC (stamping Partner In Crime) celebrated her 29th birthday again (as we all do...) and this post is about what I made and gave her to celebrate this yearly event --  My PIC is a purple person and keeping that in mind here is what I made to put her gifts in:


These are different sized Acetate Policy Envelopes. I used a pad of printed acetate sheets from We R Memory keepers for the acetate. The sizes I made were decided by what I was giving her for gifts:


Wanted to give her some products to get her Christmas projects a good start - plus some other goodies. I am on the waiting list for the Magic Mat from Scrapbook.com for her as well as for me so I told her that was eventually coming... but will be late. I wrapped all the dies/things in sparkly purple tissue paper and the dies fit inside the policy envelopes. I stacked everything and tied it together using sparkly white tulle and dropped that off to her at home with a chocolate layer cake I bought for her birthday along with this card - 

LOVE my Spellbinders Glimmer Hot Foil machine -- I had used it on her BOO Day card (Halloween):


and now for her birthday card:


I foiled two pieces of the white card stock using the gold foil and then fussy cut one of the larger flowers to put next to the banner piece that I also foiled. Really hard to photograph foil pieces but this photo does show the gold foil well. Hoping she had a good birthday and will get lots of use from her bday gifts... LOVE the foil machine and all the patterned plates Spellbinders offers and it is so easy to get such great results!! Will be using it for Christmas cards this year as well..... 


Thanksgiving Icons Card

 Had seen the Fall Icon die set from FranticStamper.com and when I saw it I knew I wanted to use it for my Thanksgiving cards this year.  Have a lot of their brand dies and they cut well with lighter card stocks, the heavier card stocks, as well as the mirrored (foiled) card stocks. Here is my card:

To start with my card stock base is kraft card stock which is cut and scored at the top. Used a pad of autumn card stock prints from Authentique for the prints and I had a partial pack of the speckled card stock that I used for the card front. I used the Tonic Studios/T Holtz Deckle Torn Edge trimmer for those two pieces. Once those were cut to size I sponged the edges with brown ink. 

For the "THANKFUL" greeting strip at the bottom of the card I used the FranticStamper die set Reverse Cut - Autumn Words and cut out my pieces from scraps. I used a pumpkin card stock and then a gold mirrored card stock and used the gold letters on the pumpkin strip. To hold the letters in place I used a piece of Scotch tape behind the strip piece. Here is a photo to show the two card stocks together:.

For the wreath - here is a photo of the die packaging that comes with the die set:

Always helps to have a photo of the die set so you know what pieces are for what or maybe for colours or a layout. Since I was making multiple cards I decided to die cut lots of pieces from different scraps I had on hand. I did not have golden card stock for my leaves but I had a darker yellow so I die cut that out instead.  With all my die cut pieces I began to sponge the edges of all the pieces. For the yellow leaves I left some not sponged and the others I sponged with orange ink to make them have the golden look fall leaves have. The small sunflower I die cut twice - once for the flower petals in yellow and then a dark brown for the center. Again used tape on the back of the flower piece to keep the brown circle in the center of the flowers. 

With all the die cut pieces I cut out the wreath die from kraft card stock - I wanted to layer the wreath with two layers so I doubled the amount of wreaths I would need. Each card has two wreath pieces that I put together using liquid glue. While those were set aside to dry I began to layout my pieces for the wreath. I wanted three pumpkins for the wreath so I used tear n tape and put two different leaves behind the pumpkins. Then for the sunflowers again I wanted three so I put two leaves behind each flower. I had spare leaves so I planned to use those but I also wanted to use the tiny acorns. I die cut those from kraft card stock and sponged the top with brown ink and the bottom with a pumpkin coloured ink. 

With all the die cut pieces cut and assembled I assembled the card. Used the ATG and put the plaid card stock onto the card base front then the speckled cream card front onto that. I laid the wreath onto the card front and laid out all the die cut pieces onto the wreath - a dry fit - I did not attach anything yet. I decided I needed to add some sparkle or shine to the wreath so I took out the clear Wink of Stella pen and put that over the brown circle in the flower and also the bottom only of the the acorns. The camera did not capture the sparkle but IRL you can see it:

Once I was happy with everything on the wreath I added tear and tape behind the pumpkin pieces and placed them on the wreath. Then I did this to the sunflower pieces. With those in place I turned the wreath over and put tear and tape on the backside and put the wreath in place on the card front. For "fillers" for spaces I used extra leaves with glue dots. I also used glue dots to add the acorns. Fun Fall wreath to assemble and a great way to use up scraps! Here is a photo of the two die sets from FranticStamper I used for this card:

Fun project to put together using scraps and my fall card stocks from Authentique. Both die sets cut all the card stocks I used including the mirrored card stock for the letters on the greeting strip piece. I esp like that the small leaves, pumpkin, and tiny acorns are all one die piece so that you will not misplace one on the work table .... or in the carpet.... Both fun die sets to have! 


Saturday, November 7, 2020

On the edge . . .

 Want to share a new product I just got in the mail and the pros and cons of it but first had to clear off the work table:

Working on Thanksgiving cards but wanted to have a clear surface for my photos - I just bought the Tonic Studios/Tim Holtz Deckle Torn Edge Trimmer which arrived yesterday with the mailman:

I do not have any other trimmers from the Tim Holtz line so I did not know what to expect for quality but I did like this trimmer will give you the deckle edge look on your card stock. Here is a photo of the trimmer right out of the box:

This trimmer will replace my old Fiskars deckle edge scissors for sure but it does not cut a 12 x 12 piece of card stock due to the size of the platform. There are also size markings on the trimmer surface but they are black on a black platform so it could be hard to really see them if you are trimming along:


I had checked reviews of other crafters for this product before I bought it - remember I am a card maker, not a scrapbooker, but for me for my cards, tags, or maybe for a crafter that does junk journals this is good tool to have. You do not have to buy a die set for the deckle edge that only die cuts certain sizes. I used a scrap piece of white/GP card stock for my sample piece. 

One of the most mentioned complaints on this trimmer is if you place your card stock at the top of the trimmer and then cut it the first section getting trimmed away is not really a deckle edge. For my sample I made a pencil mark arrow to show the upper right corner which is the first edge I cut:


Now after that first edge was trimmed:


I put the white card stock piece onto a piece of black card stock to show the deckle edge and how further down on the trimmer the deckle edge is more prominent. To fix this I used the lines on the trimmer surface to line up my card stock and trimmed it again - kept turning the card stock until I had all four sides trimmed:


I will also say I thought this would be a heavier tool - it is lightweight and the the handle side is heavier of course. For this card maker this tool will get used but once again I will use it for smaller card stock pieces and not a scrapbook page. It can do the edges for card stock pieces as well as it can be used for banners and greeting pieces. Plus the edge is different from the top to the bottom of the cutting blade so all four sides do not match which is true deckle edge. I have the old deckle edge ruler but many times while tearing the card stock using the ruler the core of the card stock can show and this trimmer just gives a clean edge to it. I did expect this to be a heavier tool than it is and it is disappointing that the top of the first edge corner is rather plain but I know now to make my edge cuts further down on the trimmer to avoid that first section. Not sure if Tonic/T Holtz are aware of the reviews of this problem but maybe on future models it could be fixed. But for me, for what I bought it for, this will work.I just don't like that the first top section you trim is rather plain before the deckle edging gets cut so that gives you limitations - esp if you are making lots of cuts on card stock pieces. I am so used to putting card stock in the upper right corner to trim . . .

Also - awhile back I had seen a crafter use this Dollar Tree make up applicator on her video to apply texture paste over a stencil and she explained it works better with the paste than the plastic spatulas. I had to go to a couple of stores but I did find it. This is what it looks like:


The applicator end is silicone and she cut off the curved edge of it to make it straight:


The above photo shows it with the curved edge and then a straight edge after I cut the curved edge off. I tried this as a sample to see if it did work better and what it looks like. Sorry it is hard to see white on white but I was using scraps on the work table:


The sample piece on the left was made using the make up applicator and the sample on the right was using the plastic spatula. The make up applicator gives the texture paste a smoother finish but the spatula shows the pattern better of the stencil. Here is a closer photo of the two:


For the brick stencil I used on the sample I like the thicker paste better to show the jagged edges of the bricks and with it being thicker it has more dimension - but the smoother finish on the left is also nice so I would guess it would depend on what stencil you used or look you wanted. 

Back to work on the Thanksgiving cards and everything else going on in this craft room. . . before we know it it will be Christmas projects again.... Happy Crafting!


Sunday, November 1, 2020

Moving on but - -

 Moving on and finishing up the Thanksgiving cards I am making but wanted to post the BOO Day cards I made for this year. This first card uses printed card stock from a paper pad I bought on Amazon:

The card stock base is #110 weight black card stock and I used a piece of solid orange card stock for the card front. The holiday printed card stock is from the "Spooky Paper Collection" paper pad by Miss Kate Cuttables that is from a 12 x 12 paper pad of 16 papers. I had seen this on Amazon and I liked the holiday prints so I bought one pack. This card stock has a shiny finish to it so that helps the prints have more dimension. It has a good weight to it as well. 

The white ghost is an old Sizzix die and I cut him out of the white foil card stock I had picked up at AC Moore before they closed. I added a bow and a gem to the ghost. The "Trick of Treat" greeting was stamped onto scrap orange card stock and I punched that out using a label punch. I wanted to keep this card simple to have the printed paper be the feature on the front of the card. 

This next card I made for my PIC - stamping Partner In Crime. She and I go to all the stamp shows and stamp sales together throughout the year and we are hoping in 2021 to get back to that schedule. Here is her card:

With all the stamp shows being canceled this year I used my saved show monies to buy a machine I had been wanting for some time. This is the FIRST card I made using my new Spellbinders Glimmer Hot Foil machine that I had bought off HobbyLobby.com at a great sale price with free shipping. The spider web hot foil plate is from Spellbinders and I bought that from their online store. The little ghost trick or treater is a die from Cottage Cutz that my PIC had gifted me so I HAD to use it for her card this year and the "Official Candy Inspector" stamp from Trinity Stamps was perfect for this card. Here is a photo to show the holographic foil I used for the spider web:

It is hard to photographic holographic things but this does show the different colours the foil has in it. For the ghost I used white foil card stock for the ghost, black foil card stock for the hat and the boots, and I used scraps for the socks and band on the hat. I put the ghost trick or treater on the card front using foam tape for dimension. 

Hoping everyone had a safe BOO Day (Halloween). We had no trick or treaters which DH was happy about -- more candy for him and less barking from the dog whenever the doorbell rings.... Working on Thanksgiving cards and such but first I am off to de-BOO the craft room and put Halloween items and products away until next year.... 


Packing away my decorated wood blocks from my unmounted stamps that I had decorated. Now onto Thanksgiving and Christmas items!