Saturday, June 8, 2024

A Day at the Beach Summer Cards

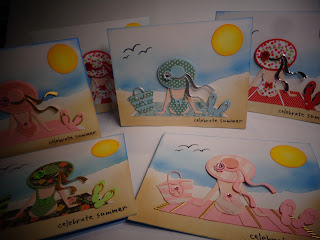
Recently Spellbinders held their Warehouse Sale and happy me I picked up lots of die sets that totaled over $132.00 for just $50.00. One of the sets I had seen other crafters use was the A Day at the Beach die set which was offered for their Small Die of the Month club in July 2022 and now on sale so I bought it.  I wanted to use this die set to make summer cards for this year:

Used paper scraps for the beach blanket, hat, bag, and swimsuit. Wanted to have a beach scene but did not want straight lines across the front of the card for the sand and water line so I used a piece of copy paper and tore a piece off of it and that used that edge for adding ink to the white card front. Here is a photo of the torn copy paper over a green envelope to show the line this torn edge made:

With the torn edge on the white card stock front I used blue ink and blended that over the edge to give me the dark blue on the card front. Removed the copy paper and then I blended more blue on the blue side of the card front with a gentle hand to blend the blue out to the white of the card front. Then I used a beige ink and at the bottom added more ink for the sandy area and when I got closer to the blue line I left white showing. Here is a photo of a finished ink blended front to show this before I added all the pieces for the card front:

First I cut all the white card fronts and then did all the ink blending. With that done I decided to go through my wood mounted stamps and find stamps to use on this card. The greeting in the lower right corner "celebrate summer" is a stamp from Stampendous from 2007.  The birds in the upper left corner is a stamp from DeNami Designs (remember them?) that I had picked up at a stamp show years ago and I thought it would work to have smaller birds over the water for this card front. With the stamping done on the card fronts I cut and scored the light blue card bases. Added liquid glue to put the card fronts onto the card bases. 

Once all the card fronts were on the card bases I began to add the pieces from the A Day at the Beach die set that I had already die cut out. Here is a photo of one of the cards I made:

The inside of the card I used a summer greeting stamp "Relax... " from Great Impressions and I have some flip flop washi tape I put inside the card as well - some washi tapes have more adhesive than others but I want to be sure my washi tape does not come off the card stock so I cut it a little longer than I needed and ran it over a glue stick to add more adhesive:

Here is a photo of the three wood mounted stamps from my stash that I was able to get more use out of:

I also used a small bow punch to add a bow to the beach bag front and the back of the swim suit. For the sun I used a circle punch and sponged the edges of that with yellow ink and then an orange ink. Used a small flower punch for the flower on the hat and added gems from the stash to the hat flower as well as the bow on the bathing suit and beach bag. Fun cards to make and good use of stamps in my stash as well as scrap card stocks. 

Saturday, June 1, 2024

Altered Clipboards for Holiday Projects

Here is a photo of the first Dollar Tree clipboard I altered for craft room projects I was working on:

I used a clipboard from the Dollar Tree and using craft paint from my stash I painted an inch on the front and back edges of the clipboard to add colour. Once dried I used ModPodge and put a printed card stock on the front of the clipboard and then on the back. For this clipboard I made a charm dangle:


I bought the spiral notebook from the Dollar Tree and it is the 100 page notebook from JOT. For the clipboards I made for craft room holiday projects I knew I would be stacking these clipboards so I did not want to make a charm dangle. Instead I used various ribbons from the stash for each of my clipboards and the ribbons dress up the clip that holds the notebook but is also flat for storage. Here are the holiday project clipboards I made:


For the Valentine clipboard I used a heart printed card stock on the front and a matching print for the back. The ribbons are reds and pinks. To tie the ribbons on the clip I cut a piece of 6 inch long ribbon, folded it in half and put this under the clip. Pulled the loop up and put the ribbon ends through the loop and pulled it tight. To keep the ribbons from coming untied I put some Beacon 3 in 1 glue on a toothpick tip and rubbed that on the clipboard clip and pulled the ribbon tight over the glue to keep it in place. I used both thinner and wider ribbons on all my clipboard clips and the clipboard clips hold 13 ribbons in total. 

This next clipboard is for both Spring and Easter projects. When Heartfelt Creations announced they were closing and no longer selling their stamps, die sets, and cards stocks I remembered all the times I went to stamp shows in the past and would shop their booth. They always had specials going on for the shows so lots of sales.... they also had walls and walls of card/project samples as well as having a demo booth or two so you could see their products in use. I really liked a lot of their card stock patterns but not being a scrapbooker these larger printed card stock pads did not work well for card making for me. I used to ask at the shows if they would ever offer their card stocks in 6x6 pads but that never happened.... so when I wanted to make my Spring/Easter clip board I looked through my printed card stock stash and nothing stood out that would work for this clip board...

I have shopped the Reconsidered Goods store in Greensboro and they sell gently used craft items. I decided on a recent trip there to look through their space they have all their printed card stocks displayed. I went through a couple of bins of prints and happy me to find two sheets of coordinating Heartfelt Creations card stock that would be perfect for the Spring colours and the larger pattern will fit nicely on the clipboard:


and the back:


I decided to make these holiday clipboards as throughout the year when I shop sales I buy holiday items and I do not want to bring the stamps and dies home and put them away and never give them a second thought. This way when I buy a new product I can write it in the notebook on that holiday clipboard it goes with so I will remember later a product I want to use or maybe a project I want to make and what products I want to use. I bought some snap closure storage boxes off Amazon and as I have gotten new sale products in the mail I have put them in these storage boxes and I keep the matching clipboard on top of it:


Here is the clipboard I made for Summer projects and that would also include patriotic projects for the 4th of July:


Then the Fall/Thanksgiving clipboard:


For Halloween:

For Christmas:

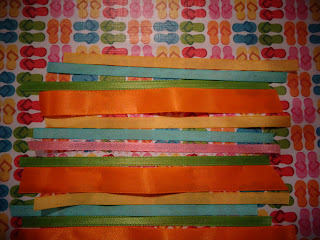
I have found that the 100 page notebooks work well with the clip on these clipboards as this clip only lifts up so high so the thicker notebooks may not work with them. To make all of these at one time first I decided how many clipboards I would need and I bought them at the Dollar Tree. Then I picked out the card stock prints for the fronts and backs of the clipboards. I picked out all the paints I would use for the clipboards. I measured the clipboard and made a paper pattern so I could cut all my card stocks to size to fit the clipboards, both front and back. Once those were cut I used a corner rounder punch for all the corners. Put all the card stocks on the clipboards using ModPodge. Once that dried I applied a second coat of the ModPodge. With that dried, I then cut all the ribbons for the clipboards:


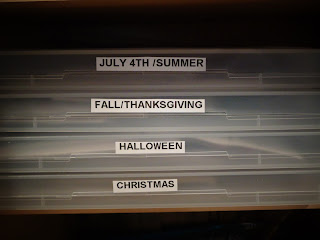
The cases I bought from Amazon are close to the size of the clipboards so everything stacks nicely for storage:

Used the label maker to label the cases and now I can keep the holiday clipboard with each holiday case for project products and ideas for future projects. The cases can be easily stacked for storage with the clipboard on top. Happy to finish this project and to sort recent craft items I bought as well as keeping projects I already have and want to use together in one place.