

This print is double sided card stock with a dotted backside. Once I scored and cut my card stock I used tear and tape and assembled it. Used hot glue to add the lace all the way around this bag. This card stock has a sheen to it and unfortunately it does not crease well:

With the lace at the top of the bag I measured and punched out holes on the front and back of the back to put my gross grain ribbon through as handles. Used a bow die from FranticStamper.com for the bow on the bag front and added a purple gem from the stash to the center of the bow using Glossy Accents. Some of the things I gifted her was a purple plastic glue bottle holder I had bought off of Etsy to hold her larger glue bottles while she is crafting. Also gave her a Christmas stamp set from MFT stamps, a purple ink pad from Simon Hurley (Crown Me?), BOO Day word dies with shadow dies, a die set from Divinity Designs, some sequin mixes from Simon Says and Kat Scrappiness, a few other little things, and the anti static tool from This Calls For Confetti -- I had seen Rebecca Keppel on YouTube feature that tool in one of her must have tools for card making videos so I bought one for myself and for my PIC for her birthday. I also stopped at a local grocer and bought her a store Bakery Dept chocolate cake with chocolate frosting for her birthday. I dropped everything off to her house the night before her big day for her. Here is a photo of the card I made her:

I used a stencil set with included stamp set for the balloons background by Taylored Expressions that I bought cheaper used on Ebay than from the TE store. The stencil pattern is not a full front stencil layers set:


For the greeting inside the card I used one of the new-to-me birthday greeting stamps from a recent used stamping supply sale. I also used the stencil to add balloons to the left lower corner of the inside of the card - I stenciled three pieces to use for the inside of the card using different colours of balloons and each one looked different. I finally picked a favorite and I put that in the card - here is a photo of one of the stamped/stencil card inside pieces with the front of the card:

I used a plain rectangle frame die from my stash and die cut the rectangle frame from white card stock. Trimmed the card front balloon piece and used liquid glue to put the white frame piece on it. I feel the framed die piece gives the card front a more dimensional look. Fun card to put together and the three piece balloon stencil set will be able to be used for lots of other cards and projects besides birthdays so hoping to get lots of use out of this stencils/stamp set combo.
For my shopping --- Divinity Designs sent out an email for a really great sale they were having so I placed an order ---
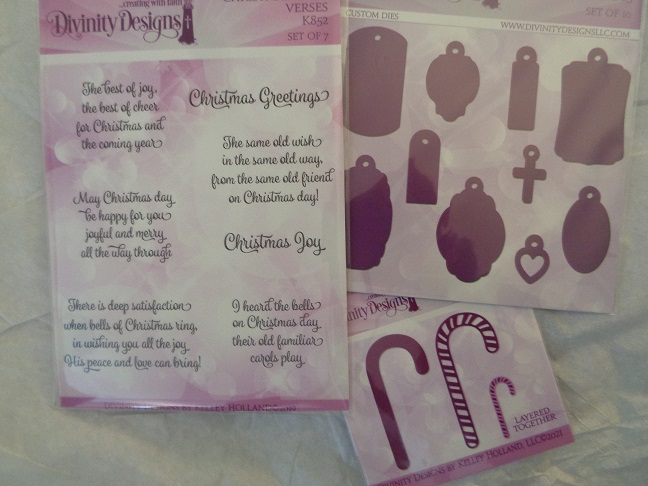
Really like this Christmas stamp set for both inside of the card as well as outside or tags:

Also -

and I knew I would qualify for a "free gift" but happy me I got two!!

Both of those die sets will be perfect for tags and such..... As mentioned above I had seen the new anti-static tool from This Calls for Confetti and I wanted to order one for me and my PIC for her birthday and I also ordered a couple of other things from her site:

Ordered items for future shaker projects and looking forward to putting them to use -- I like to order from her because usually 2 days after I place an order it is here since she is located so close to me.... so happy the mailman is busy with new craft room items!! Now to the big purchase .....
Grip mats.... Mint tape.... Washi tape.... Magnets.... tried them all and not 100% happy with any of them when it comes to stencils or adding inks to die cut pieces..... until.... had seen Waffle Flower came out with Grip Mats and demos were added to YouTube and I watched a few of them when they first came out.... but again it is another tool for the craft room..... how well will it work?? for how long will it work?? so I did not order any.... but I would watch other crafters when they were using them for stenciling or adding inks to their die cut pieces...... I used this grip mat for my Thanksgiving cards:

as well as for the balloon stencils for my PIC's birthday card:

I LOVE my grip mat!!! NO tape or magnets needed. . . . I did not have to try to tape the card stock down, tape the stencil down, and yet still have to use my left hand to hold the stencil in place -- The grip mat cleans right off with water and a cloth and it does not rip/tear the card stock. The stencils did not shift while I was adding inks, and I have put die cut pieces on the grip mat and used my pouncers to add colours to those die cut pieces. I absolutely love this new tool in the craft room and I know using it I will get great stenciled projects done and save money over all on Mint tapes and painters tape that I have had to buy for my stenciled projects. I highly recommend them!
Working on the bags for Thanksgiving and then it will be Christmas 24/7 until all projects get finished....
1 comment:
I love my Waffle Flower Grip Mats in my MISTI for stamping. They hold the cardstock so well. I really haven't tried them much for stenciling yet.
Post a Comment