Sunday, December 18, 2016

Double Treat Holder


Had made treat holders before for the Ferrero Rocher candies. Here is a photo of holders I made for Valentine's Day and BOO Day (Halloween):


Yesterday, while out running errands, I stopped at Hobby Lobby. While waiting in line I saw this package of 3 Ferrero Rocher candies and decided to make one more holiday treat holder for the Ferrero Rocher candies. Here is a photo of the package of 3:


Wanted this Christmas treat holder to hold 2 of the candies. Here is the finished treat holder:


For my treat holder I used Stampin Up Crumb Cake card stock, the holiday print is from a paper pad of holiday prints from Hobby Lobby. The red/cream striped paper is from the stash. To begin with I used white/GP card stock to make up the pattern for this holder before I used my actual card stocks for the treat holder. This way I did not waste card stocks making the pattern.

For my holder I cut a piece of Crumb Cake card stock 3 3/4" x 11". Put this on the scoreboard with the 11" edge at the top for my scoring:


Scored this at:  2, 2 3/4, 4 3/4, 5 1/2, 7 5/8.  Used the bone folder to crease all the scored lines. Once all the scored lines were made I folded the treat holder and made a pencil "x" on the two parts I would be putting printed card stock on -- the front panel and the larger back panel:


 Using a 1 3/8" circle punch I punched two red circles from scrap card stock. Used temporary adhesive to position those onto the holder for the holes that the candies sit in. Punched those circles out and that left me my two holes:


Cut a piece of printed card stock for the back of the holder and put that onto the Crumb Cake using the ATG. Using the Stampin Up Labels Collection die set for the back of the holder. I used the third largest die for my holder. Before I put the die onto the printed card stock I marked the center with a pencil so I would know that my die was straight and even:


The photo does not show it but I had a piece of painters tape holding the top of the die in place to keep it straight at the top before I cut it out. When I cut this in the Big Shot I only cut the top of the piece -- I did not roll the die all the way through the machine as I did not want to cut the back piece other than the shaped top. This is what the treat holder looked like with the patterned card stocks on the holder and after the die cut the back piece:


I cut a piece of the red/cream striped card stock for the front panel and put that onto the holder while it was flat using the ATG. Used scissors to trim off any excess paper on the sides of the holder. Used tear and tape to hold the holder together. Removed the paper strips off the tape and folded the treat holder into shape. Added a greeting from Stampin Up Petite Pairs and used the SU Classic Label punch to punch that out. Used a punch for the hole at the top of the back piece and punched out a ring to put over that hole. Put the ring over the hole using a glue pen. Added ribbons and then the candies:


This is a free standing treat holder and I will put it in a cellophane bag from the candy making supplies aisle at the craft store for packaging. TFL  (What happened to the third Ferrero Rocher from that package??? DH took care of that.. ;0)  haha)


Saturday, December 10, 2016

Embossed Trees Christmas Card

Had recently bought the "Christmas Greetings" stamp set from Gina K Designs for a gift bag with matching tag I was making:


Once that project was made my next project was this card that I had seen Gina K make up on Youtube:

https://www.youtube.com/watch?v=_53eUtngyfU&t=162s

This card uses the tree cluster stamp for the card front and as I watched the video I thought to myself 'this can't be this easy'... but it was. Here is the card I made:


I will say most card makers probably make their card and then pick out the ribbon/trims... but for this card I wanted to use this ribbon and so I made a card using Stampin Up Pool Party card stock to match my ribbon.

If you should watch the video there are no sizes given for the pieces for the tree and the solid card stock behind it. I will explain sizes I used. First:

Cut and scored the Pool Party card stock for the card base. Set that aside.

Using white/GP card stock I cut that 4 1/4 x 5 1/2 for the embossed piece. (If you follow my blog you know when I emboss I always use two pieces of card stock in the folder at a time. This prevents the card stock from having rips or tears on the embossed piece. It also gives you a softer looking embossed piece). I used a swirls embossing folder by Sizzix and embossed the two white/GP pieces in the Big Shot. Once embossed I took one embossed piece to the trimmer and trimmed it down to 4 x 5 1/4 for the card front. To add the ribbon I put double sided Scotch tape behind the embossed piece and cut a piece of ribbon for the right side of the card front. Put the straight ribbon onto the embossed card front piece. Used the ATG to put this embossed piece onto the card stock base. Set this aside.

My tree panel piece looks a bit bigger than hers in the video and these are the sizes I used: (Approx)

The white piece is: 3 5/8 wide by 3 1/4 high. The Pool Party piece behind that is 3 7/8 wide by almost 3 3/8 high. Before I did any embossing I stamped my greeting on the lower right corner using a small stamp from the SOL Mini Tags stamp set. The ink I used for that is SU Sage Shadow. With that stamped I used the tree stamp from the Gina K Designs "Christmas Greenery" stamp set and I inked that using VersaMark ink. Covered that with white embossing powder and heat set that.

Set that piece aside to cool. Took a smaller piece of ribbon and tied it onto the ribbon on the card front. Used scissors to trim this to the size I wanted. With the trees embossed piece cooled I sponged SU Pool Party over the trees, as explained in the video. Put this piece onto the smaller Pool Party piece using the ATG. Put dimensionals behind the trees piece for dimension. Here is a photo to show the shine the embossed trees have on the card front:


This card went together quickly and it is very pretty IRL. Happy I have already made two projects with my new purchase from Gina K. Thanks to her for sharing this ever so pretty Christmas card on her Stamp TV channel. TFL  *** Just received an email letting me know this card was chosen as one of the Favorites of the Week on Splitcoast Stampers. Will email the Gina K website and let them know and thank them for the easy layout and great video how-to.  TFL

Washi Reindeer Card

** This card was chosen as a Favorites of the Week this week on Splitcoast Stampers **

Had seen a few versions of this card made up here and there. Used #110 weight white card stock from Mikes for the card stock base. Red is Stampin Up. Front white piece is white card stock from PaperTreyInk. Here is the card:


Used various washi tapes from the stash for this card. First I cut and scored the white card stock base. Set that aside. Using SU red card stock I trimmed that to the size I would need for my card front. Cut the white card front a bit smaller than the red piece.

To keep the washi tapes straight I made a very light pencil line across the white card stock and then put down the green holly/berries tape. Put a red print above and below the holly/berry tape. Then put a striped tape above and below that. Pressed down to make sure the tape would stick to the card front piece. Used the ATG and put the washi tape card front onto the red card front. Then put these onto the white card stock base.

Stamped "Merry Christmas!" on the lower card front using SU Real Red ink. That stamp is from the SU Greetings from Santa stamp set. For the reindeer I had seen this used just as a die cut piece without stamping it first and that is the look I wanted for this card. I cut the reindeer out of scrap #110 weight white card stock. Put the reindeer onto the washi tape using dimensionals.

Used the large and small bow punches from Holly Lobby for the red foil bow with the smaller red glittered card stock bow on top of that for the front of the reindeer:


Easy card to put together and great use for washi tapes. TFL  See below for another version of this card in reds and whites:


Again used the red foil card stock for the larger bow punched piece with the smaller bow punched out of the red glittered card stock. TFL

Detailed Santa Card


When I saw this stamp/die bundle in the Stampin Up holiday catalog I was not too impressed with the project in the catalog showing these products. Did not order it... but then saw more and more projects being done with these products and I watched the video by Kristin:

https://www.youtube.com/watch?v=A5FkQVqBIWA

I ordered the bundle and here is my version of her card:


Used white #110 weight card stock from Mikes for the card stock base. The Santa piece is white card stock from PaperTreyInk. Cut out the die in the Big Shot and then stamped a stamp from the Stampin Up stamp set Greetings from Santa. I stamped that with Memento black ink.

For my Santa I used flocked red card stock for the hat and a black foil card stock for his glasses. Cut these out and put the hat piece in the die cut piece and a piece of Scotch tape is holding this hat in the die on the back. For the glasses I used a glue pen to put them on Santa's face.  Here is a photo to show the shine of the glasses using the black foil card stock:


With the hat and glasses in place I then added the red ribbon and tied an extra piece of ribbon onto that. Put adhesive strips behind the die cut piece and put this onto the card front. Easy card to put together and thanks to Kristin for sharing her card and ideas. TFL

Monday, December 5, 2016

Elf Season is here . . .


Here are a few of the treat holders I have been working on recently ---

Snowman Nuggets --- Used the small snowman face stamp from morningstarstamps.com. The hat is a fingertip cut off a pair of gloves from the dollar store. Added a sparkly pom pom at the top of his hat:


Another nugget decorated for Christmas with Santa in mind:


Used red card stock and black card stock from Mikes. Cut the red piece 11" long by 3 1/8". Made a line across the center with a ruler and a pencil. Covered the line with red sticky tape and put the 11" by 1/4" piece of black card stock onto the red:


Once the black strip was on the red card stock I took it to the trimmer and cut this every 1" for the nugget wrappers. Using a 1/2" circle punch I punched out circles from sliver glittered card stock. Then used a 1/4" circle punch and punched out black circles. Put these two circles together using glue dots:


Put the red/black wrappers around the nugget candies and then put the circles on top of those. Made a black card stock "tray" to put the nuggets on and put these in a pretzel bag from the candy aisle at the craft store.

This next treat holder came about from ribbon I just bought on sale at Mikes yesterday with a stamping buddy:


That ribbon inspired my Reindeer Noses treats. Used Whopper candies and a cinnamon candy for the red nose. The reindeer is from the Stampin Up Holiday Helpers. The "reindeer noses" stamp is from Morningstarstamps.com. Easy treat holder:


Used clear Wink of Stella for the shine on his nose. Now to the Candy Cane Seeds container --

Metal container is sold in a pack of 4 at the dollar store. Inside this container is Peppermint candy from Brach's. For the top of the container I used a large circle punch and punched out silver glittered card stock -- put that circle on the lid using tear and tape:


The glittery candy cane is from the foam holiday project display for kids at Mikes. The candy cane has adhesive on the back so that is how it is on the lid. Used two bow punches for the red foil box and the sliver glittery bow. Added a red crystal to the center of the bows. The "Candy Cane Seeds" tag was typed up on the computer and printed out on white/GP card stock. Used the SU Classic Label punch to punch that out. Here is a photo to show the side of this container -- I used tear and tape to put this ribbon around the metal container:


This photo shows some of the sparkle on the candy cane piece:


More projects will be posted as they are completed.... phew!! No wonder it takes the Elves a FULL year to be ready!!! Wink, wink.... TFL

Sunday, December 4, 2016

Gift Bag and Tag Set


Had seen a video on Youtube by Karen Hightower using paper gift bags. She uses Gina K Designs stamp sets for this project for Christmas. In her video she also gives a tip about cutting out your own tags without a die using one sheet of 8 1/2" x 11" card stock. Thanks to Karen for sharing her inspiration.

I have decorated paper gift bags from the dollar store before using stencils and washi tapes -- here is one of the bags I had decorated for Halloween:


Then for Thanksgiving I used the paper gift bags but just decorated them with a banner:


When I saw Karen's video I knew I wanted to make up gift bags using her tips/tricks. Here is my version of Karen's gift bag and tag:


For this bag I bought white gift bags at the dollar store. I used the same stamp sets Karen had used for her video by Gina K Designs:  Christmas Greetings and Music Background. Did not have the Gina K ink pads Karen used so I will explain what I used for my bag. My white gift bags are from the dollar store.

I used 110# weight white card stock from Mikes for the stamped panel piece and my tag. Cut the white panel 4 3/4" x 6 3/4". Using the MISTI I stamped the Music Background stamp onto the white panel using SU Crumb Cake ink. I also stamped this on the matching tag. With the tag piece stamped I then punched the top corners of the tag using the Tag Corner punch by SU. Then punched the circle at the top of the tag.

With both pieces stamped I sponged SU Hello Honey ink on the edges of the panel and tag. Sponged over that using SU Close to Cocoa ink. Using three SU green inks -- light to dark -- Pear Pizzazz, Lucky Limeade, and Old Olive I stamped the sprigs, holly leaves, and vines in the upper corners of the panel piece and around the hole at the top of the tag. Using SU Old Olive ink I stamped the tree stamp at the lower left corner of the stamped panel piece and again on the lower left bottom corner of the tag. For the tag I also inked and stamped off the middle tree. Once the trees were stamped on the panel piece I used a light gray coloured pencil at the bottom of the trees cluster. Using SU Real Red ink I stamped the berries for the holly randomly on the tag and panel piece.

Karen explains that out of one sheet of 8 1/2" x 11" card stock you will get 10 pieces to make into tags. With the 8 1/2" end of the card stock at the top of your trimmer cut this piece to 4 1/4" so you now have two 4 1/4" x 11" card stock pieces. Turn it sideways with the 11" edge at the top of your trimmer and cut this at 2 1/8" until all your pieces are cut. This one sheet of card stock will give you 10 tag pieces. Use your tag corner punch at the top of the tag and use a circle punch to punch at hole for the tag top.

Of course. . .  as usual I can not leave well enough alone. . . I did not have the stamp set Karen used for her "Merry Christmas" on her panel piece but I did have a free "Merry Christmas" die that came with a British card making magazine I had recently picked up at Barnes and Noble.... but.... I wanted my panel and tag to have a little shimmer and shine so I spritzed both of them with gold Glimmer Mist:


The camera did capture a little of this in the above photo.

Decided I liked the pop of red on the panel that the red berries gave the piece so I used red foiled card stock to cut out my greetings die. For the tag I used this foiled card stock and made a ring to the hole at the top of the tag. Put the greeting and ring on my pieces using a glue pen. Used a piece of craft foam (kids craft aisle @ Mikes --thanks to Bonnie for that tip) behind the panel piece and also use dimensionals to put the panel onto the paper gift bag front. For the tag I tied on a piece of sheer red ribbon and tied gold twine around that at the tag top. To keep the bow in place and not to untie I used clear glue by Aileen and a toothpick. Once that dried I used scissors to trim the twine pieces.

Here is the panel piece:


and the tag:


Using the MISTI makes making these panels for the gift bags/tags easy.  Cut out all my pieces and then did all the sponging, stamping, etc. Easy project to put together. A BIG thank you to Karen for sharing her projects for this pretty holiday gift bag. TFL

Monday, November 28, 2016

Treat Box with Snowman Tag


Picked up this treat box die at Hobby Lobby by Momenta with my coupon. Here is a photo of the packaging with this die:


Here is the first box I made:


For this box I used double sided card stock. The tan strip across the front of the box (and the flower on the snowman hat) are the other side of the red print. I cut out two of the treat box pieces in the Big Shot and put the box together using tear tape. This is an easy box to put together and it will hold a lot of treats but I did not like that on the bottom of the box you see a gap as the bottom is not sealed. So I measured and cut a piece of kraft card stock that I put inside this box using the ATG for adhesive so the bottom is sealed now:


This next box I used solid blue card stock and again I cut out two treat box pieces. While these were still flat I used a snowflake wheel stamp (I have taken all my stamps off their wheels) and I used the MISTI and white ColorBox ink to stamp the snowflakes on the front and the back of the box. Put this together used tear tape:


 The camera did not capture this well but here is a closer photo of the snowflake stamp across the box:


Once again I cut a piece of the blue card stock to put inside the box for the bottom. Now to the snowman tag --

These tags are sold at the office supply store and I picked up a package of 50:


These are in the shipping labels/tags aisle. To make the snowman tag remove one of the tags from the package:


Open the ring at the top with your fingers and remove that from the round tag:


I used the small snowman face stamp from www.http://morningstarstamps.com and stamped at on the tag near the bottom using StazOn black ink. Used an orange marker to colour his nose:


For his hat I used a piece of black card stock from Mikes and punched that out using the Stampin Up Curvy Tab punch:


Used the card stock scraps from each box to cut a band for the hat and put that band onto the hat using a glue pen. Used a dollar bin flower punch for the flower on this hat:


For the blue treat box snowman hat I used the M Stewart snowflake border punch and punched out a snowflake from white glittered card stock:


Added a crystal to each hat for bling and that was done. Used twine from the stash to tie the snowman tags on the treat box. Put paper shred from the dollar store in the boxes and will fill them with candy treats for the holidays. These boxes would also be cute as place markers on a holiday table -- just put the recipient's name on the front of the box. TFL


Sunday, November 27, 2016

Impression Obsession tags


Just bought this new Christmas die set from Impression Obsession and my first project are oval tags:


Used the ovals die set from Stampin Up for the white and red oval. White card stock is #110 weight from Mikes. Red is also from Mikes. With the ovals cut I decided to sponge the edges of the red ovals. Using the same white card stock from Mikes I cut out all the IO die shapes. Wanted these pieces to have some shimmer or shine so I spritzed Pearls Glimmer Mist on them before I put them on the ovals. Once dried I put these tags together.

Used the ATG to put the red oval onto the white one. Used a leaves punch from EK Success and scrap green card stock for those. Used the M Stewart sprig punch for the piece on the front of all the tags under the red crystal in the center of each ornament bow. Here is a photo to show the shimmer from the Glimmer Mist:


"Merry Christmas" is a stamp from Taylored Expression and I stamped that onto scrap white/GP card stock using SU Real Red ink. Used the SU Classic Label punch to make the greeting banner for each tag. Shapes, leaves, and sprigs were put onto the red ovals using glue dots.

These are very easy tags to make. With everything on each tag all I had to do is punch a small hole at the top for the red and white twine to go through and I tied that into a knot and trimmed it with scissors. Easy tags to put together. TFL

Too good to be true? ? ?


Since this was "Black Friday" weekend I took advantage of sales and coupons at Mikes. I had seen this ink there before but for the asking price of $9.99 per ink pad it was something I was not going to be buying anytime soon . . .  until this weekend... Mikes offered a 60% off coupon of one item so this was my chance to pick this up and see if it is as good as they say . . .  Here is the ink pad:


This is a specialty ink pad as it is supposed to be 'glittery' when you use it for stamping without having to use embossing power and a heat gun. It is made by Tsukineko and although they certainly know all they need to in making ink pads these claims seemed too good to be true.

My first concern is will the glitter begin to separate from the ink on the pad? Will this ink combination take forever to dry? Will it naturally smear? Is it going to be a shiny finish like an embossed piece? Brought it home and used it on one of the tags I was making:


The tag base is #110 weight white card stock from Mikes. I did not use a tag die for this tag. I measured how wide and long I wanted the tag to be and then cut that out. Used the Stampin Up Tag Corner punch for the tag top. Punched a hole at the top of the tag. Using a small star stamp from the Stampin Up Star of Light stamp set I randomly stamped that all over the front of the tag.

Using the matching die set for that I cut out a gold glittered card stock star. Using the smaller, more detailed die from that set, I cut out a white glittered card stock star. I put these two stars together using a brad. Using a dauber I sponged the edges of the tag with the same gold ink. I also stamped a greeting stamp from that stamp set at the bottom of the tag. Here is a photo to show the sparkle and shine of this ink:


I made a second tag using navy blue card stock and the Encore silver ink to show the difference between these inks:


This photo shows that ink better:


Although the silver ink is shiny it does not have a sparkle to it like the Delicata gold ink does. Am happy I bought the gold ink pad and plan on buying the silver ink pad but not without a serious coupon! TFL

All 30 tags are done --

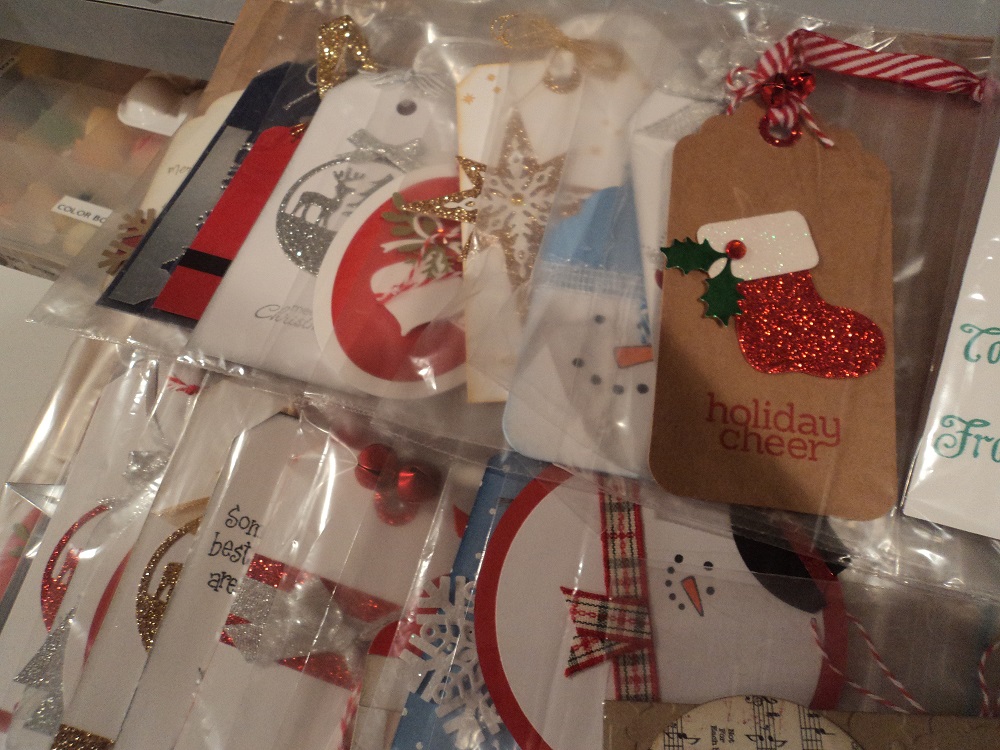
Happy to say all 30 tags I was making are complete and now I can work on finding the counter top and work table top again ... before the Christmas projects are started. . . To keep the tags neat and tidy I have them in sandwich bags from the dollar store on a piece of card board to keep them from not getting bent:


Now I can work on some cards and treat holders for Christmas projects I have wanted to make. TFL

Saturday, November 26, 2016

Flaky Tag


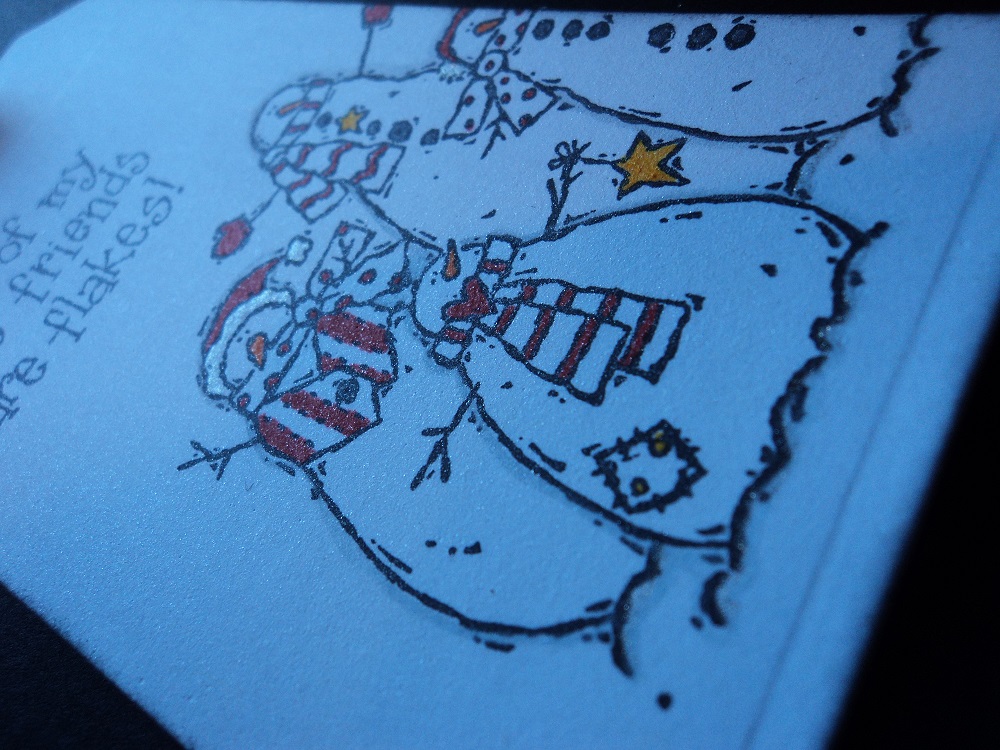
Tag base is #110 weight white card stock from Mikes. Used the Sizzix tags die set to cut out the tag. Stamped the snowmen stamp from the Stampin Up Flaky Friends stamp set off the edge of the tag using StazOn black ink. Used markers to colour the tag. Stamped the greeting above the snowmen to the left.

Using clear Wink of Stella I went over the snow at the bottom of the tag. Then spritzed the tag using Pearl Glimmer Mist:


 Used a 1/4" circle punch and then a 1/2" circle punch to make the red ring for the hole at the top of the tag. Put that ring on the tag using a glue pen. Tied red ribbon with a snowflake pattern at the tag top and tied a sparkly ribbon around that at the tag top:


Stamped "To and From" on the back of the tag. TFL