
Saturday, December 18, 2021

End of Season . . .

 Cleaning up the mess in the craft room and here are the last of the Christmas projects in a baggie:
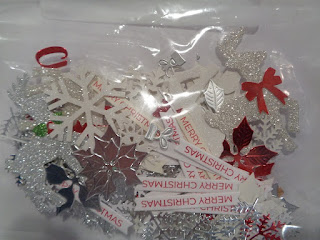
Putting them away for next year in the Christmas trims and bling box. Nice to see the top of the work table again!! When I put this photo on the computer I decided to show some progress photos of projects I did for this year. Here are photos of the Snuggets in the works:

First I cut all my white card stock pieces 1" x 3 1/8" for the nugget wrappers. I cut them 1/8" longer so that I can have the adhesive stick to the card stock rather than to the candy wrapper. Once they were all cut I stamped then small Snowman face stamp on them using black ink. Using an orange marker I added orange to the noses:

To help the wrappers fit on the nugget candies better I run each one over the edge of a bone folder so it will curve around the candies easier:

I put the wrappers around the candies and used two glue dots to adhere them. Once all the candies were wrapped it was time for their hats -- I used the fingertips of the bath gloves sold at the Dollar Tree:

I made a light blue card stock tray for my Snuggets and put them in pretzel bags sold in the candy making aisle at the craft store. Closed the bags with twine and tied silver bells on them. Next for the Santa Belt nuggets I used red card stock for the wrappers -

The wrappers are small so to make this an easier assembly project I cut a piece of red card stock 3 1/8" wide by 11" long. I used a pencil and a ruler and marked the center of the length of the card stock. I cut a piece of black card stock 1/4" wide by 11" long. Used the ATG and put the black card stock stripe down the center of the red card stock:

With that in place I took this to the trimmer and cut it at every inch - this gave me my wrapper pieces that measure 1" x 3 1/8":

For the Snuggets I used the solid chocolate Hershey Nuggets. For the Santa Belt nuggets I used the solid chocolate and also the Almond nugget candies. The Almond nuggets are wrapped in gold wrappers so for those I did the Santa belt buckles in gold to match the wrappers. For the belt pieces I used glittered card stock and a circle punch. The center is black card stock and I used a small circle punch for those. I made a black card stock tray for the Santa Belt nuggets and packaged them like this:

Again I tied these closed with twine and tied on red bells. Both the Snuggets and Santa Belt nuggets can be done quickly in an assembly line style and everyone always smile when they see them...

Easy peasy --- Candy Cane Seeds:

Here are some photos of other HO HO HO boxes I had made for the Ferrero Rocher candies:

Favorite season for holiday projects but certainly am thinking I pulled out everything in the craft room to make them because the craft room is certainly a mess!! But fun to use older and not so old items to make the treat holders. But for now... back to cleaning and organizing as I go.... again.... or is that still??? 

Sunday, December 12, 2021

Last of the Christmas-ing!!!!

 Finished everything I was making for the holidays -- will post more details for projects later but just finished decorating the gift bag fronts... Every holiday I use paper gift bags and I decorate them for the holiday.... Here are photos of past Christmas gift bags:


Here is the bag I decorated for this year:

This year for holiday projects I tried to use only projects or supplies that I already have on hand in the craft room. The white gift bags are left from a Hobby Lobby purchase of a large amount of the white bags. I dug through the holiday card stock stash and had enough of the red and white striped card stock from Hobby Lobby to use for the bag fronts. For the snowman picture I used the front of greeting cards from the Dollar Tree. I wanted to have a snowman on the front of the bag and when I saw the box of the cards at DT I decided I would use that for the bag front. I used red mirrored card stock and die cut out "Merry Christmas" and put that on the snowman piece using liquid glue. For the silver poinsettias I used the Poinsettia dies in different sizes from Impression Obsession/IO Stamps. Used the M Stewart sprig punch for the sprigs behind the Poinsettia. Used a border die and die cut two pieces of decorative scallops for the top and bottom of the snowman piece. Used silver mirror card stock for the three snowflakes I die cut and then added red crystals from the stash to. 

Used ribbons from the stash:

Tied triple loop bows using the Bow It All for the top of the bag by the handles. Here are photos of some treat holders I made this year:

Triangle Hershey Kiss Holders:

Used the Taylored Expression die for this holder for the Ghirardelli candies. I cut trim apart from the Dollar Tree and added that to the bow fronts:

Santa's Belt Nuggets:

As usual my Snuggets using the small Snowman Face stamp from Morningstar stamps:

This year I made a sectioned tray to hold the Snuggets on. Their hats are the fingertips from the bath gloves sold at the Dollar Tree. Added a pompom from the stash to their hats. 

Star pillow boxes made using the Star Pillow Box die from My Creative Time:

Ferrero Rocher HO HO HO box:

Will post soon the Candy Cane Seeds holder and a few more details on things I made. Happy it is almost finished and craft room is a tad messy..... for sure!!!  But fun....


Sunday, December 5, 2021

Black Friday Sales and Projects

 Have lots to share -- shopped a few of the online stores Black Friday sales and have been able to finish a few new projects. First is the order from SimonSaysStamp:

I picked up a few die sets and a hot foil plate for Valentine's Day. This weekend I made up some of the Christmas tree tags using scrap card stocks:

To make the tags more sturdy I used solid card stocks for the tag backs. I can stamp "to and from" or just write on the back of the tags:

Also bought the Present Treat Wrap from Taylored Expressions:


I made "sides" for my treat holder to make it into a box. I used a piece of 2 1/4" x 1 15/16" and scored it on the two long sides and bottom at 1/2". This gave me the sides in the size I wanted to make this into a box - my holders hold 3 of the Ghiradelli candies:

Made another gift card holder:

Had seen Emma from My Creative Time on her video making her Star Pillow Box die treat holder and it was too cute not to buy -- she had put a window in the front of her box but I did not do that as I wanted to be able to use the front of the box to decorate it:


For my pillow boxes I used double sided card stocks from the stash as they are a heavier weight and it makes the box sturdy. This die cuts the heavier card stocks with no problem and this little box can hold a lot of chocolate treats. The "Merry Christmas" is a stamp from Trinity Stamps and their stamp set "A Sentiment for Almost Everything" set. I stamped it onto scraps and used a banner die from Pink & Main to cut those out. Used a Fiskars tree punch and green glittered card stock for the tree. Added a red crystal from the stash for the tree top. Here is a photo of the stamp set:

Busy weekend in the craft room but always a fun time... Working on a few more things for holiday treat holders and then the holiday projects will be done. Glad to have saved some monies at these holiday sales adding new products to the craft room..... More photos:


Sunday, November 28, 2021

TopNote Snowman Gift Card Holder

 Needed a holder for a gift card for the holidays and I had remembered the TopNote Snowman Gift Card Holder I had made long ago so I just made another one. This gift card holder is very easy to put together and goes together quickly:

For the gift card holder I used both white and black #110 weight card stock from Mikes. I die cut out a white TopNote die piece. Cut out two of the black TopNote pieces. Here is one of the black pieces:


Took it to the trimmer and cut it in half:


Used TomBow glue to add one of the cut black pieces to the top of the white base for the hat for the snowman. Used the trimmer and trimmed a piece of striped card stock from the stash 1/2" wide for the hat band. Put this piece across the bottom of the black piece. Using circle punches I punched out 2 3/8" circles for the eyes, and for the mouth I used a 1/4" circle punch and punched out 5 circles. Put the eyes and mouth circles on the snowman face using glue dots. For the carrot I used scrap orange card stock and cut a nose out free hand using scissors. Lightly sponged the edges of the nose and put that onto the snowman face using TomBow glue. Used a dauber and added light pink cheeks to the face.

For the snowflake I used a Snowflake punch from EK Success and punched that out of white glittered card stock. Used red 'bling' from the Dollar Tree and added that to the center of the snowflake. Used large glue dots to put the snowflake onto the hat piece. 

For the back of the snowman I used the solid black TopNot piece I had die cut earlier. Using the Word Window punch I punched a slit to hold the gift card in:

I used tear and tape to put the slit back piece on the snowman TopNote being careful to keep the tear and tape near the edges to allow the gift card to be slid in and out of the holder. When all done I decided to use a light blue ink and sponged the edges of the snowman face:

Easy holder to put together and the #110 weight card stock makes this gift card holder very sturdy. Easy project to mass produce if you need a few gift card holders. 

Friday, November 26, 2021

Gnome Christmas Card

 Started some of the Christmas cards earlier this week and here is one of the cards:

Not all the cards will be the same this year but this is the first design I am using. The card stock base is red with a white panel for the front. The "MERRY" is the Stacked Merry die from MFTstamps that I bought on sale and I die cut that from red foil card stock. I also cut it out using scrap white card stock and stacked those layers together using TomBow glue. The candy stripe strip on the right side of the card front is from American Crafts. For the Gnome I used this die from CottageCutz:

I have worked on these little Gnomes for about a week after work doing it all in stages. First I did all the die cutting using as many of the scraps that I could for the pieces. Stacked the pieces into piles so I could see I had all the pieces I would need:

Then I sponged the edges of the pieces I wanted sponged:

Then, over a couple of days, I glued my pieces/layers together that went together:

This photo shows some of the pieces/layers put together and the next day I did the face, beard, mustache, holly berries with leaves pieces. When all pieces were glued I could assemble the Gnomes and here is a group photo of the Gnomes waiting their card fronts:

With the Gnomes all assembled I cut and scored all the red card stock bases and then cut all the white card stock fronts for the cards. Used pop dots to put the Gnome on the card front:

With the card fronts almost done I cut the white card stock for the inside of the card and stamped my holiday greeting on those with red ink. Working on finishing the rest of the card fronts. Cute Gnome die from CottageCutz - I had bought it last year but did not get a chance to use it for any projects so it was my first choice for holiday cards for this year. Glad to get some use out of the cute Gnome die!  ** Added red crystals to the card front before I mailed the cards out:

the crystals add a little sparkle and shine to the card front:


Now back to other holiday projects -- gift bags and treat holders....


Saturday, November 20, 2021

Holiday Gift Cards

 Full Christmassing in the craft room -- holiday tunes on the radio and busy, busy with projects.... Cut and scored all the card bases for the Christmas cards, cut the card front panels, started some die cutting for the card fronts and so it begins....  But this post is about gift card holders --

Many of the retailers that sell gift cards have store cards, restaurant cards, coffee shop cards, etc... but with most is a fee if you buy the gift card -- so why not just give cash and save the fees? Either way if you should get a gift card or decide to use cash a gift card holder will hold both -- here is a photo of the gift card holders I made that did not take long at all to put together:

Used a die from the stash for the gift card holders. These are all made using 6x6 card stocks from the stash. I used all double sided card stocks but any card stock would do. Once all my gift card holders were cut out I folded the scored lines and assembled the holder. Then I decorated the front of the gift card holder:

For the front of this gift card holder I used a "Happy Holidays" die from the stash and die cut that out of red foil card stock. Used liquid glue to adhere this to the front. Added a pre-made poinsettia from Hobby Lobby. This holder could be used for a male or female gift. This next holder:

Card stock design leans towards a male but I still added a holiday poinsettia to the front. Easy holder to assemble and good use for the 6x6 card stock pads in the stash.  For the third holder - red with snowflake print - I added two glittered snowflakes I punched out to the front of the holder and then put a felt poinsettia in the center of that and those are also from Hobby Lobby.  Lots of ways to decorate the gift card holders but fast and easy to put together. 

Thanksgiving Cards

 Thanksgiving cards are in the mail and this year I wanted to use items from the stash. First thing I did was to go through the printed card stock scraps and decide what I wanted to use. Then I went to the extra card stock bases I have that are all cut and scored and ready for use. With the card stocks decided on I went over to the wood stamp storage and pulled out two older stamps I wanted to use. Here is a photo of one of the cards I made:

The "Thanksgiving Blessings" is a stamp from Hobby Lobby from 2008. For the inside I used a stamp from Stampendous from 1997 - here is a photo of scrap card stock I had stamped it on:

No sense in storing all these stamps if they do not get used.... . .  I have some duplicate cards but here are some photos of other cards I had made using items from the stash:

Happy to get some use from the older stamps and to be able to use more scraps and card bases that were cut, scored, and ready to go. Used pop dots behind the stamped panel on the front of the card for dimension.