
Asked DH to cut some of his extra wood pieces in the garage into a base piece and a large triangle for a top and this would be a wooden Witch Hat Decor piece. I asked him to cut two of these for me. He pulled out the larger pieces of wood he had and I measured what I wanted and he cut them out - this photo shows the base piece he cut and the triangle piece for the hat and with those cut he screwed the pieces together:
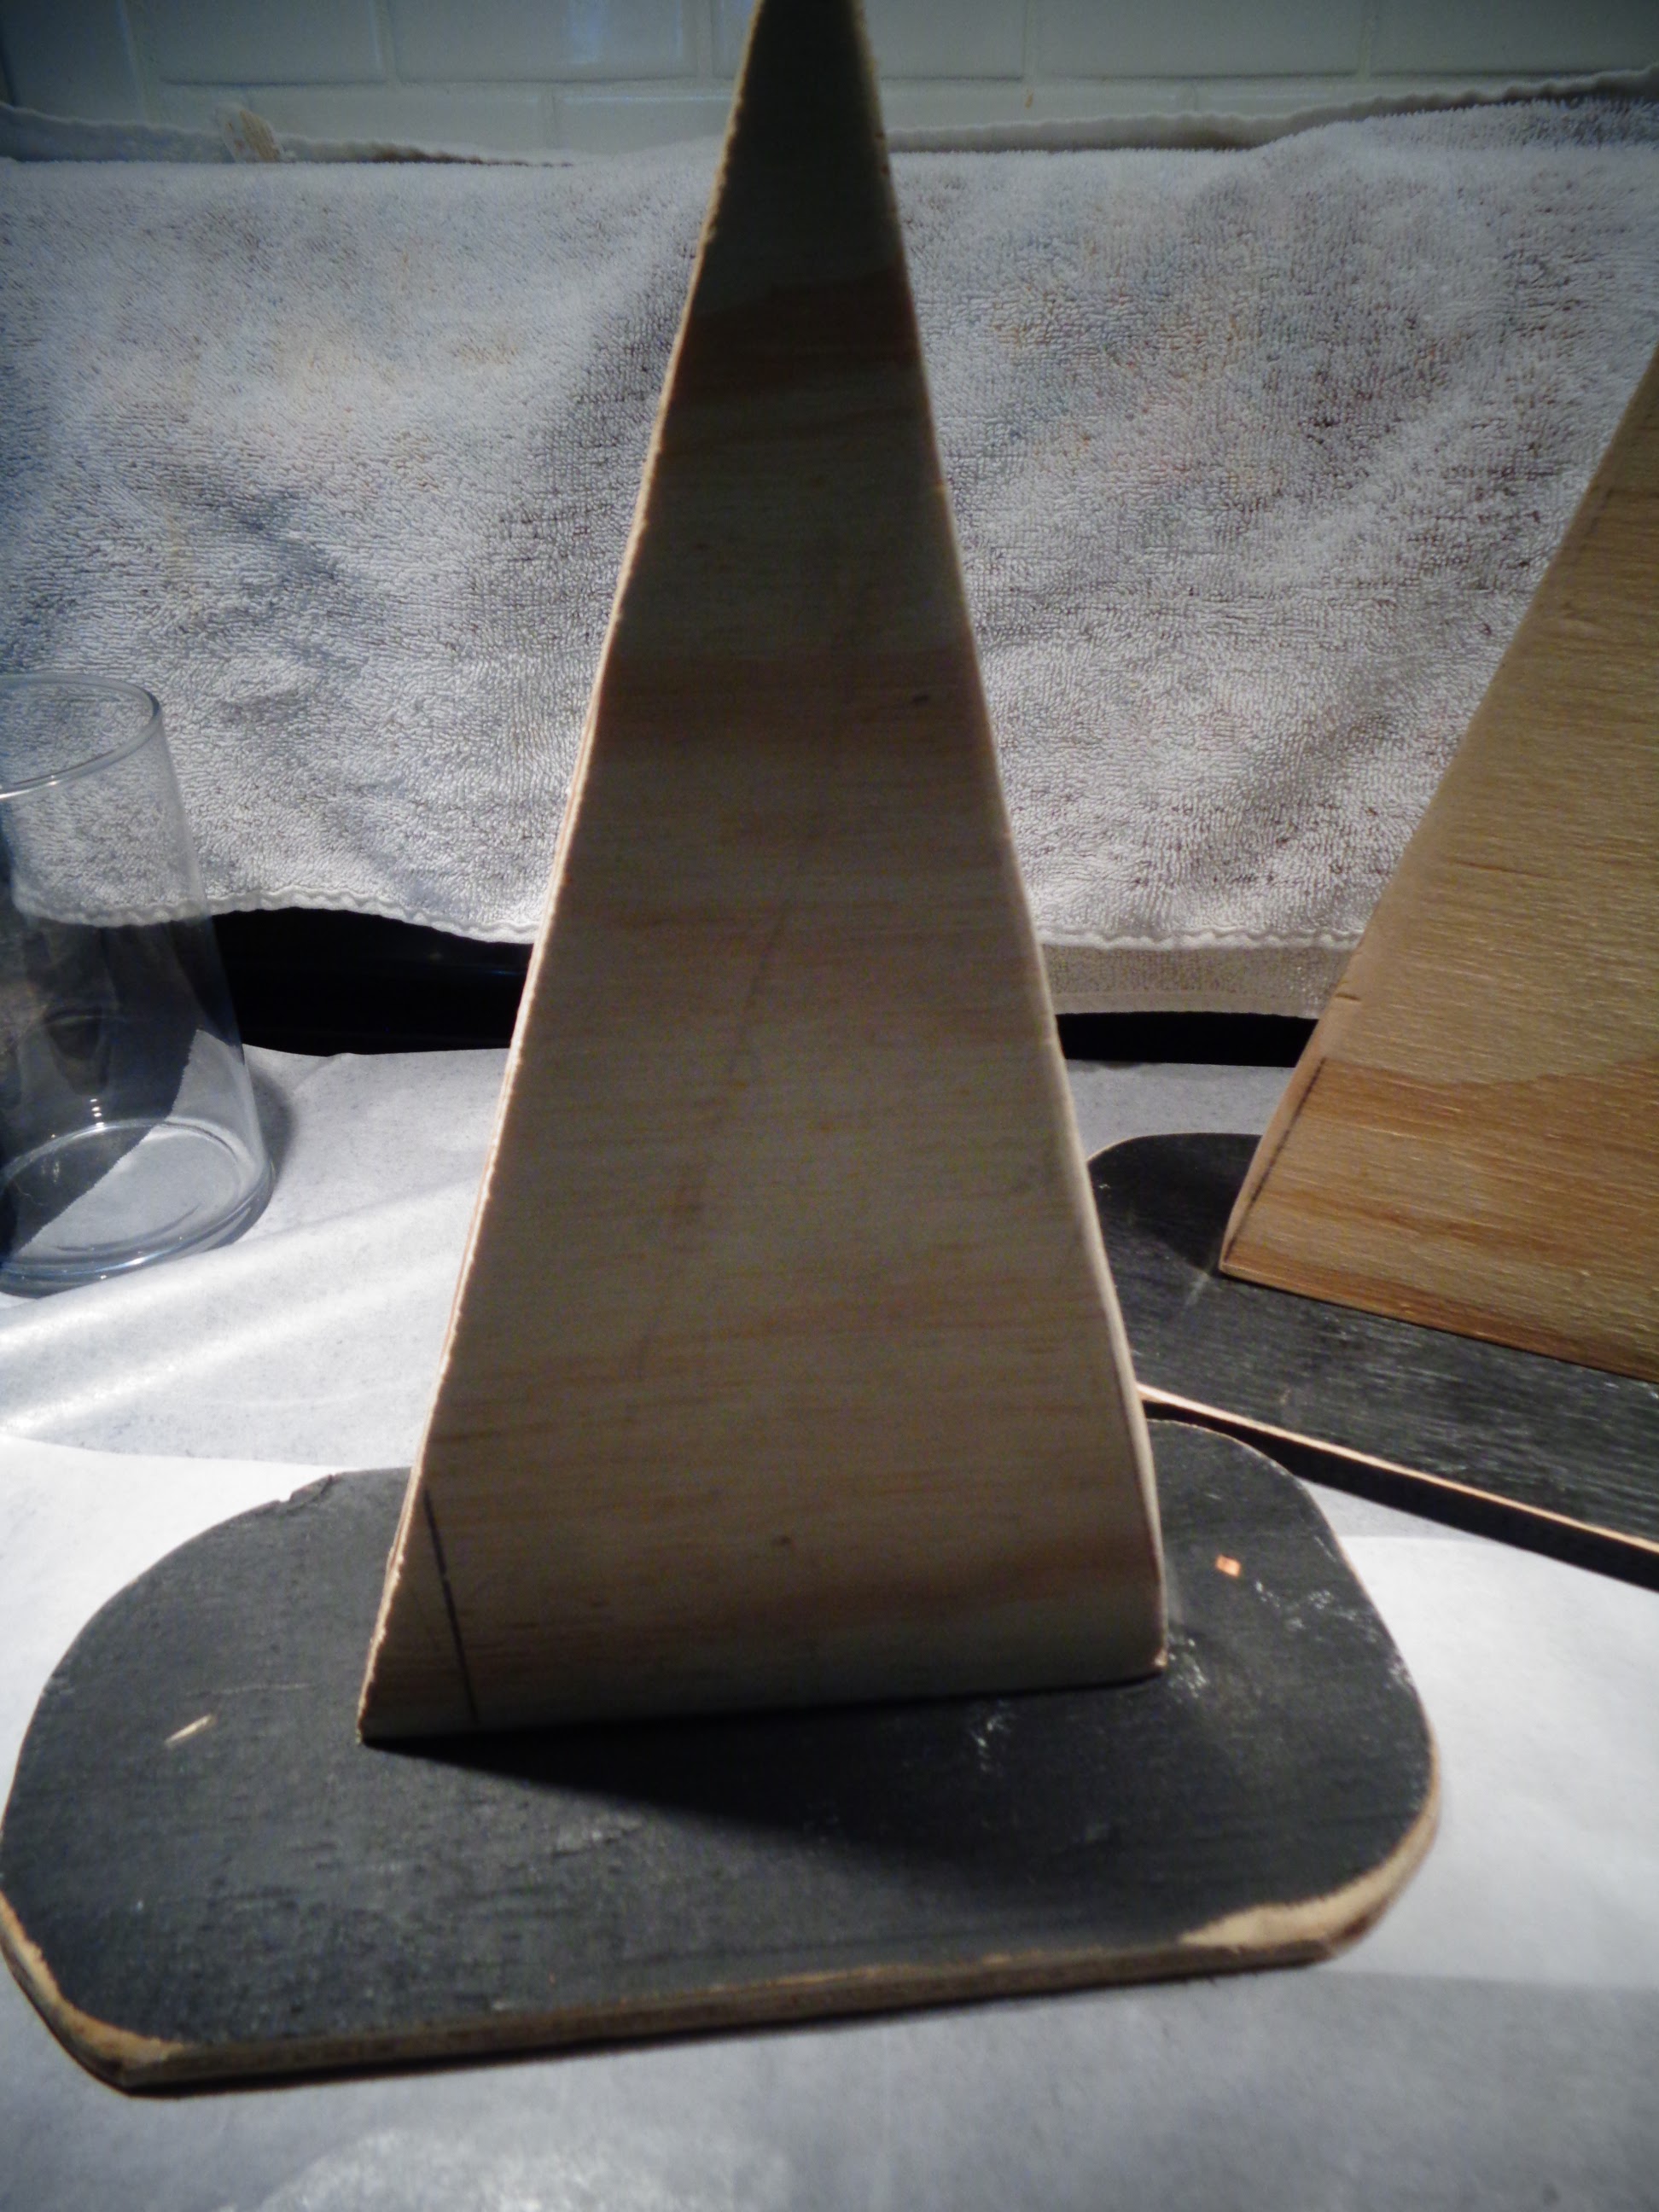

The wood he used for the base pieces were already covered in a black paint from other project he had used it for but I did not care. When he cut the rectangles for the brim/bottom of the hat I told him I wanted these pieces more random and not even looking for the witch hat. He rounded off the edges and then I took the sander to all four pieces and then he attached the triangles to the base pieces.
Using acrylic black craft paint I painted both hats and let them dry:

Once these were dry I took them back outside and sanded them so they would look old and used. I then lightly dry brushed acrylic white craft paint on the triangle and base pieces. That did not take long to dry. When dried I used the glittered spider web tulle from the Dollar Tree and I cut out two of the webs for one hat and then covered the front of the second hat with a full piece of the glittered spider web tulle. I put the web/tulle pieces onto the hats using ModPodge I had on hand and that had a matte finish:

The above photo shows the sanded and dried hat piece before the tulle was added to both:


I put the ModPodge on the hats were the tulle would be and put the tulle on. Then I covered these tulle pieces with a full coat of the ModPodge to seal them. My concern with the matte finish of the ModPodge was I did not know if it would cover up too much of the glitter of the spider web tulle and not be as shiny as I wanted but they are still very sparkly. Recently I went to the Customer Yard Sale at the Enchanted Cottage in Lewisville and happy I was able to pick up two large bags of various flowers for $1.00 per bag -- to decorate these hats I used those flowers....
To decorate the bottom of the hat where it meets the wooden base/brim I used layers of orange crepe paper that was layered with hot glue and when dried I used my fringe scissors on them and then crumbled the crepe paper up with my hands and using hot glue I attached this crepe paper fringe pieces to the hats - front and back. Here is a photo to show the front of one of the hats to show what this looks like:


I looked through the bin of extra Halloween items - ribbons, trims, pumpkins, etc and pulled out two ribbons to make my bows for the hat fronts using the Bowdabra. One hat I decided I would use a lot of orange items and the second hat I decided I would decorate it with purples/pinks. Here is the front of the orange Witch Hat decorated:

First I had hot glued the crepe paper fringe on the front and back of the hat. Then I hot glued the orange bat bow to the front over to the left. I added some black and orange bead trim pieces from the Dollar Tree above the bow. Added an orange flower from the bag of flowers. Added a small pumpkin to the right front side of the hat with a couple of small flowers next to that. I had a bag of the Dollar Tree eye balls in the bin so I added one eye ball by my bow. I used an orange fuzzy pipe cleaner, that I wrapped around a pencil for the shape, to add to the right of the bow. Added one leaf behind the orange flower and a piece of black greenery also from the Dollar Tree. Here is a photo of the second hat:


No comments:
Post a Comment