
Had seen a card by Loll Thompson she recently made from a technique by Karen from Karen's Kreative Kards. Loll made a few cards using this technique and she made a video with all the how-to's of the technique for Youtube:
www.youtube.com/watch?v=WYNnouzX6RU&feature=youtu.be
The video is very informative and easy to follow. When I first saw this card Loll Thompson had made and posted on Splitcoast Stampers I thought it would be very difficult to put together. Clicked on her video and then I made my card:
For my card I followed what Loll instructed on her video. I was happy I already had white tissue on hand, the same snowflake sash die she used, as well as the Stampin Up stamp Hostess stamp set Warmth and Wonder. I had decided since I was trying a new technique that I would make up a few of them rather than just the one for my card. I cut a piece of white card stock into four pieces 4 1/4" x 5 1/2". Set those aside. Cut four pieces of white tissue paper 6" x 6" and set those aside. Pulled out the craft mats and decided for my card I would use these colours of distress inks:

As instructed on the video I swiped my three colours onto the craft mat and then spritzed them with water. Used a palette knife to mix the colours together in a swirl. Laid one white tissue in the ink. Tapped it down to absorb the inks. Carefully pulled up the inked tissue and laid it onto a cookie cooling rack I have for the craft room that I picked up at the thrift store to dry. Cleaned off the mat and continued the ink process until all four tissue pieces were inked:

The tissue pieces did not take long to dry. Once totally dried I crumpled them up. Used craft glue to cover my four white card stock pieces and opened each tissue piece and put them on the white card stock being careful to leave the hills and valleys of the creases in the tissue paper. (Be sure to use craft glue that dries clear) Set these aside for the glue to dry.
With that dried I used the VersaMark ink and rubbed it over the tissue pieces and I used silver embossing powder from Stampendous on the tissues:

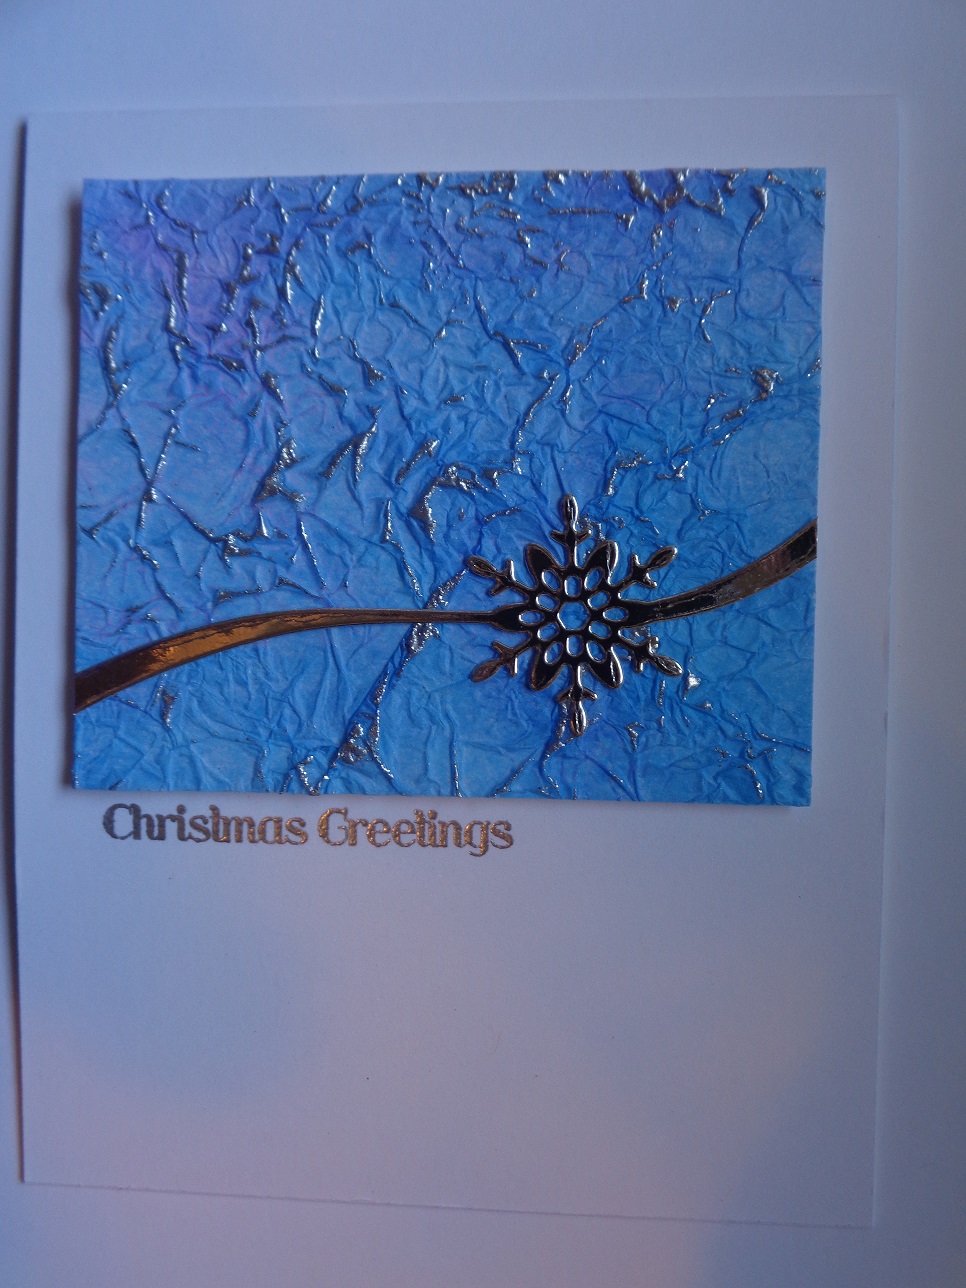
Did one piece at a time -- once the embossing powder was on the tissue I put this onto my foil covered small clip board and heat set the embossing powder. (I use the clip board to help keep the piece being embossed flat and it also helps not to burn the fingers). As you can see in the next photo all four tissues look different:

Now to the card -- cut and scored at the top a piece of #110 weight white card stock from Mikes. I had to decide which of the tissue pieces I would use for my card and with that decided I trimmed the tissue piece to this size:
3 5/8" wide by 3" high
Using a white craft foam sheet I cut a piece of foam smaller than the tissue piece. Put the foam piece on the back of the tissue piece using double sided tape. Set this aside. For the greeting "Christmas Greetings" I used the MISTI. Put the folded white card stock base into the MISTI and tapped the embossing buddy over the front of the card. I laid the embossed tissue piece onto the card front so I would know where to position the greeting stamp. With that decided I removed the tissue piece and used VersaMark ink for the greeting. For the greeting stamp I used the silver embossing powder from Stampin Up and heat embossed that.
Cut out one of the snowflake sash die pieces from silver foil card stock lined with Stick It sheet from Ken Oliver. Peeled off the backing and put the snowflake die cut piece across the embossed tissue piece. Then put this piece onto the card front and the card is done.
A BIG thank you to Loll Thompson for sharing her pretty card and for making an easy and very informative video to follow. A BIGGER thank you to Karen for sharing her technique to begin with. This card is very pretty and sparkly IRL -- A good start for holiday cards!

1 comment:
Very nice, Candee. You could share it with CAS Mix Up if you'd like to! We'd love to see it there. I'll warn you. This tissue paper technique is addictive!
Post a Comment