Tuesday, June 27, 2017

All Geared Up Birthday Card


Last weekend went to the stamp show in Chantilly, VA and I bought this die set from the clearance basket at the Heartfelt Creations booth:


I had seen a card done by Heartfelt Creations using this die and since it was discontinued I figured I had better pick it up while I could. I searched for other cards made using this die and since I needed a masculine birthday card I decided to make this card first:


I had seen a card by Jeane V on her blog and she had the how-to's to get these colours on the die cut pieces for her card:

http://jvcreate.blogspot.com/2015/08/lets-get-geared-up-with-heartfelt.html

Did not have all the products she used but used what I had on hand. First I cut out scraps of #110 weight white card stock from Mikes for the gear die cut pieces. Then added a red, blue, and brown distress inks to my die cut pieces:


With that done I then used the Walnut distressed ink to over the die cut pieces. Using the dark brown ink over these pieces really knocks down the red and the blue:


Did not have the inks she used to add the finish to the die cut pieces so I used Perfect Pearls since they were already in the craft room. Used a cup of water and a small paint brush and I added the bronze, then the gold, and then the silver Perfect Pearls to these pieces:


With the die cut pieces cut out, then the distressed inks added, followed by the Perfect Pearls I set these pieces aside and worked on the rest of the card:


Cut and scored the Crumb Cake card stock base. Found a dark plaid printed card stock in the stash and cut a piece for the card front. Cut a piece of rust card stock smaller for the card front. Using scrap cream Close To My Heart card stock I embossed a piece using a diamonds embossing folder. Once that was done I cut it to the size I wanted for the front of the card. Using the distressing tool I distressed the edges of this piece. Using the Walnut stain sponge I added colour over the embossed piece.

Stamped "Happy Birthday" onto scrap Close To My Heart cream card stock for the greeting piece. Cut it to the size I wanted for the card and trimmed a piece of rust card stock to fit behind that. Put these together using the ATG. Using the ATG I put the plaid and the rust card stocks onto the card base. Used a piece of brown dotted card stock across the front of the card. Put the embossed piece on top of that. Using the ATG I put the greeting piece on the card front.

For the gear die cut pieces I used two brads that are screw heads and one square brad. Cut the gear pieces apart and put them on the card front using glue dots and liquid glue. Added a few pieces of the chain die cuts. Here is a closer photo of the shine on the gear die cut pieces:


Thanks to Jeane V for sharing her card and her how-to's to get the card stock die cut pieces to have a metal finish look to them. TFL

Saturday, June 17, 2017

Treat Holders - Patriotic


Made some patriotic treat holders for July 4th:


Bought the paper patriotic cups at the dollar store -- 8 for $1.00.  Filled that with paper shred and candy treats. Used a cellophane bag from the candy aisle at the craft store to keep this in tied it closed with ribbons and added a patriotic decoration from Hobby Lobby to the center. Used a felt star with adhesive back to put on the front of the bag. Here is a better photo of this holder:


The Tootsie Pop holder is a die from MFTstamps.com and I used white card stock for the holder base. Used the Stampin Up Solid Strip stamp to add stripes to that, front and back. Sponged the edges of this using Stampin Up Crumb Cake ink. For the flower on the top I used the Stampin Up stamp set Triple Treat Flower and used the 5 Petal Flower punch and the Fancy Flower Punch to punch out the flowers. Here is a closer photo of this holder:


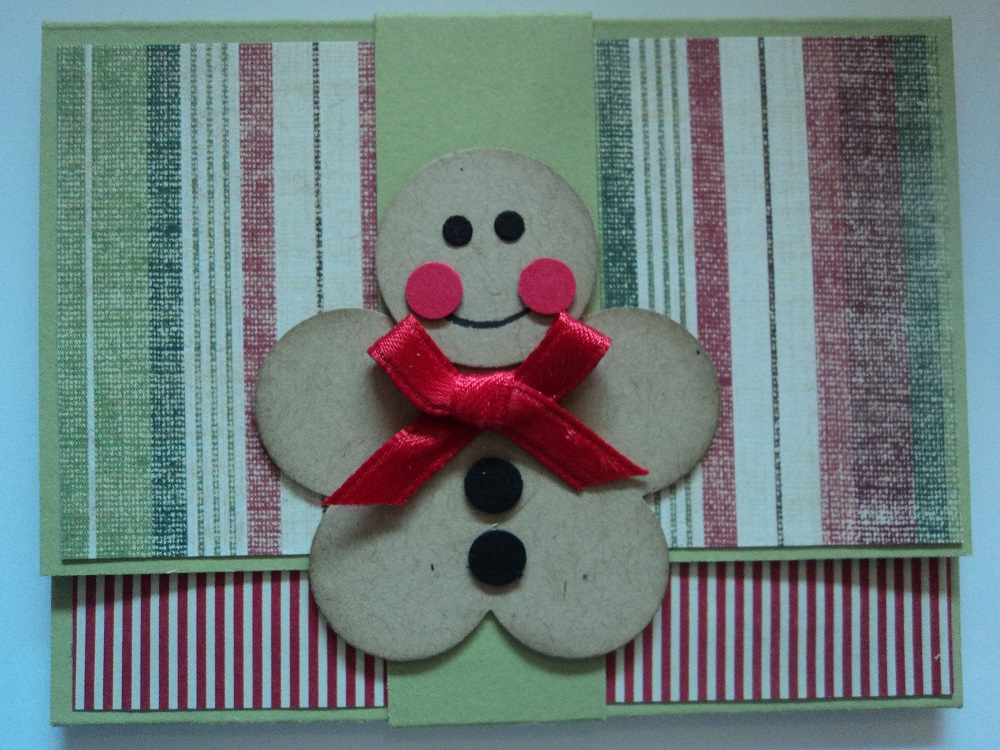
Used red and blue inks for the flower. Tied them onto the holder using red and white twine. Added small stars and clear crystals to the front of the holder using glue dots. The Fancy Flower Punch is good for flowers but also comes in handy at holiday time for the Gingerbread guy:


This third project is an older die from Lifestyle Crafts that I recently picked up at a used stampers sale for $10.00:


Perfect sized box to hold three of the Ghirardelli candies. Added some patriotic decorations:


For the box I used Kraft card stock from Paper Trey Ink. Cut and formed the box. Sponged the edges using Stampin Up Crumb Cake ink. Used a star circle frame die set from Spellbinders for the star circle behind the 4th. Used a circle punch for the blue circle and the white circle. Layered these together using glue dots. The "4th" is part of this stamp from the Hobby Lobby stamp line, Stampabilities:


Used a red marker and the huff method to stamp the "4th" for my white circle. The small red stars around the greeting on the box front are stars that the die cut out of the frame. "Celebrate" is a stamp from a summer stamp set from Paper Sweeties.  Used the Stampin Up Classic Label punch to cut that out. On the two sides and across the bottom of this box I added patriotic washi tape:


Used the Stampin Up Mini Gift bag die and make a small bag to hold a couple of the fun sized candy bars. Wanted to make a shiny bag and decided to use a roll of red gift wrap from the dollar store for my bag. Used accessory dies in that die set for the decorated pieces on the bag front:


With the bag front decorated I added white paper shred from the dollar store and the candy bars:


Easy treat holders to put together and best yet -- they are all full of chocolates!! TFL

Wednesday, June 14, 2017

Stained Glass Butterfly Card No. 2


Another card using the Sue Wilson Stained Glass Butterfly die. Had seen this video on Youtube using this die but had none of the products used so I made this card with supplies on hand:

www.youtube.com/watch?v=8X3W66DT1gg

Very good video and she offers a lot of tips and how to's -- but I do not have anything on hand for the Pixied and Beaded Techniques. Using cheap watercolour paints that I have on hand here is my version of her card:


Used #110 black card stock from Mikes and cut and scored that on the side. Used the Sue Wilson Stained Glass Butterfly die and cut out the black die cut piece. Using Strathmore watercolour card stock I used cheap watercolour paints from Mikes.

Watercoloured a piece of Strathmore card stock larger than what I needed. Set it aside to dry over night. Using the Stick It sheets from Ken Oliver I put the die cut piece onto the dried watercolour piece:


As done in the video I punched out flowers from scrap card stock and for my top flower layers I used cheap colored vellum flowers from Mikes I had on hand. Used a black Sharpie marker to cover the center crystals in black. Added sprig pieces and a leave die cut piece behind the flowers:


Used a stitched frame die and cut out the white frame to go around the black die cut piece. On this card I put the butterfly body on the card and added three black crystals to the upper left corner to help balance out the flowers on the bottom right corner:


Easy card to put together -- only time that was long was waiting for the watercolour card stock to dry! Good video to watch for tips for this die -- thanks to Sue Wilson for such a nice design. TFL

Stained Glass Butterfly Card. No. 1


Recent trip to Daphne's store, the Paper Muse in Matthews, NC, brought this new die by Sue Wilson into the craft room:


LOVE Daphne's store with all her inspiring cards on the wall near all the products she used to create them. She had a card hanging on the wall near this die and for her card she used a shimmer sheet for the background... Simple enough and a pretty card so the die came home with me.... only to find I did not have the same colour shimmer sheet Daphne used so I used what I had on hand. Here is my card:


VERY hard to photograph shiny cards but this is the best I could get. Cut out the turquoise card stock using the die and then decided to use the Stick It die adhesive sheets by Ken Oliver to get the die cut piece to stick to the shimmer sheet. These Stick It sheets are great - they are perforated so you are not spending twenty minutes trying to peel a corner off to get it started and they leave no messy residue which would easily show up on the shimmer sheet:


Cut and scored the white card base from #110 weight card stock from Mikes with the scored line at that top. Using a stitched rectangle frame die I cut out a white/GP frame and put this over the shimmer sheet/die cut piece using red sticky tape. Then used the foam edges of my pop dot sheets behind the white frame to raise it off the card front for dimension.

Did not want a greeting to cover my die cut piece so I used the SU stamp set Lotus Blossom and the "thank you" stamp from that set for the greeting. Stamped it with turquoise ink onto scrap white/GP and punched it out with a circle punch. Then punched out a scalloped circle using scrap turquoise card stock and put those together using the ATG. Put this onto the lower right corner using glue dots:


Problem -- wanted to put something in the center of my flowers so tried Stickles and also the white Pearl Pen but not sure what would stick to the shimmer sheet and look good -- did a sample of each and decided to use the white Pearl Pen. They both stuck well but the Stickles was too glittery for the shimmer sheet. Here is a photo of the Pearl Pen flower centers:


Love Sue Wilson dies not only for the details but the designs and how well they cut out. TFL

Tuesday, June 13, 2017

Tri Tranquil Tulips Card


Just made some cards using my new Stampin Up Tranquil Tulips stamp set and wanted to make a card with different colour of tulips and here it is:


Card stock base is yellow card stock. Embossed a piece of white/GP using the Cuttlebug embossing folder Caramelo. (Used two sheets of that to emboss at the same time so my image is softer and the folder does not tear the card stock during embossing). Cut and scored the yellow card stock base with the scored line at the top of the card. Trimmed the white embossed piece and put that onto the card stock base using the ATG.

Decided I wanted to have a pink frame around my tulips so I cut that out using a stitched scallop frame die. Using a piece of white/GP larger than what I would need I stamped my imagine. Started with the three stem stamp and then stamped the tulips. Once those were stamped I stamped the leaf stamps. Then the stems and purple flowers at the sides of the tulips. Then stamped the black centers to the tulips using a Post It note so these are not so high.

Once all the stamping was done I laid the scalloped pink frame over the stamped piece and used a pencil to trace around the pink frame. Trimmed the excess off the tulip piece using a trimmer and used TomBow glue to put the pink frame piece over the stamped tulip piece. Wrapped pink and white twine around the bottom of the frame piece. Tied a bow on that.

For the greeting "hello" I used the Gina K Designs stamp set Simple Flowers. Stamped it onto scrap white/GP and cut that out using a banner die. Put this on the framed piece using mini glue dots. Added pop dots to the back of the frame piece and put it on the card front.

To add some sparkle to the card front I used clear Wink Of Stella on the black centers of the tulips:


Hardest part was deciding what colour tulips I wanted to put together. Easy two step stamp set to use since it is clear stamps and you can see where you are stamping. TFL

Monday, June 12, 2017

When Plan A fails . . .


When Plan A fails . . .  Off to Plan B . . .

Prior to the new Stampin Up catalog being released videos on new products popped up on Youtube and stamping blogs were showing new projects made with new stamp sets and dies. I waited for my new SU catalog to be delivered and was happy when it arrived. I had already seen cards made using the new Tranquil Tulip stamp set and had made up my mind that that would be a stamp set I would be buying.

Looked through the catalog -- but nothing really caught my eye other than one or two of the embossing folders. Plan A for me qualifying for a Host stamp set was out the window -- off to Plan B. Checked with Ebay and no one had listed Tranquil Tulips stamp set so what is a stamper to do??? I signed up for a "watch item" on Ebay and waited to get notification when this stamp set was posted for sale. Figured it would take awhile to hear anything -- imagine my surprise two days later this stamp set was posted for sale!

Had not really thought about how much I would pay for this set if and when it was posted but I checked out the Ebay listing. Brand new stamp set not used. This stamp has 22 stamps and I was surprised the seller was asking a low price for the set. Lucky for me it was a "Buy It Now" price and so I did and three days later it arrived. Here is the first card I made using a new favorite stamp set of mine, Tranquil Tulips:


White card stock base is #110 weight from Mikes. Print is from the stash. Used a stitched scallop die to cut out the tulip piece. All inks are from SU. Added clear sequins to the card front:


This next card is has more detail than the first:


Card stock base is #110 weight ivory from Mikes. Print is from the stash. Used cream card stock for the stamped piece from Close To My Heart. For this card I used the tulip stamps, the small flower stamp (Hyacinth?) and a small dots stamp in the set. Added a bow to the front of the stamped piece. For the "hello" stamp I used the Stampin Up Teeny Tiny Wishes and I used the "hello baby" stamp and just inked the "hello". Used a small tag punch to punch that out.


This next card was inspired by this video on Youtube:

www.youtube.com/watch?v=LdjDTJfxGV4


Card stock base is on ivory #110 weight card stock from Mikes. Used prints from the stash. For this card I used a doily die and cut out a piece of cream card stock from Close To My Heart. With all my pieces of card stock I cut them out, distressed the edges, and I used a dauber and added SU Crumb Cake ink to the edges. Added twine from SU to the front of the stamped piece and added a pearl to the center of the twine. "thinking of you" is a stamp from the new to me stamp set Peaceful Petals. Thanks to Areli for her video for this card filled with tips and tricks. Here is a closer photo of this card:


For the black parts of the tulip - stamens? For the first card I stamped that stamp on the edge of one of the curves of the tulip so you see those clearly. For the other two cards I used a Post It note and placed that even with the curve of the tulip and stamped it so you see them peeking out of the top of the tulip -- here is the Post It note to show I stamped it over the edge:


Tips and tricks I learned using this stamp set for the first time. First I cut my piece I was stamping my tulips on a bit bigger than I was needing. This allowed me space to use a frame die or to trim this piece closer to the stamped image. The first stamp I stamped on this was the stamp with the three stems. Then stamped the tulip stamps. Once those were stamped I added the leaves so that the leaves were not stamped over the tulip flower image.

With both the coral tulips and my pink tulips I stamped the base tulip in a lighter ink, then the detailed tulip stamp in a darker ink, and then stamped that stamp a second time to add colour and depth to the tulip. This stamp set has the look of watercolour stamps so it will seem "splotchy" when you stamp but it is meant to stamp like that.

I used different inks for all my leaves/stems and flowers and each card looks different. This stamp set is a favorite in my stamp room for sure. TFL

Sunday, May 21, 2017

Jar of Flowers Card


Used the Stampin Up Jar of Love bundle for this card:


Used #110 weight white card stock for the card stock base. Cut and scored this card with the fold at the top. Cut a piece of red card stock a bit larger than what I needed and used a M Stewart border punch on the two sides of the red card stock. Cut a piece of white/GP to fit on my punched red piece.

Using the Stampin Up Jar of Love stamp set I stamped flowers using various pink inks. The black anther part of the flower was stamped using black Memento ink. For the smaller flowers I used an orange marker for the center of the flowers. With all the flowers stamped I used the matching die set and cut out all the flowers with the Big Shot.

Stamped the jar image using black ink. Stamped the water for the jar with Pool Party ink. Using the burlap strip stamp I stamped that onto the jar using Crumb Cake ink. Stamped the bow and ribbon stamps with a red ink and cut them out with the matching dies. Using the leaves stamp I stamped the leaves onto the jar piece. Used scrap green card stock and cut out the solid leaf pieces. With all the flowers cut out I added clear Wink of Stella to them and using pop dots and glue dots I put the flowers on the top of the jar. Put the solid green leaf pieces behind the flowers using mini glue dots.

"hello" is from the stamp set Teeny Tiny Wishes from Stampin Up. Stamped that onto scrap card stock and punched it out using a mini tag punch. Tucked that under a flower and used a mini glue dot for that. Used the ATG and put the stamped piece with flowers onto the red piece. Then put this onto the card base front using the ATG..

Here is a closer photo of the flowers showing the Wink of Stella:


Added three clear sequins to the card front using clear TomBow glue. To make this card it is best to stamp all your flowers and then cut them all out. Easy card to put together once all items are stamped and die cut. TFL


Monday, May 15, 2017

Whirl Wreath Card


A Christmas card in May ....  Used the my new Penny Black Whirl Wreath die for this card. I tried to follow the layout I had seen on the board showing this die at the store but I do not have all the products they used so I used what I have on hand:


The card stock base is Crumb Cake card stock from Stampin Up. The cream card front panel is #110 weight card stock from Mikes. I used the Close To My Heart Wood Slats embossing folder for the pattern on the card front.

Cut and scored the Crumb Cake card stock for the card base. Then  I used Crumb Cake ink and inked the raised side of the embossing folder.  I put the cream card stock inside and closed that. Ran the brayer over the closed folder to transfer the ink and pattern to the card stock. Trimmed that to the size I needed for the card front. Used the ATG and put this stamped piece onto the card stock base. Set that aside.

Here is a photo of the Penny Black Whirl Wreath die I bought on Saturday:


Using scrap Crumb Cake card stock I cut out the wreath using the Big Shot. Used TomBow glue to put adhesive around the inside center ring of the wreath. Put this onto the stamped card front. For the "Joy" I used a Christmas die for that and cut that out of copper coloured foil card stock. Once that was cut out I decided I wanted that word to have some dimension so this is how I did that.

In this photo you can see a tear tab from a Scotties kleenex box. I cut the "Joy" out of that and then the foil card stock. Put them together using the TomBow glue:


The cardboard tear tab is a thin cardboard but thick enough for dimension. With the wreath on the card front I used micro mini glue dots and put the "Joy" on the front of the wreath. I wanted to use different "bling" to decorate the wreath so here is a closer photo to show the different things I put on the wreath for decoration:


I used solid sequins, sparkly sequins, white pearls, white pearls I used a bronze Sharpie marker on to add colour, and a small hole punch to punch out small circles from the scrap foil card stock.  All "bling" was added to the wreath using micro mini glue dots. The pearls are higher than the sequins with a dull finish and that works with the sparkly sequins and the foil circles. Very simple holiday card to put together and would look nice in any colour combination. TFL

Black or White Botanical Card


Just bought the Stampin Up Botanicals For You stamp set at a used stamping supply sale and wanted to make up two cards -- one embossed with black embossing powder and the other with white embossing powder. I also used a second stamp set I bought at that sale -- Watercolor Wash.

To make these cards I cut and scored my card stock base. Set that aside. Then I cut the coloured front panel piece for each card and set that aside. For the embossed card front I used the Mixed Media card stock from Strathmore that I bought at Mikes with a coupon. Using the stamping buddy I went over the card fronts. I used Versa Mark ink and inked the "just for you" and stamped this onto the card fronts. Embossed the black letters using black Zing embossing powder. The second card embossed with white I used the Stampin Up white embossing powder. Here are the finished cards:


For the blue card on the left after I used three distress inks on the background Watercolor Wash stamp in the MISTI I used a fine mister and spritzed water over the inked stamp. Stamped this onto the white card stock. Once that was stamped I used the fine mister and spritzed more water into my hand and then I sprinkled that over the blue image. Used a clean kleenex to absorb the larger drops of water. Once dried I put the card pieces together using the ATG. Added blue sequins using micro mini glue dots.

For the yellow card on the right I inked the Watercolor Wash stamp with three distress inks and used the find mister to spritz water onto the inked stamp. Stamped my image and used a kleenex to clean the ink off the embossed letters. Once dried I put the card pieces together using the ATG. Added fabric flowers with brads to the card front using glue dots. Here is the blue card:


And the yellow card:


Like both cards using the Watercolor Wash background stamp. Works well in the MISTI also. Easy card to put together. TFL

Sunday, May 14, 2017

Same card -- Three ways


Using the die by Penny Black "in a row" I made three cards three ways using a layout I had seen in the store I bought the die at. Simple card and just by using a coloured mat and changing the stamped greeting this card layout works well.

Here is a photo of the birds die and the die cut pieces I cut using #110 weight black card stock from Mikes:


Once all the bird pieces were cut out I cut and scored my black card stock base using the #110 weight black card stock. Used a bone folder and creased the scored line for the top of my cards. For the white card fronts I used the Mixed Media card stock by Strathmore (thanks Bonnie for that tip) and I cut my card fronts to the sizes I wanted for the cards.

Using cheap water colour paints I used six colours for the card fronts. Here is the first card:


For this card I let the water colour paints dry naturally.While that was drying I flicked water colour paints onto the card front piece in a couple of different colours. Using a stamp from a stamp set by SU, "Express Yourself",  I stamped "get well" in the lower right corner using the Memento black ink. I used the ATG and put this stamped piece onto a piece of lavender card stock cut to the size I needed for the card front. Then put these pieces onto the black card stock base. I used micro mini glue dots to adhere the birds die cut piece to the card front.

This is the second card:


For the second card I did not use a coloured mat. Once the water colouring was done I flicked different paints over that and set it aside to dry. Using the SU stamp set "Happy Day" I stamped "hello there" in Memento black ink on the lower right corner of the card front. Put this piece onto the black card stock base. Used micro mini glue dots to put the birds die cut piece on the card front.

Here is the last card:


This last card I did the water colouring and then used the heat tool to set that. This gives the water colouring a different look once dried. I also did not flick water colour paint over the card front. Using the SU stamp set "Greatest Greetings" from last weekend's used stamp sale I went to,  I stamped "sending smiles" on the lower right corner using the Memento black ink. Using the micro mini glue dots I added the birds die cut piece.

Cut a piece of turquoise card stock for the mat for this card front. Used the ATG to put the white card front piece onto the coloured mat. Then put these pieces onto the black card stock base. To finish this card I added three white sequins.

Very easy card to put together... longest time in making these cards is letting the water colour paints dry naturally. Remember if your card stock should get wavy when you cover it with water simply turn over the card stock and add water to the backside. This will make the card stock lay flat while you are applying your water colour paints. Fun card to put together. TFL

Tuesday, May 9, 2017

Penned Petals Card


Had seen this card by Patty Bennett on her blog:

http://www.pattystamps.com/pattys_stamping_spot/2016/08/penned-and-painted-appreciation-cards.html

I liked her cards and made a few changes for mine and here is my version of her cards:


My card stock base is Stampin' Up Cameo Coral and the pink front piece is Pretty in Pink. The stamped white card front is by GP.

Cut and scored the card stock base with the scored line on the side of the card. Cut the pink piece to the size I needed for the card front. For the white/GP piece I cut that 4 1/4" x 5 1/2" and then did my stamping on it. Trimmed it to the size I wanted for the card front once all the stamping was complete.

For the stamps used on the card front I used the Two Step stamp set from Stampin' Up Penned and Painted. Here is a photo of the stamps I used on their stamp blocks:


I stamped the largest flower, randomly, all over the white/GP card stock using Stampin' Up Pink Pirouette ink. Then I stamped the detailed flower stamp over that using Cameo Coral ink. Using Old Olive ink I stamped my largest detailed stamp onto a Post-It note and cut that out with scissors. This piece will be my mask for my flowers so I can stamp the leaf stamps without getting green ink onto my flowers. Here is a photo of the mask before I cut it out:


I placed the stamped mask piece over my flowers and then stamped my two leaf stamps using the Old Olive ink. The detailed leaf stamp I inked up the stamp and stamped it. The softer green leaf was stamped using the stamp-off method. I inked the stamp and stamped it onto scratch paper and then stamped the leaves on the card front so the leaf center is lighter than the detailed leaf stamped image.

For the small yellow flowers on my card front I used that same stamp set and the Stampin' Up Daffodil Delight ink and randomly stamped those around the flowers. Also I used that small flower for the center of my flowers as Patty did on hers. Here is a better photo of the flower centers:


Patty used the Gorgeous Grunge stamp set for the dots on her card front but I wanted to use smaller and less dots on my card front. For my dots I used the berry stamp from the Stampin' Up Holley Berry Happiness stamp set from Stampin' Up and again I used the Daffodil Delight ink to stamp those dots all over my card front to fill in the blank white areas.

For my greeting "For You" I used the Stampin' Up Thoughtful Branches stamp set and stamped that onto scrap white/GP card stock using the Cameo Coral ink. I cut this out using the Stampin' Up Layering Circles die set. Cut out the white circle and than a scalloped circle, using that same die set, out of Pretty In Pink card stock. Put the two circles together using the ATG. Set it aside. Using the ATG I put the trimmed stamped card front onto the pink piece and then onto the coral card stock base. To add dimension to the card front I used pop dots for the greeting circle. Added three small white pearls to the greeting piece.

This is an easy card to put together. I suggest before you start to have all the stamps you want to stamp with on their blocks with the inks you want to use with them ready for use. Fun card to make and thanks to Patty for sharing her card.  TFL