Tuesday, August 23, 2016

Bling it on... BOO


Sooner than later we will be working on BOO Day (Halloween) treat holders and tags... decided I may as well get some items cut out and ready for assembly when needed in October.

To begin with wanted to cut out word dies from glittered card stock as well as glittered foam sheets that I picked up at Mikes in the kids crafts section of the store. Problem is some of the words are smaller so they could be flimsy on a project -- both a tag or a treat holder. Wanted to be able to use a stiff backer piece for these but regular card board and even the thinnest chip board were too thick.

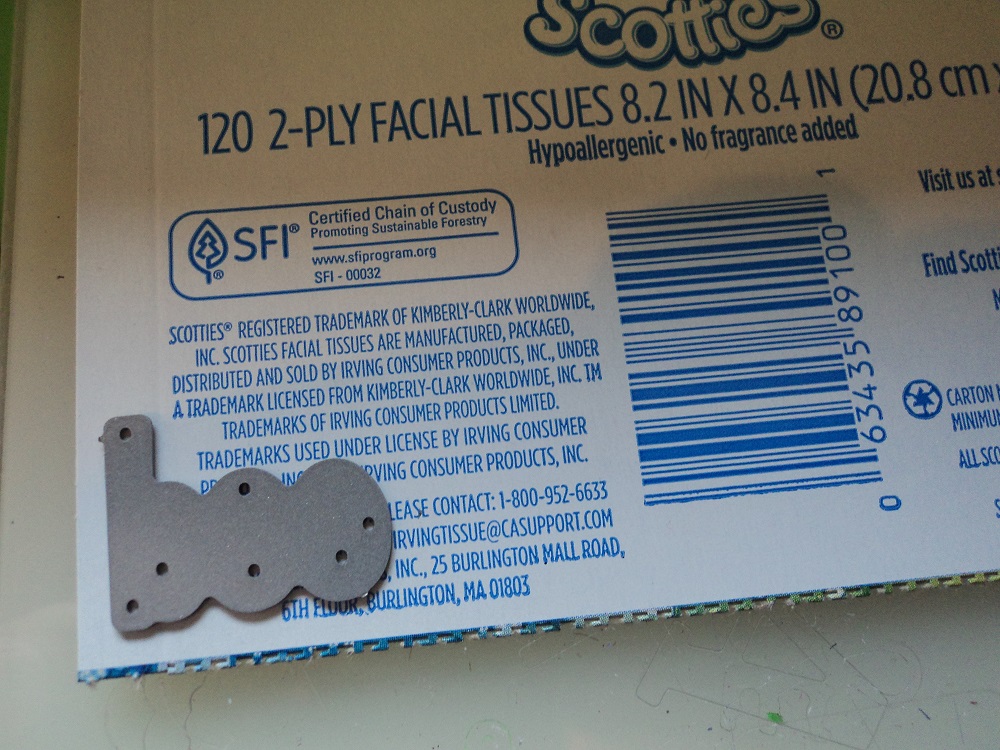
Decided the thinner the better but what could I use that I already had on hand??? Simple -- the pull tab lid to a kleenex box:


Used the Cuttlebug to cut out my word die using this lighter weight card board piece -- one pass through the machine and all the words were cut:


After my card board words were cut out I cut out these same dies using the glittered card stock and the glittered foam sheets:


Using TomBow glue and an old craft paint brush I covered the card board word with glue and then put the matching glittered word on that. This photo shows some of the words cut and glued to the card board words:


The above photo has the foam sheet words on the left and the words on the right are glittered card stock words. Once all my words were adhered to the card board words I rinsed off the red lid and my paint brush with warm water to remove the glue before it set. Having these small words on the thinner card board for a backer piece will give my projects dimension when layering them for the holiday.

This photo shows some of the items I have either die cut or used punches for to use for my projects:


Will keep all these pieces together in an empty clam shell box for use for the BOO Day festivities. By making these things up now it will help with the rush around the holiday. TFL and YOLO

Thursday, August 18, 2016

Autumn Colours Card


This technique was done by "jantink.com" on YouTube on her video that she titled "Joseph's Dirty Coat Technique". I followed her instructions but my inked/stamped card front turned out more pink than I wanted so I made a couple of changes.

First my card stock base is Stampin Up Soft Suede card stock. Cut and scored that and set it aside. Cut a piece of rust card stock for the card front and set that aside.

For the inked/stamped card front I used a piece of Stampin Up Whisper White card stock cut larger than I would need for my card front -- 4 1/4" x 5 1/2". Following Jan's instructions these are the inks that I sponged onto the white card stock and in this order: (all Stampin Up)

Crushed Curry
Cajun Craze
Garden Green
Island Indigo

For my leaf stamp I used the positive leaf stamp from the Stampin Up Gently Falling stamp set. Instead of using the Early Expresso as Jan did I used Baked Brown Sugar ink for my leaves and for the technique over my sponged/stamped image. Once this piece was complete I set it aside to dry.

Here is a photo of another piece I had done using the Rose Red ink she had used and for this leaf stamp I used the negative leaf stamp:


I did not like the pinks on the card front, or the open leaf design, so I redid my card front piece using the solid leaf stamp, as she did, as well as omitting the Rose Red ink. However I did use this first piece for the little leaves under my twine on my card. I used a small leaves die to cut out the three leaves. Using Pearls Shimmer Mist I spritzed the small leaves and set those aside to dry.

Surgery needed.... Wanted to use the "hello FALL" stamp from the Stampin Up stamp set For All Things. I inked the stamp and stamped it onto a piece of rust card stock using the Baked Brown Sugar ink only to find a problem with the stamp. The exclamation point on the stamp looked like a small "l" as there was no space above the period. Using an exacto knife I carefully trimmed away a tiny piece of the rubber on the stamp so now my stamped greeting is correct:


With my greeting stamped I put this strip onto a strip of Soft Suede using the ATG. With my stamped/sponged card front dry I trimmed that to the size I needed for my card front. Using the ATG I put the greeting strip across my stamped/sponged card front and trimmed it to size. Then put these onto the rust card stock front and then all of it onto the card stock base.

For the three die cut leaves I wanted to use twine to put them on the card front with. Decided to add one strand of gold twine to the jute twine for some sparkle for the card front. Once I made the twine bow I trimmed it to the size I wanted and put the three leaves onto the greeting strip using mini glue dots. Put the twine bow on those using mini glue dots. Added three brown crystals next to the greeting. Here is a photo to show the three small leaves and the twine bow:


Thanks to Jan for sharing her technique for an autumn card. TFL and YOLO Here is the card again:


Wednesday, August 17, 2016

Quilted Thoughts Card

** This card was chosen as a Favorites of the Week on Splitcoast Stampers by Amy and Susie notified me -- thanks both ladies! Certainly an honor with so many talented card makers on Splitcoast!  :0)   **


To make this card I used a printed card stock pack by Anna Griffin and the Fiskars hexagon punch. Punched out all the hexagons I would need for my card:


Wanted to use a hexagon shape punch for my pieces but wanted the pieces to be smaller than the recent hexagon cards I have made using the Stampin Up hexagon punch. I have a smaller hexagon punch from Fiskars and this photo shows the sizes the punches make -- yellow is Stampin Up and the green is the Fisakrs:


This card may sound complicated but it is not. To begin with I cut and scored my Celery Green card stock base and the dark pink card front piece and set those aside. I do not have the Stampin Up pad of grid paper but I do have a pack of grid paper from the dollar store so I used a sheet of that to use for lining up my pieces. Cut a piece of white/GP card stock 4 1/4 x 5 1/2. Using painters tape I taped my white/GP piece onto the grid paper:


After my white/GP was taped to the grid paper I lightly made a pencil line across and down this card stock piece using a ruler so I would have a center line for my first piece. Used the ATG and added adhesive to my hexagon pieces**. I did the center of the card design first and then onto each corner -- I did not want the corners to be exact and look the same so they are all random--some corners have more hexagon pieces and others, less:


Once all hexagon pieces were on the white/GP piece I used the trimmer to trim the pieces that hung off the card stock edge. Now is when you need to erase any of your light pencil lines you used to line up your design:


Once the hexagons were on the card stock I then used the Anna Griffin Rosa embossing folder by Cuttlebug -- since I had paper pieces on the card front I did not want the embossing folder to embossed too deeply which would cause my hexagons to separate. So I cut a second piece of white/GP card stock and put it under my pieced card front in the embossing folder for the ride through the Cuttlebug:


As you can see in the above photo I have a red dot on my B plate for the Cuttlebug--when I use embossing folders I have two B plates that I use for embossing only. The red dots let me know these are to be used for embossing folders only. With these plates always flat I get a good embossed impression on my card stock. Here is a photo after the two card stocks were embossed:


and the extra embossed card stock piece will go back in the file with this embossing folder - then if I need an embossed piece in a hurry one is already done and with that embossing folder:


Once my piece was embossed I trimmed it to the size I wanted for the card front. I then sponged the edges of this piece using River Rock ink. These photos show that:


Once this was sponged I used the ATG and put the pieced card front onto the pink card stock and then put those onto the green card stock base.

For the greeting I used the Classic Label punch and the new-to-me Stampin Up stamp set On the Grow. I stamped that using green ink and punched that out. Did not want to block the hexagon quilt pattern with a greeting tag so I put the trimmed greeting piece up against one of the hexagons at the bottom of the center design:


Added pearls to the tag edge. ** When you make a card using card stock pieces and then plan to emboss that piece be sure to butt the pieces tightly next to each other so there are no spaces. Also when you emboss this piece use an extra piece of card stock so your embossing folder does not emboss too deeply and pull apart your pieces.

This card looks very difficult but it really isn't -- just use a grid paper, a ruler, and pencil and the design will be straight. TFL and YOLO

Tuesday, August 16, 2016

Halloween Treat Boxes


That time of the year when treat boxes are on the mind . . . .  Wanted a different treat box but still wanted it to be free standing or easy to tuck into another treat holder. Decided for my treat boxes I would make and decorate them for Halloween -- and here they are:


To begin with I had seen the tutorial of these on YouTube by Elaine "gettinginspired". If you should want to make these I suggest you watch her video -- with a pen and paper in hand. . . Her video goes from start to finish and is easy to follow along. These treat holders stay closed using velcro dots -- I cut mine in half so a package will make up quite a few of these holders.

Since I had never made a box like this before I made up a sample box using kraft card stock from Mikes. You can get two of these boxes from one sheet of 8 1/2" x 11" card stock so it is very economical if you have to make up a few of these. I will also say I used all Martha Stewart punches, as she did in her video, although I did use different punches than she had as I did not have all the punches she used. Will start with my sample treat holder in kraft card stock. I cut it to the size she suggested and took it to the Martha Stewart score board and scored all my lines:


Since this was my first holder I wrote "FR" on my piece so I would know which piece is the front of the holder (the candy pocket) and not the flap piece. As she shows in the video I did all the cutting of the excess flaps not needed:


Now you need to punch both straight ends of the holder with your Martha Stewart punches:


With my straight ends punched I then put the Scor tape on the flaps to hold the candy pocket in place. But before you make this into your treat holder be sure to add your printed card stocks to the pocket front and the outside flap front. It is much easier to do this while your holder is flat -- I did not decorate my kraft sample holder as you can see:


Now to decorate the holders. I will show each holder and then show the candies in each. All these holders hold two of the smaller candy treats:


SU gray card stock was used for the holder base. The chevron stripe is Mikes and the skeleton print is from Peebles. Used a Happy Halloween die for the circle on the front. For the mini ghosts I used a small ghost punch and white glittered card stock -- to have two ghosts facing in two directions for one I punched it out with the glittered card stock up and then turned it over with the glittered side down and punched out another ghost. Now they can face each other. I used a decorative scalloped border punch from M Stewart for the holder front flap. For the inside I used the M Stewart graveyard border punch - this holder holds two of the Fun Size Hershey bars:


 This next holder is purple -- not blue:


Used printed card stock from the stash for the front of the holder. Die cut a pumpkin and layered that for the front, "Boo" is a stamp from My Favorite Things. The ghost I cut out of vellum using a Sizzix ghost die. Used a dotted scallop punch for the front and on the inside is a fence punch -- again both punches are M Stewart. Inside this holder is webbed printed paper -- that is not card stock but the shelf strip from Walgreens from their Halloween aisle from last year. This holder holds two York Peppermint Patties:


The last holder:


The front of this holder has card stock by Nicole from AC Moore. The ghost is white glittered card stock and I cut that out using a flat Sizzix die. The orange decoration with the black brad on the left front of the holder is the mesh bag from the grocery store that held onions. BOO! washi tape was used on the holder front and the bat was made using an EK Success punch. Again the scalloped border punch was used -- for the inside:


As you can see on the inside of this holder I stamped "happy halloween" (stamp from HobbyLobby) and I was careful to position this above where the velcro would be to close this holder. This holder holds two of the Ghirardelli candies.

For my velcro pieces -- I put the two pieces of velcro together on the package:


Then using scissor I cut these in half. Peeled them off the plastic and put them on the front of the candy pocket and then closed the flap and pressed. Now both pieces of the velcro are adhered to the holder for closing.

This is an easy holder to put together but I would suggest making a sample one first so you can see how to cut the excess flaps off and how to punch the edges. Do as much as you can while this holder is flat as it is much easier and faster. Thanks to Elaine for sharing this cute holder --- since it is free standing it would be cute on a desk or the table.  TFL and YOLO

Holly Christmas Card


To begin with I had seen a card with this layout made up on "joyfulcreationswithkim.blogspot.com" and it was too cute not to make my own. I thank Kim for sharing her card and inspiration.

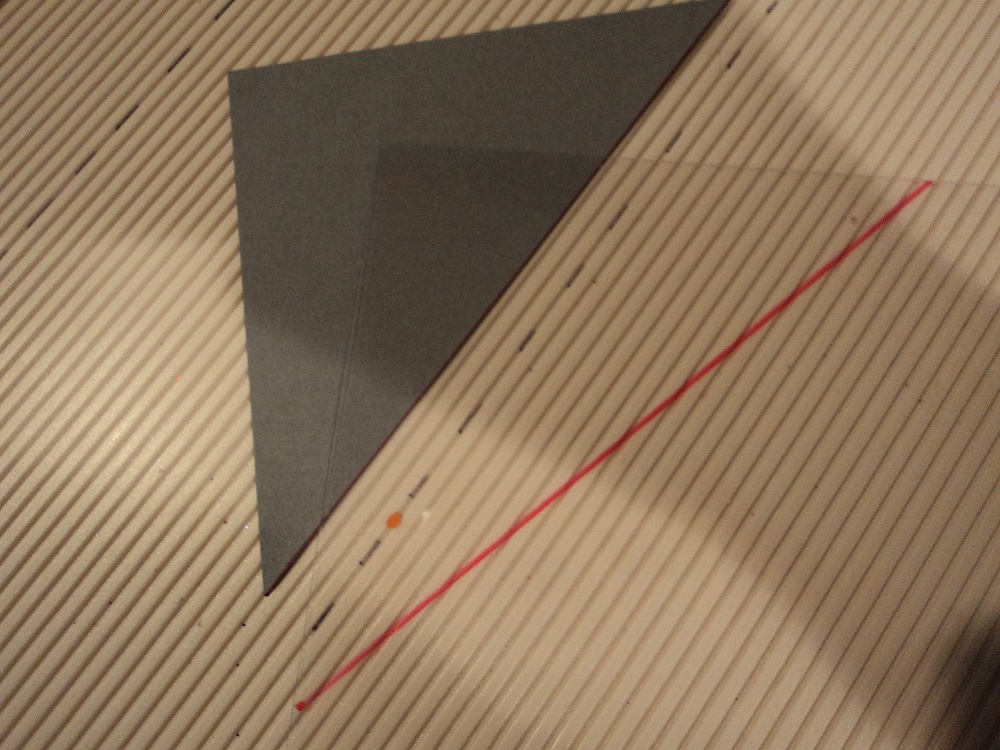
Not sure where to begin so decided to make a sample card first trying to figure out the size of the triangle printed card stock. Only easy way to do this??? Cut out a square piece of scrap card stock using the trimmer. Once that was cut out I used the trimmer and cut the square from the top corner to the bottom corner diagonally and this gave me my triangle. Decided the size I would need for my card front and for my square I used a piece of card stock 3 3/4" x 3 3/4". Cut it in half for two triangles.

With the triangle pattern piece cut I decided I would now cut it out of clear sheet so if I was going to make this card layout again using a directional print or maybe a print with words on it I would know if my triangle piece was straight. Here is a photo of the gray card stock triangle and next to it is the clear sheet triangle -- I just used a red Sharpie marker on the clear sheet tracing my gray triangle. I cut out the clear sheet using the trimmer:


Once the clear triangle was cut I put that over the holly printed card stock and used a light pencil line to trace my triangle and took that to the trimmer for cutting. For this card I used Stampin Up Real Red card stock for the card stock base. The cream is Close To My Heart. I trimmed that to the size that the long edge of the triangle is.

Using a holly/berries stamp from Stampabilities (Hobby Lobby) I used the 'huff technique' and markers and stamped this once in the upper corner and lower corner of the cream card stock. Using the ATG I put the holly print card stock (also Hobby Lobby) on the front of the stamped cream card stock. Put these onto the red card stock base using the ATG.

For the bow I used scrap Real Red card stock and the Bow Builder punch from Stampin Up. Put that together and set it aside. For the "merry" I used a stamp from the Stampin Up stamp set Tiny Tags and punched that out along with a scrap green card stock tag. Put this over the bow using gold twine. Added a red crystal to the center of the bow.  I put the bow and tags at the edge of the point of the triangle printed card stock using glue dots and the card was complete.

Thanks to Kim for sharing this layout and her card for inspiration! TFL and YOLO

Thursday, August 11, 2016

Haunting Halloween Cards


To begin with I had seen this card on Splitcoast Stampers made up by "barbfarmd". In her post she said she was casing it from Leena Girsa. Thanks to both stampers for sharing their cards. Here is a photo of the three cards I made from their ideas:


I will explain what products I used and the measurements I used to make my cards. I did not have their spider web nor their card stocks but was able to used products I had on hand. Also will explain how I made the Happy Haunting banner across the front of the card.

Each card has a black card stock base of 110# weight card stock from Mikes. I cut and scored all three card stock bases. Used the bone folder to crease the fold. For the black prints on the card fronts I used printed card stocks from Peebles and cut those 4 1/4 x 5 1/4. I put these black prints onto the black card stock bases using the ATG.  In the photos below you can see one black print is a plaid, one is polka dots, and the final photo shows a Halloween skull print. Since the skull print has direction I had to be sure to be putting it onto the black card stock base right side up - so if you should also be using a directional print be sure it is going in the direction you want before you put this on your card stock base:


For the black piece behind the orange polka dot print I used 65# weight black card stock from Mikes. Cut that to 3 1/4 x 4 1/4. The orange polka dot print - also Mikes - I cut that to 3 x 4. Then put the orange polka dot print onto the black card stock using the ATG. Set these aside.

For the spider web I used the Cheery Lynn spider web die and cut out my spider webs using black 65# weight card stock from Mikes. Using the glue pen I positioned the spider web onto the orange polka dot piece and then used scissors to trim off the left and top of the spider web die cut piece that was over the edge of the orange polka dot piece. For the yellow moon piece I used a 1 3/4 circle punch and punched that out from scrap Stampin Up Summer Sun card stock. Sponged the edges of that using Tangerine Tango ink. Used the ATG to put this onto the spider web. Set these aside:


For the larger orange banner piece I used Stampin Up Tangerine Tango card stock and cut that approx 4 3/4 x 1 1/2. Used the Stampin Up Triple Banner punch to punch one end of this as a banner. Laid this across the card front and trimmed off the straight end of the banner to the size I wanted for the card front. Put this banner onto the card front using the ATG.

From a stamper's sale I now have the "new to me" Stampin Up stamp set Cheer All Year. That is the stamp set for the greeting "Happy Haunting" on my card. The bat for their card is also a stamp from that stamp set but I did not want to 'fussy cut' the bat since Stampin Up does not offer a matching die set for this stamp set. Checking my Halloween dies I do have the Bat die from Prickley Pear and it is the same size as the bat stamp in the stamp set. I cut out my bats using this die and the 65# weight black card stock from Mikes. Wanted some shimmer to the bats so I spritzed those using the Pearls Shimmer Mist. Set those aside to dry.

For the greeting banner I had no measurements to go by so I cut scrap white/GP card stock 1 x 4 1/4. I stamped the greeting on these pieces using black ink from Memento. To use the banner punch on both ends of these stamped pieces and to be sure they were even I used a pencil and made a mark near my greeting where I would want the banner to be punched. Here is a photo of a greeting banner and then a stamped piece before I used the banner punch:


You can see the two pencil dots next to the greeting. I put this stamped piece into the banner punch with the stamped side facing down on the punch channel so I could see the pencil dot when using the banner punch from the back side when lining it up:


To put the card together -- using the ATG I put the spider web/orange polka dot piece on the card front over the orange banner using the ATG. Put my bat on the circle using glue dots behind his body-not his wings. Using the ATG I put the Happy Haunting greeting banner across the bottom of the web piece. The only thing I added to this card was three back sequins, using mini glue dots, to the card front. Easy card to put together even though it all all layered.

Thanks to both stampers for sharing their cards!  TFL and YOLO

Sunday, August 7, 2016

Birthday Hexagons Card


Another hexagon card made using the Stampin Up hexagon punch I recently bought "new to me". Used green card stock for the card stock base. Black for the card front is Mikes, and the white is Stampin Up Whisper White card stock. Cut and scored the green card stock base. Used a bone folder to crease the fold. Cut the black card stock to the size I wanted for the card front. Put the black piece onto the green card stock base using the ATG. Set this aside.

This card has seven hexagon punched pieces using the Stampin Up Pretty Petals card stock pack. The greeting "happy Birthday wishes" is a stamp from the Stampin Up Petite Pairs stamp set. Stamped that in black onto scrap white card stock. Used the hexagon punch and punched out one hexagon shape for the greeting on the white piece that will be the card front. With that punched I then put all the hexagon pieces onto this piece using the ATG.  With those in place I used scissors to trim off any edges that were hanging off the white card stock edge. Once those were trimmed I then put this white piece onto the card stock base using pop dots.

Punched out the stamped greeting image using the hexagon punch. Used double sided tape to put the greeting on the card front where I had punched out the first hexagon on the white piece:


For the flowers I used the Stampin Up Triple Flower punch and the small flower by the greeting was made using this M Stewart border punch:


All flowers are on the card front using glue dots. Added clear crystals to the center of all the flowers. Easy layout of this card and the flowers/crystals add the sparkle and shine to the card front. TFL and YOLO